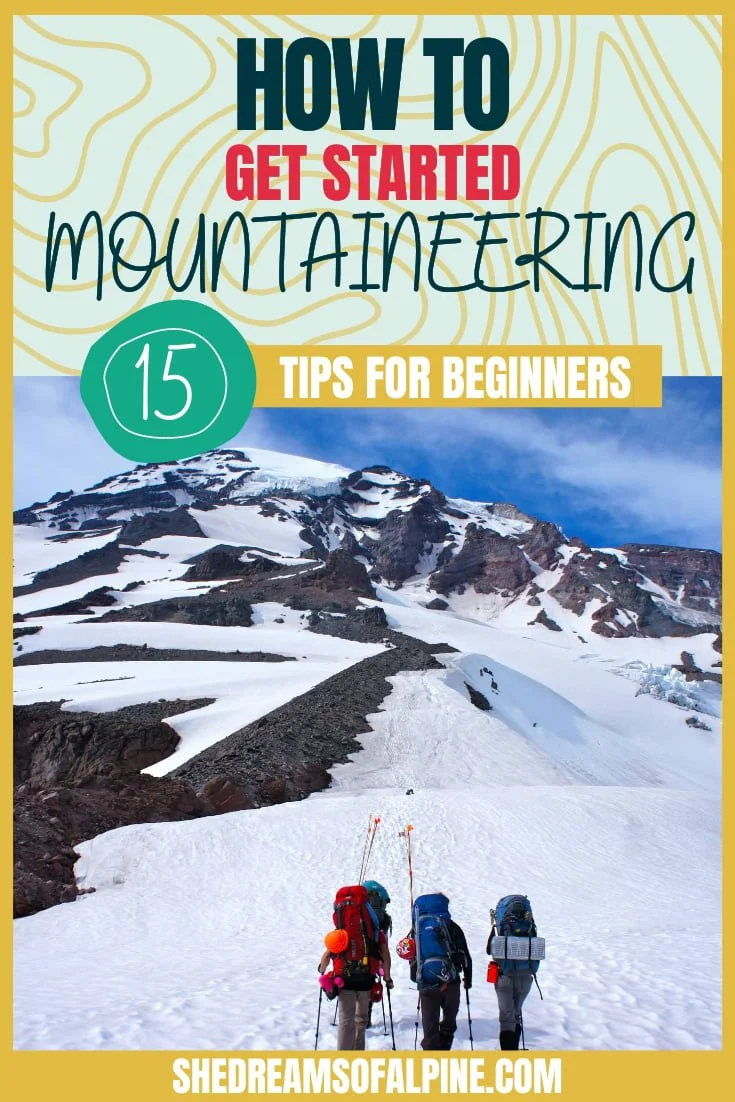
California 14ers Guide: Easiest to Hardest 14ers & the Routes to Summit Them

One of the coveted goals of many California hikers, peak-baggers, and mountaineers is to summit all of the tallest peaks in California, aka, the California. 14ers. Fourteeners are among the tallest and most challenging summits in the United States, which makes them worth the struggle, planning, and challenge to reach their rocky summit.
The 14ers in California are spectacular and were a pivotal factor in my growth as a mountaineer, hiker, and backpacker.
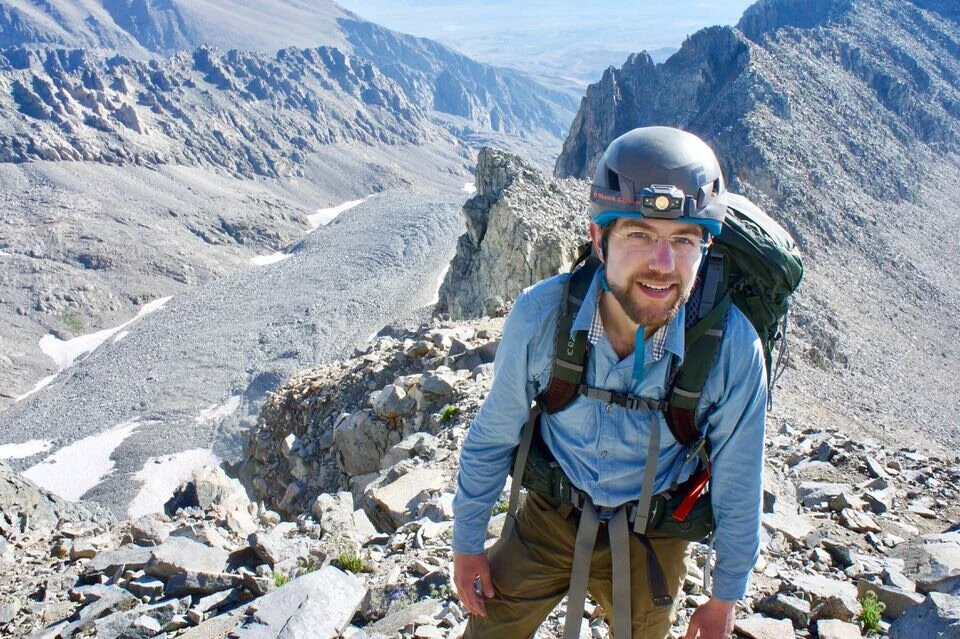
In fact, my very first mountaineering trip in California was the Mountaineer’s Route up Mount Whitney, the tallest peak in the contiguous US.
Following the successful summit of Mount Whitney, I found myself intrigued by the idea of one day summiting all of the California fourteeners. So far I’ve made it to the top of Whitney, Shasta, White Mountain, Langley, and have made attempts on Split and Middle Palisade.

My journey to summit the California 14ers has been a slower one (especially since I have since moved out of the state and into Colorado), but I still enjoy summiting these peaks when I get the opportunity.
Since the California 14ers are so special, I created this California fourteener guide to help you find all the info you need to start planning your own California peak-bagging adventure and summiting them yourself!
If you’re looking to get your feet wet, I’ve ordered this list from easiest to hardest. Some of the California 14ers can be quite technical, so you will need to build your confidence and skills with time to ensure you can summit them safely.
GRAB MY [FREE] OUTDOOR BACKPACKER STARTER KIT
I created the Ultimate Outdoor Backpacker Starter Kit for you (and it's FREE)! This starter kit is filled with 14 pages of my best hiking and backpacking tips to help you learn what it takes to become a safe, confident, and self-sufficient outdoor backpacker!
WHAT WE WILL COVER IN THIS CALIFORNIA 14ERS GUIDE
In this California 14ers guide, we will cover the following topics to help you understand the California 14ers – and start hiking them!
What is a 14er? - Find out more about the accepted definition of a “true” 14er.
What Do the 14er Class Ratings Mean? - Learn the details of the Yosemite Decimal System.
When to Hike the California 14ers - Determine the best time of the year to hike the California fourteeners in good weather.
California 14ers Map - Get an overview of where the 14ers are in relation to each other.
California 14er Resources -Some extra resources to help you plan and prepare for your summits of the California fourteeners.
Descriptions of All the California 14ers Ranked by Difficulty (from easiest to hardest 14er) - A list of the California 14ers by difficulty, including the easiest route up each one.
How to Start Hiking the California 14ers - Tips on training and learning the skills need to safely summit 14ers.
California 14ers Packing List - What to bring on your California 14er summit hike.
I’ve also linked to essential hiking trail guides and resources along the way to help you further plan and prepare for your summits.

1. WHAT QUALIFIES AS A FOURTEENER MOUNTAIN?
There are 15 mountains in California that rise to an elevation above 14,000 feet, but only 12 of them are considered "true" 14ers. These are the highest mountains in California.
The generally accepted rule is that to be classified as a true 14er, a peak must also have at least 300 feet of prominence. Prominence is defined as how high the summit of a peak rises above the surrounding saddle.
For people who are trying to bag all the fourteeners in California or other states, this is an important rule. In this guide, we still cover all 15 of the California mountains that rise above 14,000 feet, since it’s a fun challenge to hike any fourteener, whether it’s considered a “true” 14er or not!
2. WHAT DO THE CLASS DIFFICULTY RATINGS MEAN?
Fourteeners and other mountain peaks are rated on a grading scale called the Yosemite Decimal System (YDS). This scale ranges from Class 1 to Class 5, with the difficulty increasing in the higher numbers. Here is what you can generally expect from each class.

CLASS 1
Class 1 is considered easy hiking, usually on a good, well-defined trail. This can include hikes that are steep and strenuous, but non-technical, meaning they don’t really require any other skills than walking uphill. The Mount Whitney hike is a good example of this.
CLASS 2
Class 2 hikes are slightly more difficult and may briefly involve the need to use your hands. You could be hiking off trail over talus, scree, or loose rocks, but the movement is not very difficult. Split Mountain is a good example of this from the California 14ers.
CLASS 3
Class 3 terrain will contain scrambling, meaning you have to use your hands and feet to move over rocks. While this requires more technical skill, this doesn’t usually require a rope. Class 3 also includes steep snow. Mount Russell is a great example of this.
CLASS 4
On Class 4 hikes, you will actually be climbing, and handholds and footholds are required. These hikes are steep, and a fall would be fatal, so ropes are often used on Class 4 terrain. North Palisade’s easiest route includes sections of Class 4 terrain.
CLASS 5
Class 5 is when you enter the realm of technical rock climbing, and you should always be roped up and be belayed. The ranking of Class 5 climbs is further broken down by difficulty from 5.0 (easiest) to 5.15 (extremely difficult).
Many of the California 14ers have Class 5 “options” to reach the summit. For instance, Mount Whitney has a Class 1 trail AND a few Class 5 options as well.
3. CALIFORNIA WEATHER: WHEN TO HIKE OR CLIMB THE CALIFORNIA 14ERS
Summer is the ideal time to hike or climb the California 14ers. When it’s too hot other places to do anything but lie on the beach, head to the mountains instead!
June to September are the prime months to attempt the California 14ers. While the 14ers can be summitted year-round by very experienced mountaineers, it’s much safer to attempt to hike or climb the California 14ers when the possibility of snow and ice is low.
Here’s an average temperature map of the Mount Whitney area, which is similar to the average temps of many of the California fourteeners.
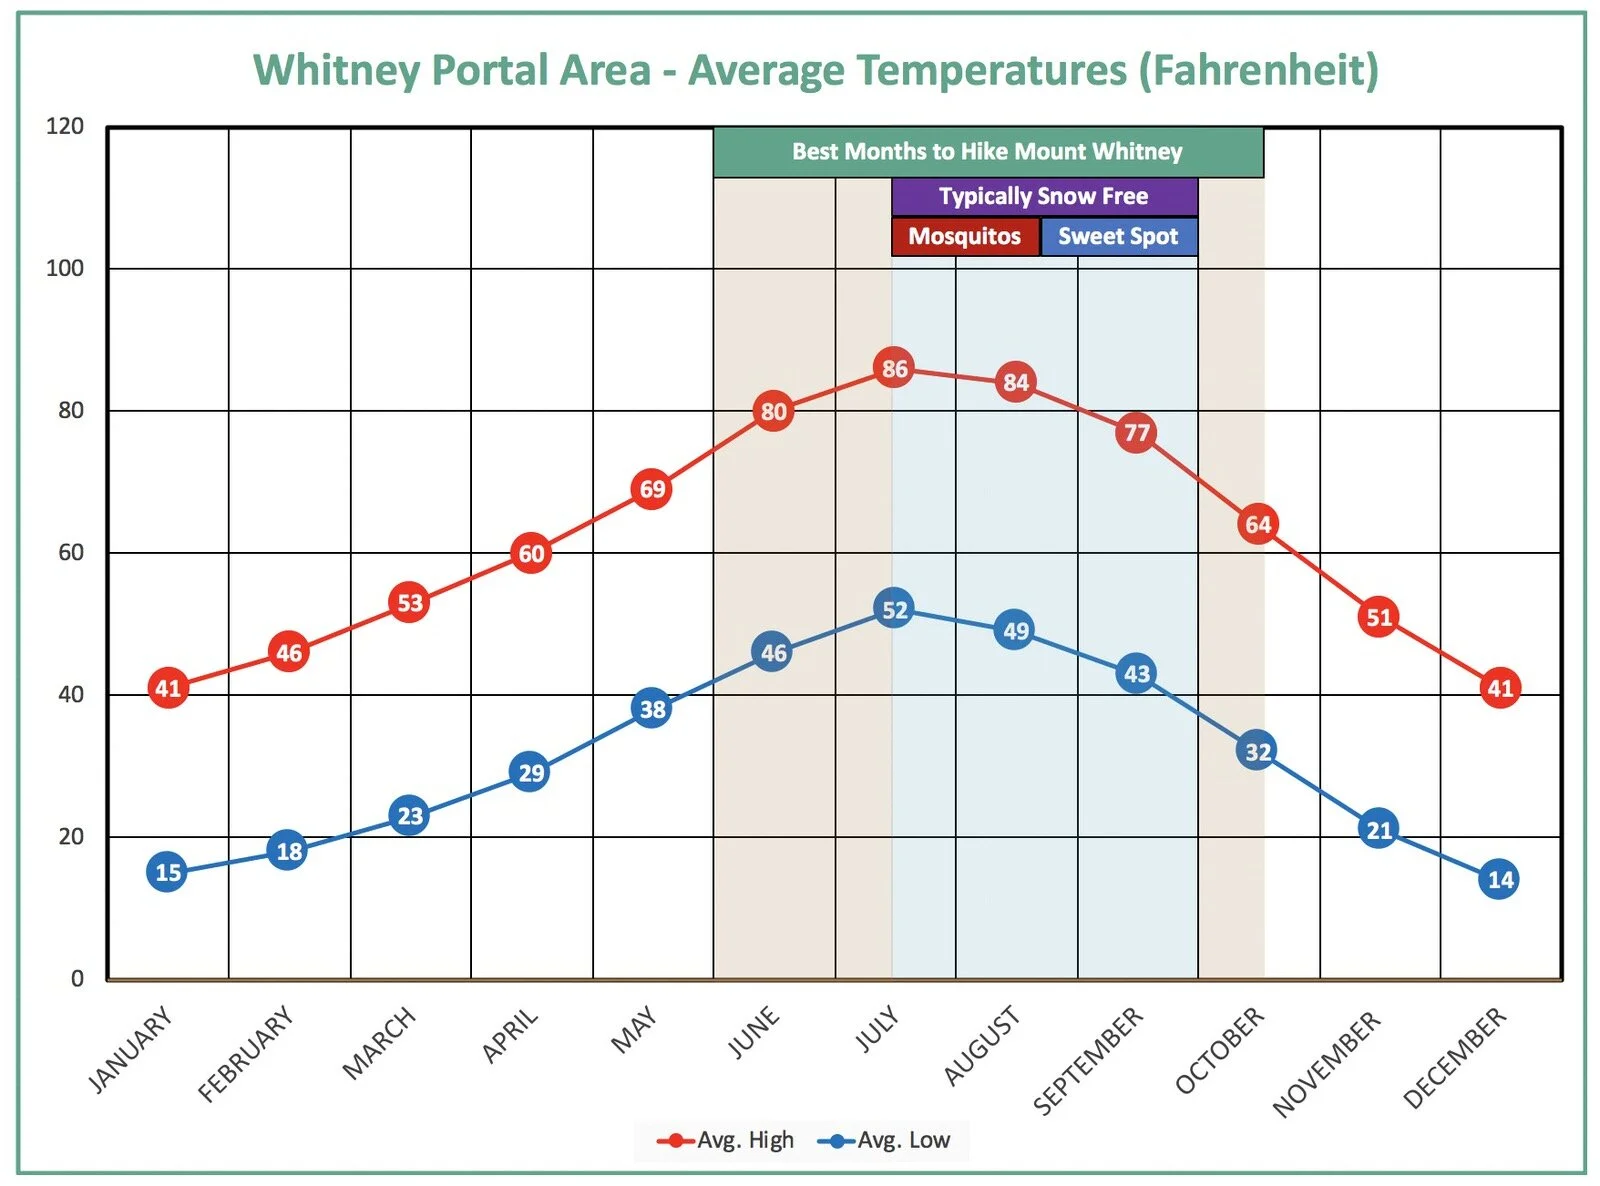
Mountain Forecast is a great resource for weather reports for the specific 14er you’ll be hiking because it gives you the forecast at several different elevations on the peak, from the base to the summit (which can be drastically different).
If it’s a high snow year, you could still encounter snow on the higher altitude sections of California 14ers as late as June or July. Be aware of the probability of snow and the risks it entails on the 14er you choose when you decide when to attempt it. And never be afraid to turn around without summitting if you encounter terrain that you are unprepared for.
Also, nowadays, wildfires are a concern that you need to factor in during summer and fall, especially August and September in the Sierras. So you have to weigh the hazards of the different possible conditions you could encounter when deciding when to attempt a California 14er.
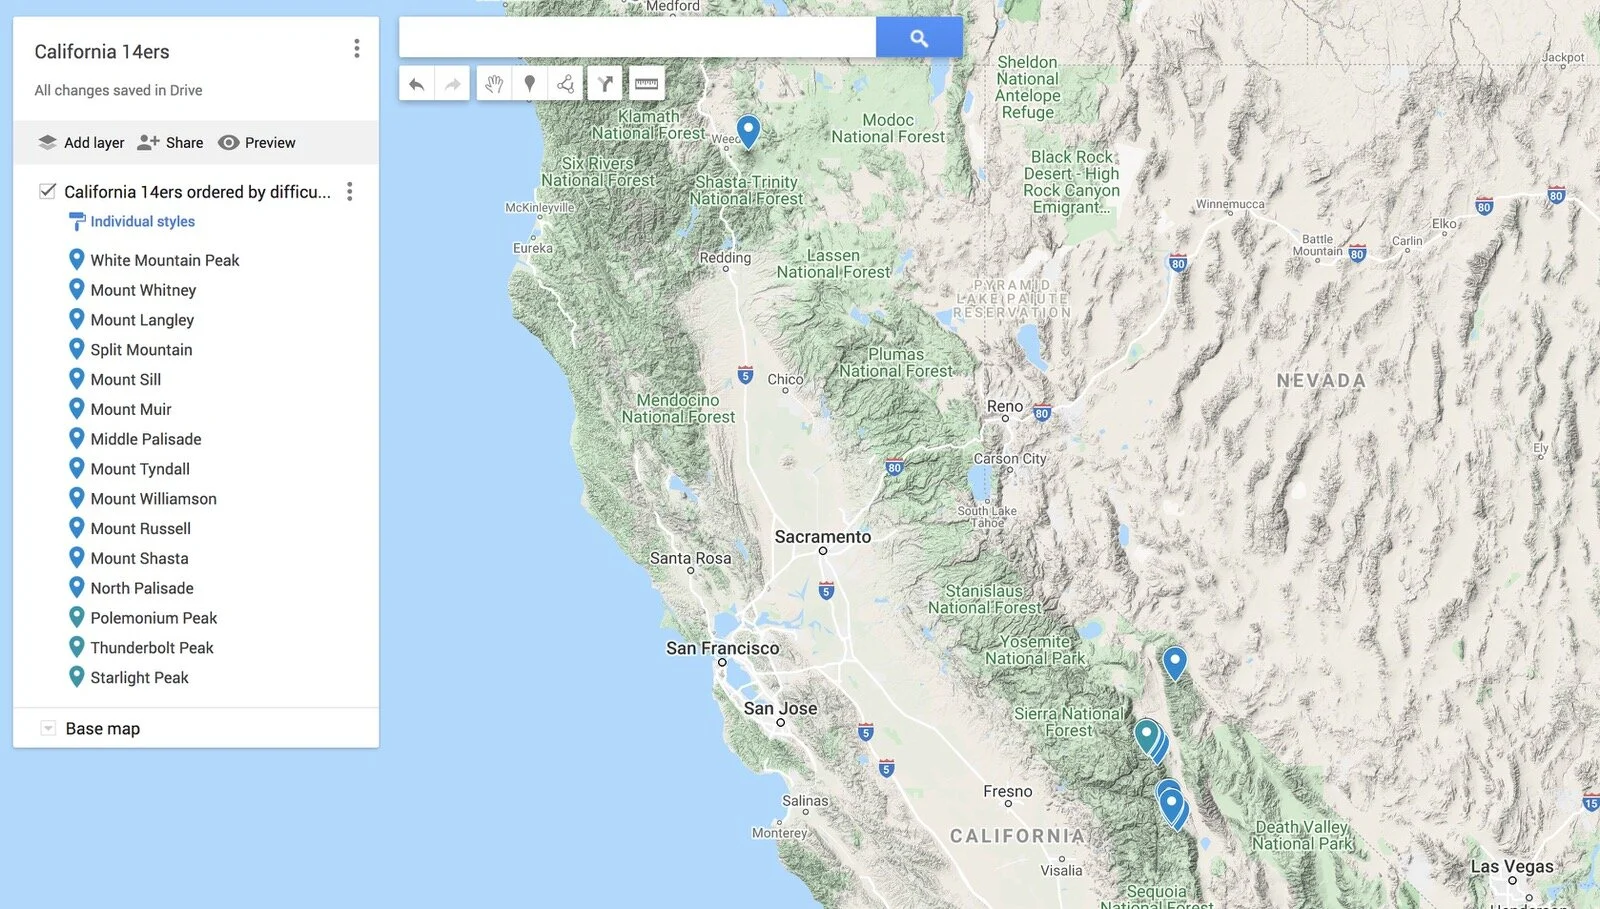
4. CALIFORNIA 14ERS MAP
On the California fourteeners map below you will see that most of the California 14ers are located in the Sierra Nevada mountain range. Mount Shasta is located in the California Cascades and White Mountain is located in the Inyo White Mountains.
If you click on the map below you can zoom in and explore the California 14ers in more detail.
5. CALIFORNIA 14ER RESOURCES
Here are a few of my favorite useful resources for planning and preparing for your summits of the 15 California fourteeners.

If you are thinking of taking on the challenge of tackling all the California 14ers, I highly recommend checking out some of these books:
Note: These links may be affiliate links.
2) The High Sierra: Peaks, Passes, Trails - A GREAT resource for any and all things in the Sierra Nevada Mountains!
3) High Sierra Climbing - For those of you who are looking for class 5 alternatives to summiting some of these Sierra Nevada high points.
4) Mountaineering: Freedom of the Hills - Another must own for any aspiring peak bagger or mountaineer.
5) Climbing California's Fourteeners: Hiking the State’s 15 Peaks Over 14,000 Feet - This is a newer guidebook to the California 14ers, since the other one is pretty old now and some of the info might be outdated. Falcon Guides is a trusted guidebook publisher, so this is a big update.
Also, check out Peakbagger.com – This resource is particularly useful when looking for GPX files from people who have gone before you and summited the fourteeners. You’ll need to do your research and due diligence on the files you download, but it’s a great starting point for planning your trip or creating a GPX file for your GPS.
6. 14ERS BY DIFFICULTY
How many 14ers does California have? While there are technically only 12 "true" 14ers in California, I have included all 15 peaks in California above 14,000 feet here.
Obviously ranking anything by difficulty is subjective based on someone's technical skills and comfort in the mountains, but I try to be as objective as possible in ranking difficulty (and I will let you know if something is my own personal opinion).

Also, please note that there are variances among different resources in the exact height and prominence of each 14er, but they shouldn't vary by more than several feet or so.
Climbing the California 14ers from the easiest 14ers to the most difficult 14ers will help you progress and build your skills as a mountaineer. The following list of California fourteeners is ordered from the most beginner hikes to climbs that require the most experience.
You can also choose to go guided with a professional guiding company like Sierra Mountain Guides, American Alpine Institute, or another guiding company. This is a great option for some of the more technical peaks, especially if you aren’t as confident in navigating trickier terrain or lack the needed climbing and mountaineering skills for the more technical California summits.
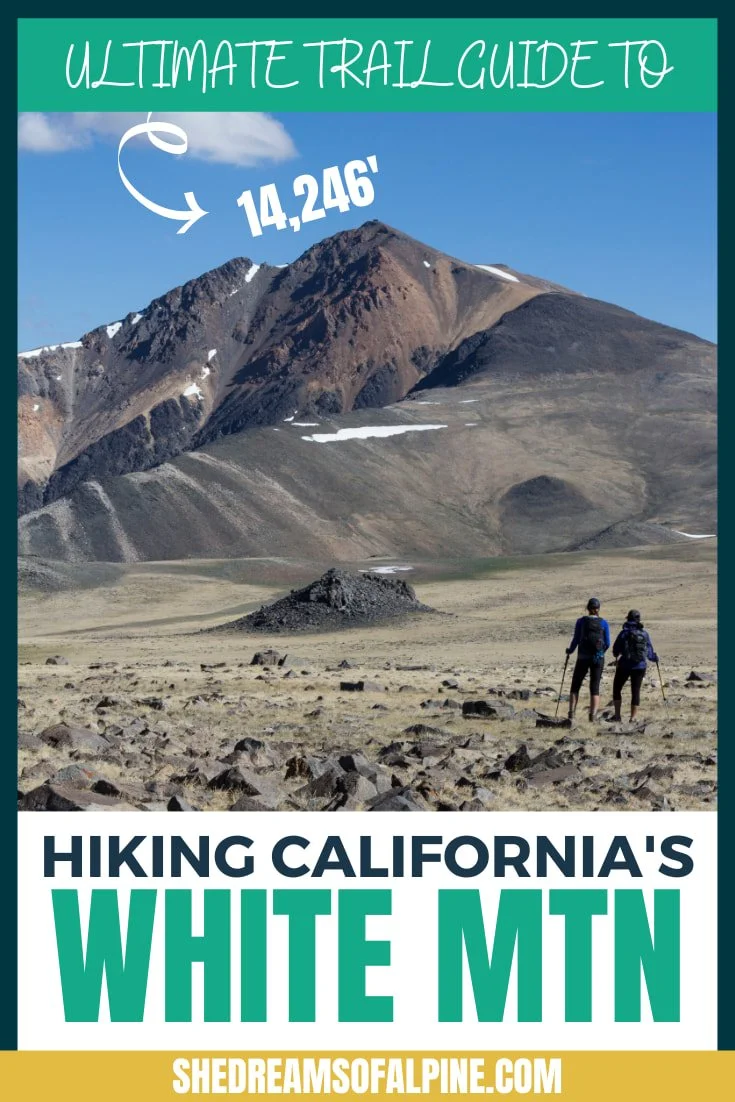
WHITE MOUNTAIN PEAK
Height: 14,246 feet
Prominence: 7,196 feet
Mountain Range: Inyo White Mountains
Easiest Route: South Face
Class of Easiest Route: Class 1
Permit Required: No

While White Mountain Peak is the 3rd tallest peak in California, it is also generally considered to be the easiest of the California 14ers. It is also one of only two California 14ers that lies outside the Sierra Nevada range.
The South Face (Class 1) trail is the recommended route for beginners, as it is basically a 4WD road all the way to the summit. It’s a 7 mile hike with approximately 3,400 feet of elevation gain. While the hike itself is not technically difficult, the trailhead is high up at 12,000 feet, so altitude can be a concern if you’re not acclimated to it.
White Mountain can easily be done as a day hike, and it takes on average 7-9 hours to complete the hike.
>> READ THE FULL TRAIL GUIDE: Check out my complete guide to hiking White Mountain for all the details, including a full trip report.
MOUNT WHITNEY
Height: 14,498 feet
Prominence: 10,080 feet
Mountain Range: Sierra Nevada
Easiest Route: Whitney Trail
Class of Easiest Route: Class 1
Permit Required: Yes

Mount Whitney is the most famous of all the California 14ers, since it is also the highest peak in California and the tallest peak in the lower 48 states, and it is considered a relatively easy 14er to climb – in fact, Mt. Whitney via the Mountaineers Route was my first 14er!
While the main Mount Whitney Trail might not be technical, this is definitely a difficult hike with a round trip distance of 22 miles and 6,200 feet of elevation gain. Many people do Mt. Whitney as a day hike, but I think backpacking it makes for a much more enjoyable experience.
During peak season, from May 1 - Nov 1, permits are required for Mt. Whitney, whether you are day hiking or backpacking. Due to its popularity as the tallest peak in the lower 48, these permits are very competitive, and you’ll need to enter a lottery to get one.
>> MOUNT WHITNEY PERMITS: My in-depth guide to getting Mt. Whitney permits goes over everything you need to know in order to get a permit. You could also backpack to Mount Whitney and get an Inyo National Forest permit instead (a bit easier than Mount Whitney permits). An example of this would be to backpack from Onion Valley to Whitney Portal.
>> READ THE FULL TRAIL GUIDE: If summitting Mt. Whitney is one of your goals, check out my ultimate guide to hiking and backpacking the Mt. Whitney Trail for all you need to know to achieve this epic summit.
>> JOHN MUIR TRAIL ENTRY/EXIT: Mount Whitney is part of the JMT and many people hiking Northbound on the JMT choose to start at Whitney Portal. Be sure to check out my full JMT permit guide if you want to learn more about grabbing a JMT permit with an entry point of Mount Whitney.
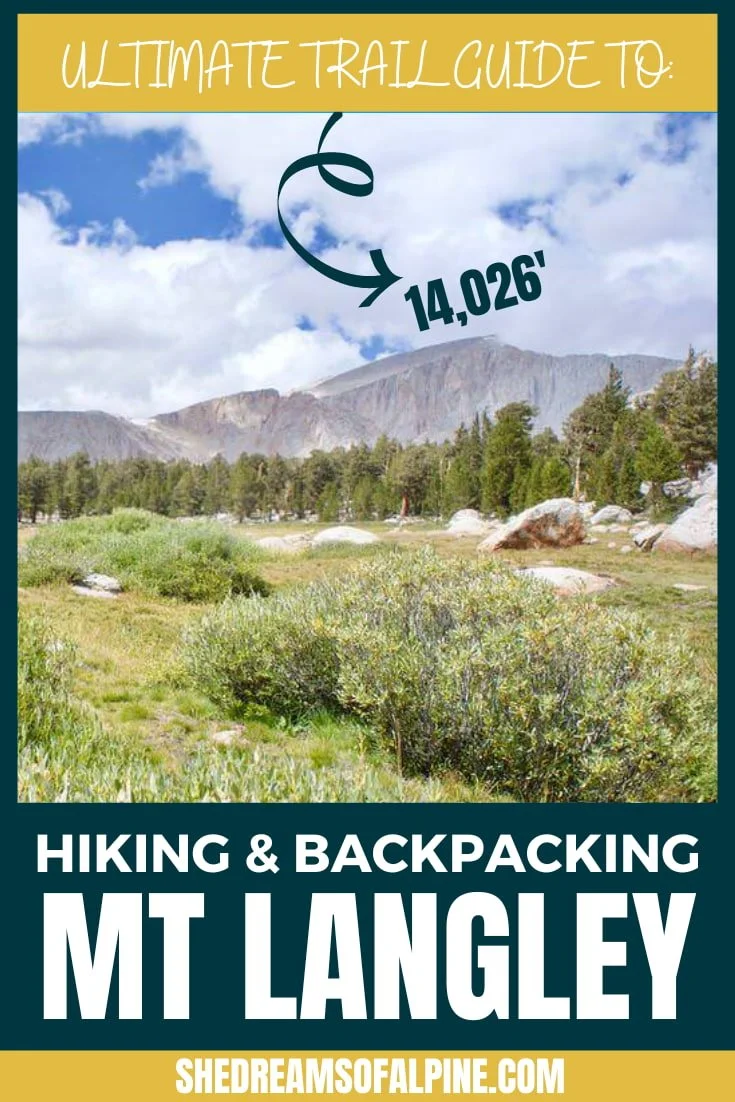
MOUNT LANGLEY
Height: 14,026 feet
Prominence: 1,198 feet
Mountain Range: Sierra Nevada
Easiest Route: New Army Pass
Class of Easiest Route: Class 1
Permit Required: Yes, if you’re camping overnight

Mount Langley is located near Mount Whitney and is often overshadowed by that famous peak. But Mount Langley is one of the best hikes in California (in my opinion), and makes an excellent beginner 14er peak with a Class 1 trail to the summit.
Starting at Cottonwood Lakes Trail, you can choose to follow either Old Army Pass (which is steeper but more direct) or New Army Pass (which has switchbacks and a more well-defined path).
Mount Langley feels a little more “desert-like” than the rest of the California 14ers, since it is the southernmost 14er in the state. While it can be done as a day hike if you’re feeling really ambitious, the hike to the summit is about 26.5 miles round trip with 5,940 feet elevation gain, so I recommend doing it as a 2-3 day backpacking trip instead. Plus, the Cottonwood Lakes area is just a beautiful area to spend time in.
Mount Langley was my second California 14er, and it actually took me two attempts to summit, since I ran into early season snow on my first try.
>> READ THE FULL TRAIL GUIDE: For that trip report and all the info you need to prepare for your own hike of Mount Langley, check out my Mount Langley trail guide.
SPLIT MOUNTAIN
Height: 14,058 feet
Prominence: 1,525 feet
Mountain Range: Sierra Nevada
Easiest Route: North Slope from the East
Class of Easiest Route: Class 2
Permit Required: Yes, if you’re camping overnight

Split Mountain actually consists of two summits (hence the name). The north summit is the tallest of the two, and the easiest route is up North Slope from the east via Red Lake.
While Split Mountain is considered one of the easier California 14ers, it is definitely a step up in difficulty from the Class 1 peaks, and I don’t recommend Split Mountain if you’re just starting out climbing 14ers.
While it is considered Class 2, I personally found it to be fairly technical mainly because “route finding” can lead you into Class 3 or Class 4 sections if you’re not careful. You should be comfortable hiking through loose, steep talus, and be aware that the trail is easy to lose, especially on the way to Red Lake. You’ll want to download a GPX file to follow to avoid bushwhacking on the wrong trail.
The trail to the summit of Split Lake is approximately 14 miles round trip with 7,500 feet of elevation gain. I recommend doing this over the course of a 2-3 day backpacking trip.
>> READ THE FULL TRAIL GUIDE: For lots more info about Split Mountain and my experience attempting the summit, check out my ultimate guide to hiking Split Mountain.
MOUNT SILL
Height: 14,153 feet
Prominence: 413 feet
Mountain Range: Sierra Nevada
Easiest Route: Southwest Slope
Class of Easiest Route: Class 2+
Permit Required: Yes, if you’re camping overnight

Mount Sill is recognizable for its unique thumb-shaped peak, and can be summited by several different routes, though all involve a crossing of the Palisade Glacier. Before attempting Mount Sill, you should be familiar with mountaineering techniques for traveling over snow and ice.
The easiest route up Mount Sill is the Southwest Slope. This trail involves a lot of scrambling and is about 7.6 miles round trip covering 3,380 feet of elevation gain.
MOUNT MUIR
Height: 14,012 feet
Prominence: 331 feet
Mountain Range: Sierra Nevada
Easiest Route: Whitney Trail
Class of Easiest Route: Class 3
Permit Required: Yes
Mount Muir actually starts at the same trailhead as Mount Whitney, and the summit makes a good side trip for hikers who want to add on another 14er after summiting Mount Whitney. Mount Muir is located about a mile away from the Mount Whitney trail and will add an extra hour or so onto that hike.
The summit block of Mount Muir requires Class 3 scrambling. You could also choose to do a technical rock climb up the East Buttress on one of several routes, rated from Class 4 to 5.9.
Since you’ll start in Whitney portal, you’ll still need to grab a Mount Whitney permit.
MIDDLE PALISADE
Height: 14,012 feet
Prominence: 1,119 feet
Mountain Range: Sierra Nevada
Easiest Route: Northeast Face
Class of Easiest Route: Class 3
Permit Required: Yes, if you’re camping overnight

Summiting Middle Palisade via the Northeast Face is a 16.2-mile round trip hike with 6,873 feet elevation gain. It’s very important to check the weather before attempting Middle Palisade or you might encounter a lot of snow, which will definitely make the hike more difficult and dangerous.
Glacier travel also might be required on Middle Palisade (depending on when you go), and you will need to do lots of 3rd class scrambling in order to summit. You should be confident in your mountaineering skills if you want to make the hike up Middle Palisade, and be sure to do plenty of research on this peak before summiting. Route finding is critical.
I attempted a summit of Middle Palisade once but experienced such bad altitude sickness, that we turned around at the base of Middle Palisade. We weren’t making good time, my judgement was off, and I had pretty gnarly headaches. Sometimes making the tough call to turn around is the right call to make in the mountains.
MOUNT TYNDALL
Height: 14,019 feet
Prominence: 1,125 feet
Mountain Range: Sierra Nevada
Easiest Route: Northwest Ridge
Class of Easiest Route: Class 2
Permit Required: Yes

While Mount Tyndall is only rated Class 2, it is considered a more difficult climb than some Class 3 14ers because it is very remote with an arduous approach hike. The total hike to the summit of Mount Tyndall and back is approximately 25 miles with 9,000 feet of elevation gain.
The hike to Mount Tyndall starts at Shepherd’s Pass Trailhead, and it is an 11 mile hike with 7,000 feet of gain just to reach Shepherd’s Pass itself. This approach hike is probably the most difficult part of climbing Mount Tyndall, so be prepared for a slog.
Mount Williamson is also approached via Shepherd’s Pass and because it is such a difficult hike to get there, most people will tackle both Mount Tyndall and Mount Williamson in the same trip.
MOUNT WILLIAMSON
Height: 14,373 feet
Prominence: 1,679 feet
Mountain Range: Sierra Nevada
Easiest Route: West Face
Class of Easiest Route: Class 3
Permit Required: Yes, if you’re camping overnight
Mount Williamson is an imposingly grand peak with many complex routes to the summit. The easiest of these is the Class 3 West Face which requires good route finding skills. Just before the summit of Mount Williamson, you’ll have to ascend a chimney. While this is considered Class 3, it can be quite intimidating if you’re not used to that type of climbing.
Mount Williamson begins with the same intense approach hike from Shepherd’s Pass as Mount Tyndall, so most people will combine the two summits into one trip. Mount Williamson used to be closed for much of the year due its location in the California Bighorn Sheep Zoological Area, but the restrictions have been lifted, and it is now open to hike year-round.
MOUNT RUSSELL
Height: 14,088 feet
Prominence: 1,129 feet
Mountain Range: Sierra Nevada
Easiest Route: East Ridge
Class of Easiest Route: Class 3
Permit Required: Yes

Like many of the California 14ers, Mount Russell begins at the Mt. Whitney trailhead at Whitney Portal. Mount Russell is located about a mile north of Mount Whitney itself, and is an excellent peak for technical rock climbers. The Fishhook Arete in particular is a great multi-pitch 5.9 climb with a sweeping view.
The easiest route up Mount Russell is the East Ridge, which is Class 3. The ridge climbing can be quite scary if you’re afraid of heights or not used to exposure. While it is not technically difficult, the steep drop-off can easily overwhelm people
MOUNT SHASTA
Height: 14,162 feet
Prominence: 9,832 feet
Mountain Range: California Cascades
Easiest Route: Avalanche Gulch
Class of Easiest Route: Class 2+
Permit Required: Yes

Unlike nearly every other California 14er, Mount Shasta is not located in the Sierra Nevada Range but is in the California Cascades. Because it is significantly farther north than the other California fourteeners, snow and ice travel is required on any route up Mount Shasta.
The easiest way up Mount Shasta is the Avalanche Gulch route, but this is still a strenuous route that you need to have technical mountaineering skills to summit. If you’re a beginner who wants to build these skills, a great way to do that is to hire a guide for Mount Shasta.
>> READ THE FULL TRAIL GUIDE: I did Mount Shasta as part of a guided trip, and you can find out more about the whole experience of climbing Mount Shasta in my guide to climbing Mount Shasta via Avalanche Gulch.
NORTH PALISADE
Height: 14,242 feet
Prominence: 2,895 feet
Mountain Range: Sierra Nevada
Easiest Route: West Chute
Class of Easiest Route: Class 4
Permit Required: Yes, if you're camping overnight

North Palisade is a technical route, and even the easiest way to the summit is Class 4. There are many routes up North Palisade, and route finding can definitely be a struggle. The West Chute requires 4th class scrambling, but it is the easiest route to the summit. Alpine climbers like to attempt the U-Notch Couloir of North Palisade.
North Palisade can be done as part of the Palisade Traverse to bag several summits in one go.
POLEMONIUM PEAK **
Height: 14,100 feet
Prominence: 200 feet << the reason it doesn't qualify as a "true" California 14er
Mountain Range: Sierra Nevada
Easiest Route: From the U-Notch
Class of Easiest Route: Class 4
Permit Required: Yes, if you’re camping overnight

Polemonium Peak is one of the three California mountains that are over 14,000 feet but don’t technically qualify as 14ers because of prominence. The peak is named for a flower unique to the Sierra Nevada called Polemonium Eximium, commonly known as Sky Pilot. This pretty purple or blue flower can be found on peaks between 9,000 and 14,000 feet.
The easiest route up Polemonium Peak is the Class 4 U-Notch. This peak can also be climbed as part of the Palisade Traverse.
STARLIGHT PEAK **
Height: 14,220 feet
Prominence: 120 feet << the reason it doesn't qualify as a "true" California 14er
Mountain Range: Sierra Nevada Mountain Range
Easiest Route: Northwest Chute
Class of Easiest Route: Class 5 (5.6)
Permit Required: Yes, if you’re camping overnight
Starlight Peak is really a sub-peak of North Palisade, and its lack of prominence is why it is not considered a “true” 14er. It is recognized by its distinctive summit spire known as the Milk Bottle.
While the Northwest Chute up Starlight Peak is Class 4, the only way up to the summit of the Milk Bottle is through 5th class climbing, and the easiest route is 5.6. Starlight Peak can be summited as part of the Palisade Traverse.
THUNDERBOLT PEAK **
Height: 14,003 feet
Prominence: 223 feet << the reason it doesn't qualify as a "true" California 14er
Mountain Range: Sierra Nevada Mountain Range
Easiest Route: Southwest Chute Number 1
Class of Easiest Route: Class 5 (5.9)
Permit Required: Yes, if you’re camping overnight

Thunderbolt Peak is probably the most difficult of all the California 14ers. While there are several routes up to the summit monolith, including a beautiful ridge line and various alpine couloirs, reaching the actual summit requires technical rock climbing rated 5.9.
The name of Thunderbolt Peak comes from the first ascent, when a bolt of lightning hit the monolith that makes up the summit just as one of the first ascensionists was descending, barely missing him. Thunderbolt Peak is also part of the Palisade Traverse.
THE PALISADE TRAVERSE
The Palisade Traverse is a route that incorporates the summits of Thunderbolt Peak, Starlight Peak, North Palisade, Polemonium Peak, and Mount Sill so you can check off five 14ers in one push.
This can be done car-to-car in one day for ambitious and experienced mountaineers, but it’s also often done as a backpacking trip over the course of a few days.
All of these peaks, with the exception of Mount Sill, are Class 4 or 5, so you should only attempt the Palisade Traverse after you have built up your mountaineering experience. This is NOT something beginners should attempt. Even experienced climbers are challenged in this terrain due to complicated route finding, loose blocks of granite rock, and the technical terrain.
7. HOW TO START HIKING THE CALIFORNIA 14ERS
Even if you’re super excited about hiking the California 14ers, you might also be a little overwhelmed about how to start. I think the best way to go about tackling these fourteeners is as a progression.
Start with the easiest peaks – the Class 1 hikes – to build your confidence, and then do some of the Class 2 hikes to build your skills. As you start getting more comfortable in the mountains and at altitude, you can decide if you’re ready to tackle more technical peaks that require scrambling and climbing.
If you’re unsure if you’re prepared for the Class 3, 4, or even 5 fourteeners, I definitely recommend hiring a guide - look for one certified by the American Mountain Guides Association (AMGA) - to literally show you the ropes and help keep you safe. You can also check out courses to learn new skills and join a mountaineering club to find adventure buddies.

For more information on how to start hiking the California 14ers, check out my post on 7 Tips to Hiking and Summitting Your First Fourteener Mountain. This will help you choose the right peak for your first 14er, develop a training plan, and get prepared with gear and logistics.
8. CALIFORNIA 14ERS PACKING LIST
The gear you carry will vary whether depending on whether you’re hiking or backpacking your California 14er route. We have some EXCELLENT resources on packing for day hiking and backpacking here on the blog, so I highly recommend you check them out:
Full day hiking gear checklist here
Full 3 to 5 day backpacking packing list here
But whether you’re day hiking or backpacking, there are a few absolutely essential items to make sure you have when you’re hiking one of the California 14ers. Here is what to make sure you have in your pack on your California 14er summit attempt (but remember, this is not a full list of everything you need!).
Note: The list below may contain affiliate links.
Again, the above is NOT your full day hiking checklist (just some of the super important items to remember), so check out my day hiking checklist for my full gear recommendations.
DOWNLOAD OUR HIKING PACKING CHECKLIST:
So that you can hit the trails with peace of mind knowing that you didn’t leave anything essential behind!
I hope this guide has inspired you to add at least one of the California 14ers to your bucket list – and given you the confidence to know it’s possible!
MORE CALIFORNIA 14ER RESOURCES
Be sure to check out these guides to specific California 14ers and tips for training!
7 Tips to Hiking and Summitting Your First Fourteener Mountain
7 of the Best Hikes in Southern California to Help Train for the Big Mountains
LOOKING FOR OTHER CALIFORNIA ADVENTURES?
If you’re looking for additional California hiking adventures, check out our resources below:
Cheers,
Allison - She Dreams of Alpine


How to Get a Mt. Whitney Permit: Understanding the Permit & Lottery Process for Day Hiking and Backpacking the Whitney Area | Mount Whitney is the tallest peak in the lower 48 states, which makes it a very popular peak to hike and climb. Due to its popularity, there is a very structured permit process, and this post covers everything you need to know about grabbing Mount Whitney permits so you can plan your hike up this epic California peak. | shedreamsofalpine.com