Hiking Split Mountain - California 14er Trail Guide
I decided to write up a report on our (spoiler alert) attempt of Split Mountain in California, despite the fact that we didn't make it all the way to the 14,065 foot summit. When doing my research on the trail prior to our attempt I realized there was not a whole lot of information out there on this peak, and I ended up needing to ask around in forums for people who had done the trail themselves to get a little more insight on what to expect. For those of you who don't know, Split Mountain is another one of California's 14er mountains, although not as well known as its counterparts like Mount Whitney or Mount Langley. While a summit of Split Mountain wasn’t in the cards for us the day that we attempted the peak, it was still a really awesome and challenging California 14er hike.
The guide below goes into great depth on the logistics of getting to the Split Mountain trailhead, and planning your trip to Split Mountain summit, plus some fun photos and a trip report of our experience on the trail and why we ended up turning around at 12,700 feet along the ridge line climb toward the summit. If you are looking for more information on hiking 14er peaks, be sure to check out our additional resource that details 7 crucial tips to hiking and summiting a 14er peak.
HIKING SPLIT MOUNTAIN QUICK INFO:
I do not recommend this as a beginner 14er peak to hike if you are just getting started in peak bagging and hiking fourteener peaks. Split Mountain, although rated only 2nd class for its easiest route to the summit, I found to be quite technical at some points and the trail was easy to lose on the way to Red Lake. You must be comfortable hiking through steep, loose, tallus terrain, and we even found ourselves at times traversing across short sections of cliffside in order to try and find a better less loose path to the ridge line (explained in better detail in my trip report below).
In the guide below we will go over:
Hiking Details for the Red Lake Trail to Split Mountain, California
Driving Directions to get to Split Mountain Trailhead + Road Conditions
Split Mountain Trail Map
When to Go – Split Mountain Weather
Split Mountain Camping Information
Split Mountain Permit Information
Backpacking Gear Essentials
Split Mountain Trip Report (with more details about the trail and pictures)
Plus, at the end we include some additional resources and guides for hiking and training for fourteeners. Let's get started...

HIKING DETAILS FOR SPLIT MOUNTAIN:
Split Mountain Elevation: 14,065 ft
Best Trail to Summit: Red Lake Trail to the Class 2 North Slope
Type of Trail: Out and Back
Mileage: ~14 miles round trip
Total Elevation Gain: ~7,500 feet total elevation gain
Split Mountain Trailhead: Red Lake Trailhead
Trailhead Elevation: 6,500 feet
Estimated Time to complete: We recommend taking 2-3 days to hike this trail. We planned for a 2 day hike. It took us about 6 hours from the trailhead to get to Red Lake on day one. We didn’t summit Split Mountain on day two, but I estimate it would’ve taken us about 14 hours (at our pace that day) to get up to summit and back down to the trailhead from Red Lake on Day 2. Some people have hiked this in a day, but it just depends on your fitness level and technical capability and comfort.
Difficulty: Strenuous and Difficult! This is a technical trail! Do not attempt unless you are comfortable with class 2, loose scree/tallus, steep loose banks, and ridge lines. If you aren't comfortable route finding, and not following a well-defined "trail" opt-out of this hike, or build those skills first and then attempt Split Mountain.
Water Available? There is water along the trail, but not super easy to access. It is best to bring enough water to make it to the Red Lake, where you can filter more water. 3 liters was sufficient for me to get from the Trailhead to Red Lake.
Dog friendly? You could certainly take a dog up to Red Lake. I would not attempt to take a pet up to Split Mountain summit though.
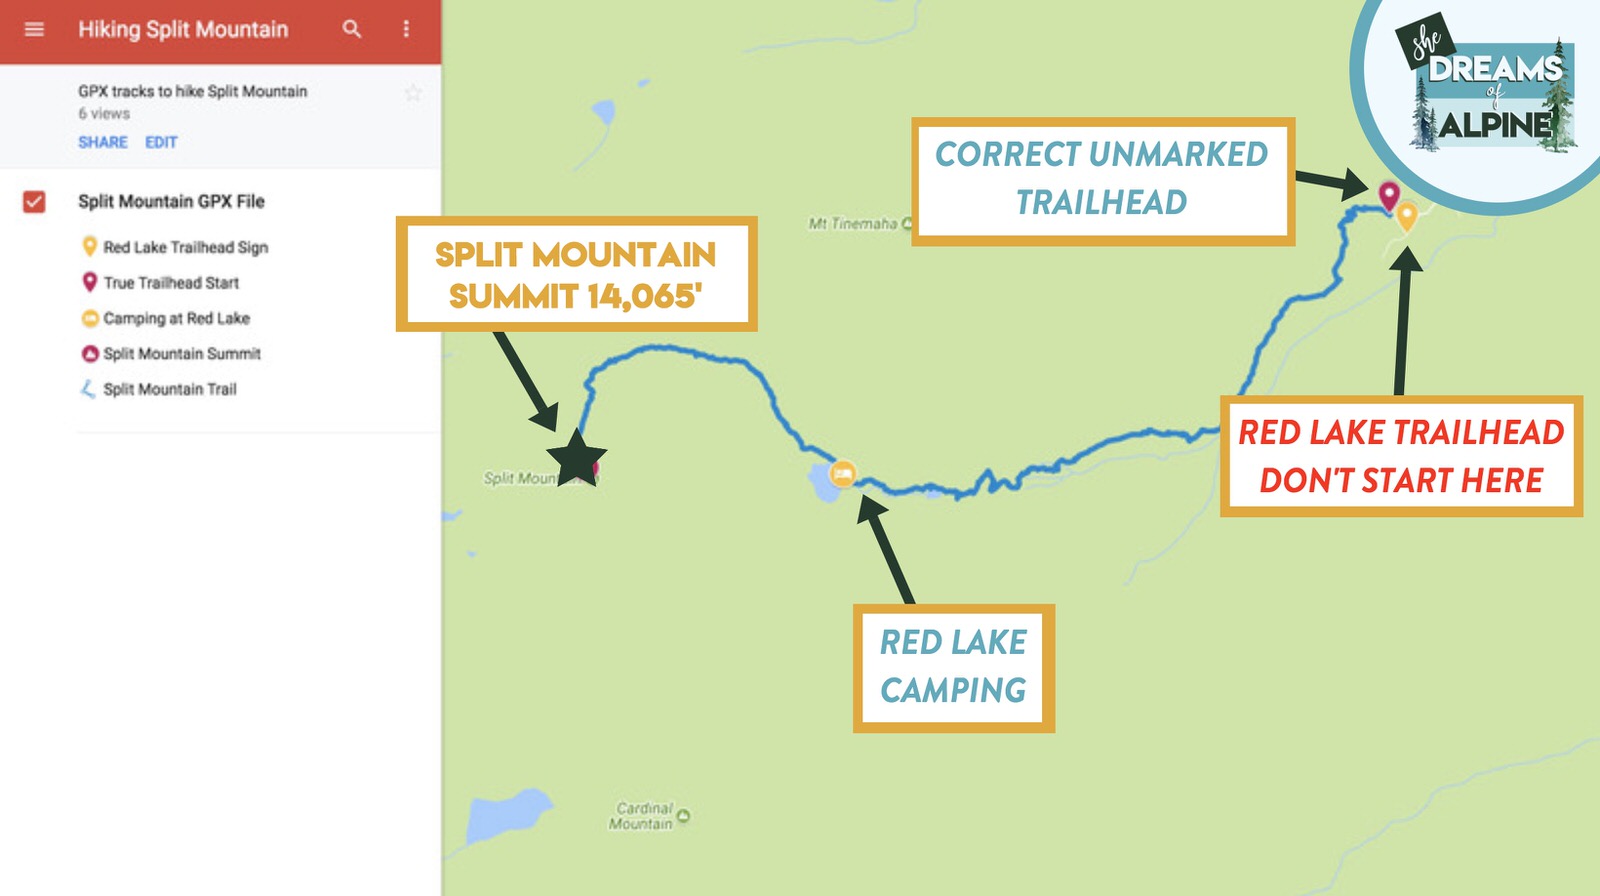
PRO TIP!! DO NOT FOLLOW THE TRAIL THAT IS RIGHT AT THE TRAILHEAD SIGN! Instead, hike up north of the trailhead sign a bit and follow an unmarked trail that will lead you higher up along the canyon instead of deep in the canyon where you will spend a lot of time bushwhacking. We were fortunate to have been told this advice before starting and were able to stay high the whole time, but we ran into others that day who said they spent a miserable time bushwhacking in the canyon.
GRAB MY [FREE] OUTDOOR BACKPACKER STARTER KIT:
I created the Ultimate Outdoor Backpacker Starter Kit for you (and it's FREE)! This starter kit is filled with 14 pages of my best hiking and backpacking tips to help you learn what it takes to become a safe, confident, and self-sufficient outdoor backpacker!
Driving TO SPLIT MOUNTAIN trailhead - road conditions
Getting to Split Mountain has its own set of challenges, and if you type in “Red Lake Trailhead” onto google maps, you won’t get the right directions. You will end up driving into a private property area, that you are now allowed to trespass into. Also, when we asked the ranger that issued us our permits about the road conditions to the trailhead, he also seemed to think that you had to park 2 miles away from the trailhead because of a gate… this advice was also wrong. We ended up following directions we found online and they got us where we needed to be.
First off, the road conditions aren’t great on the way up to the trailhead. At the beginning though, it will seem alright, but eventually you will need a high clearance vehicle. The road wasn’t super sandy or anything, it just had several sections with boulders and rocks needing higher clearance. I don’t think we actually needed 4WD, but it helped. We took a Jeep Liberty and made it just fine, but it has good clearance and good tires.
Driving Directions: Turn west onto Crocker Street from the 395 highway in Big Pine, California. After about 2.5 miles you will turn left onto McMurry Meadows Road.

What the beginning portion of McMurry Meadows Road Looks like
You will eventually pass through a gate.

Gate we opened and closed on McMurry Meadows Road.
Stay on McMurry Meadows Rd. for about 7.6 miles and turn left at a junction onto 33E301. There was also a trail sign at this junction that had “TH Split” written on it here.

At this junction, keep left!
Continue on this road for a bit, and you will eventually turn right on 33E301.

There were three different road options here, we ended up going right here and it worked out.
From here it is about 2.5 miles to the trailhead. Others mentioned that there was a really tricky section crossing a “stream” around this point, but when we went it looked like this area was recently fixed up and it wasn’t tricky at all to cross (See photo below)

Creek crossing here looks well maintained and recently re-graded. Easy to cross.
On the way into the trailhead it took us about 2 hours, but we were taking our time, making sure not to get lost, moving big rocks out of the road so they wouldn’t bottom us out or pop our tires, and taking some photos so I could report back on the road conditions here. On the way back out it only took us about and hour or so to get back to Big Pine. We made it out of there without any flat tires or events, but when I got back home I noticed a big gash in the side of one of my tires. So I will have to get that one replaced after all, but we were happy to not be stranded on the trail for any reason, I can’t imagine a tow would be cheap. I highly recommend bringing some “fix-a-flat” with you and your spare tire if you have one, just in case!
Click on the map below to go to our interactive map of our driving directions to the Red Lake Trailhead:

Our driving route to Red Lake Trailhead mapped out on google maps from Big Pine, California.
Please note that the road conditions above were from photos from July 2018. Road conditions can vary year to year depending on snow and rain damage. It's always good to follow up in forums for most up-to-date conditions.
SPLIT MOUNTAIN hike TRAIL MAP:
Getting to the trailhead is just half the battle for the Split Mountain hike. The trail is also a bit tricky to follow, and if you don’t do some research ahead of time, you could be spending some of your hiking time bushwhacking through the canyon. I definitely recommend bringing a GPS with a pre-loaded gpx track on this route with you.
First off, do not take the trail at the Red Lake Trailhead sign! Instead, hike a bit further North of this trail and find an unmarked (and not very defined) trail that will lead you up the side of the canyon instead of into the canyon. If you download our gpx track below, you will see that it doesn’t start at the Red Lake Trailhead sign.
Second, do not anticipate a well marked trail. At times this trail will be easy enough to follow, but then suddenly it will disappear on you. You may have to hike over sections of loose screen and then find yourself “off route”. We were able to always find the trail again since we had our GPS on us, but it would’ve been much more difficult without it. I don’t think you have to worry about getting “lost” per say, because you can only really “go up” to get to red lake, but your hike will definitely be more challenging if you find yourself off path.
Third, once you are at Red Lake and hiking toward Split Mountain Summit, don’t expect any trail at all. You may be able to find some sections of trail here and there, but mostly it is hiking over large sections of tallus and boulders toward the summit.
Below is a map of the hiking trail we used and followed. If you click on the image below you will be taken to an interactive map that you can further explore.
DOWNLOAD THE GPX FILE FOR THIS TRAIL!
As I mentioned above, I highly recommend brining a GPS and a downloaded GPX track of this route. Get access to this trails GPX file PLUS my library of GPX files with tracks and waypoints for all the trails loaded onto the She Dreams of Alpine blog.
Load this puppy into your trusted GPS and rest easy knowing you have tracks to follow on your next hike or backpacking trip.
DON’T HAVE A GPS? YOU SHOULD.
Look, I believe every hiker and backpacker should be self-sufficient, and that includes knowing how to practice smart navigational skills in the outdoors. This is something I teach in my backpacking program, but I want to give you a couple GPS options to get started. Don’t ever risk getting lost, and don’t rely on other people for your safety. Be empowered, take 100% ownership for yourself my friend. Here’s what I recommend:
1) GAIA GPS Phone App: At a bare minimum, consider getting a premium subscription to GAIA GPS App. This App allows you to download maps in advance and take them offline into the backcountry. You can record your tracks, upload tracks from online to follow (like the one I have above), and so much more with this phone app, and GAIA is offering a special discount to those who subscribe online through my link above, 20% off their normal prices. But even if you don’t use my link... please, at a minimum get a GPS phone app to help you navigate outdoors!
2) Handheld GPS: If you hike often or go backpacking, then I highly recommend you investing in a handheld GPS. I own a Garmin 64st and LOVE this device.
3) Handheld GPS with Satellite Communicator: However, if you have a little bit more money to spend, if I were starting over, I’d get the Garmin inReach Explorer+ which provides not only GPS tracking capabilities, but also an SOS satellite search and rescue communicator. I own the Garmin inReach mini now and I pair it with my Garmin 64st, but you can save weight by getting this all-in-one solution.
WHEN TO GO- SPLIT MOUNTAIN WEATHER:
Fortunately in California we tend to get a lot of sunshine. However it is always wise to check the weather before attempting any hike out into the backcountry of the Sierra Nevadas.
Here’s my personal advice based on my hiking experience in the Sierras:
You are pretty safe to choose a date between Mid July to Late September, these months are typically snow free
You can maybe get by Mid June to Late October, but it’s a little riskier.
For me, the “sweet spot” time to do anything in the Sierras, particularly backpacking, is Mid August to Late September (or sometimes mid-October). Why? This honestly is just my personal preference. There are more mosquitos July through August. The weather can also be pretty hot in those months, so I just prefer September/early October. I grab permits though anywhere from early July through early October though for trails. Just depends. Most backpacking trips, I aim for September.
The Sierra tend to have frequent afternoon showers in the summer as well, so it is always best to plan to be off the summit before 11AM.
Also make sure to check for fire updates, there are frequently big fires year to year in the summer months.
The chart below shows you some average temperatures for the Whitney Portal area, which is just south of Big Pine. The average temperatures should be similar for the Split Mountain area. As always, check the weather before your trip to see what the most up-to-date and current conditions might be.

CAMPING AT SPLIT MOUNTAIN:

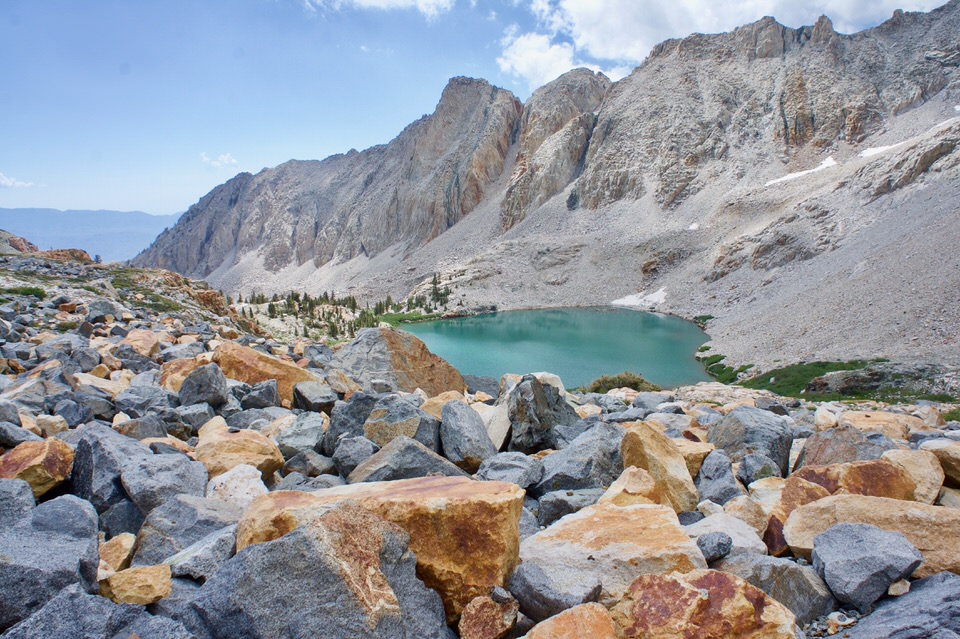
Most people who attempt Split Mountain in 2-3 days will camp at Red Lake. Red Lake is a beautiful bright blue lake at the base of Split Mountain. There are very nice, flat camping spots all along the lake, but staying overnight here does require a permit. See our permit section below for more details on this. Red Lake elevation is at 10,500 feet which also makes it a great place to spend the night to further acclimate before attempting the 14,065 foot summit.
For our hike up to Split Mountain, we drove in on Friday to pick up our permits, and then drove straight to the trailhead. We knew driving the trailhead could take us some time, and we didn’t want to start our hike on Saturday in the heat of the afternoon. You can also search for free camping options near the area to spend the night before your trip.
We camped our first night at the Red Lake Trailhead. There is no established campground here, so I just slept in the back of the Jeep and my hiking partner set up his tent near the car on a flat spot. The Red Lake trailhead is at 6,500 feet of elevation.
PERMIT INFORMATION FOR SPLIT MOUNTAIN:
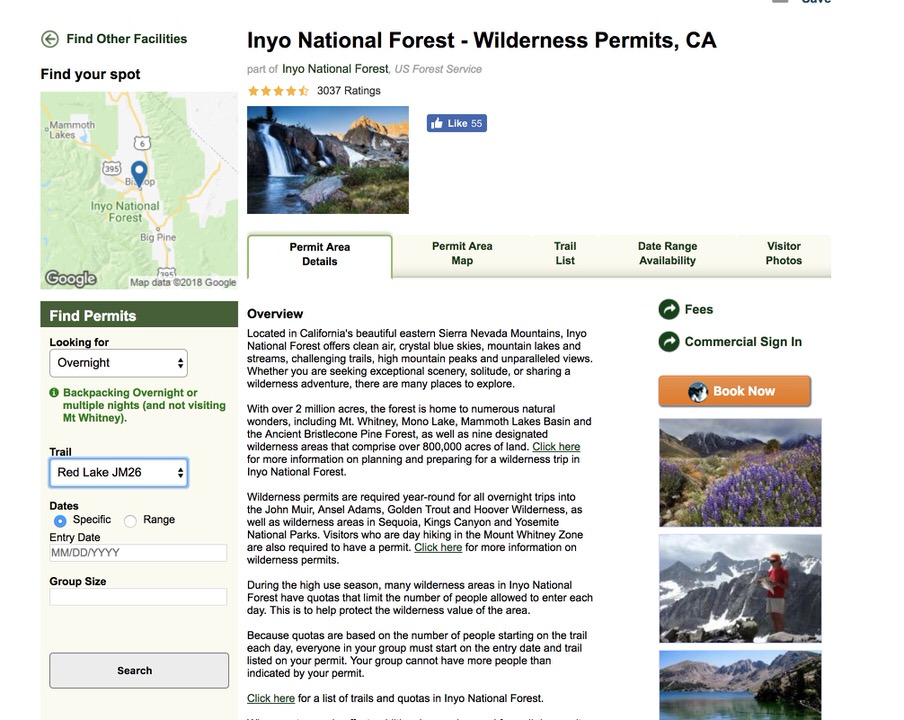
If staying overnight at Red Lake, you will need an overnight Inyo National Forest Wilderness permit in order to hike Split Mountain via the Red Lake Trail.
A wilderness permit is required for overnight trips in the national forest. Online Reservations can be made here.
There is a 8 person (5 reservation and 3 walk-in) trail quota for the Red Lake Trail from June to mid-September. More details can be found here.
Permits can be reserved from 2 days up to 6 months prior to your when you want to go. I found it fairly easy to get a reservation in advance ($5/person), but I tend to make all my permit reservations about 6 months in advance.
Trail code: Red Lake - JM26
You can find specific details about Red Lake permit here.
See some step by step details below:
>> Go to online reservation site (link above). In the "Find Permits" part on the left hand side of the page, select "overnight" (if backpacking), select "Red Lake JM26", put your entry date (if known) and number of permits desired. Then click search.
>> If the date you chose is available, select "see details". Then follow the prompts to book your permit!
We picked up our permit at White Mountain Ranger Station, which in hind sight, it might’ve been smarter to pick it up in Lone Pine since it was on our way to Big Pine.
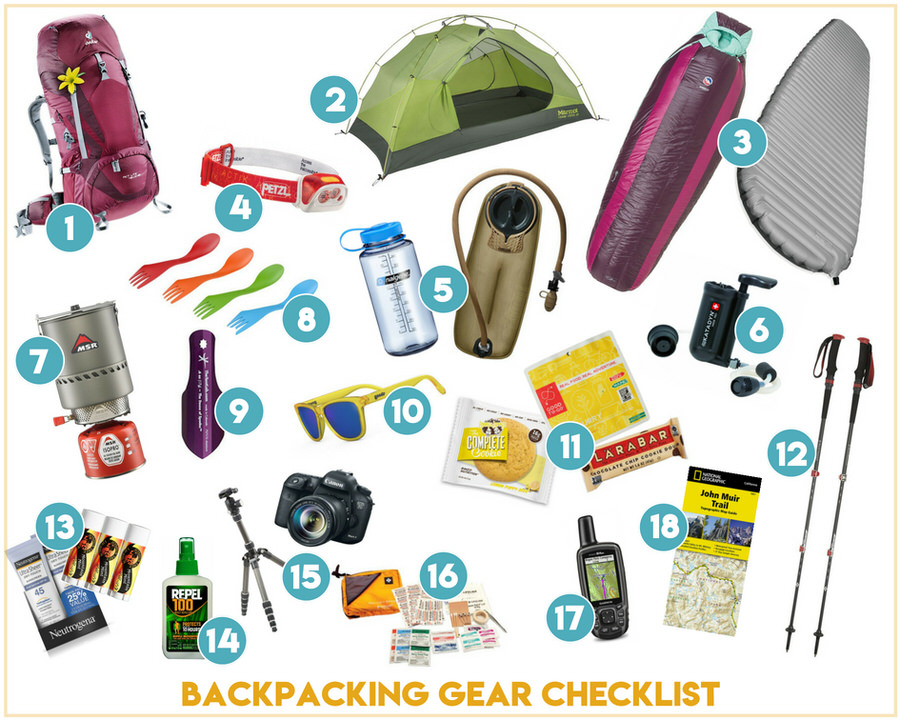
BAKPACKING GEAR ESSENTIALS:
Below I have listed some basic items to remember to pack on your backpacking trip, but it is not a comprehensive list. Be sure to check the weather and pack appropriately!
*Please note that some of the below links and in this post are affiliate links.
Backpack: Deuter's 45+ Liter backpacks make great backpacking backpacks. This was the first backpack I used when I started backpacking.
Tent: You will be fine with a 2-season tent, such as Marmots Crane Creek Backpacking Tent .
Sleeping Bag & Pad: I always recommend getting a down sleeping bag if you are going to be a "serious" backpacker. If that's you, I recommend getting a 0 to 15 degree rated bag. If you will be doing more high altitude hiking, just splurge on the zero degree bag, it will be worth it. We love the Big Agnes Brand down bags. And if you've read any of my other posts, you know that the Therm-A-Rest NeoAir XTherm sleeping pad is my favorite sleeping pad. It's light weight and easy to pack. It's super comfortable (no body parts touch the ground), and it's warm!
Headlamp: I pretty much don’t go anywhere without a headlamp. I have a Petzl headlamp, and it has been going strong for over 3 years now. It's also always good to pack an extra set of batteries too whenever you hike or backpack.
Water Bottle and CamelBak: Camelbaks are awesome for hiking! They are the easiest way to stay hydrated, and I typically always bring one with me. I recommend getting one that has at least a 3 liter reservoir. Also consider brining a Nalgene or water bottle for backup. Then, if a leak develops in my Camelbak, I can at least transfer water to the Nalgene and still be OK.
Water filter: There are two main water filters I recommend, and I own both. I like the Katadyn Hiker Pro Microfilterand I like the SteriPen. I use the Hiker Pro more often when I backpack, but when I want something small to bring with me on hikes I will throw the SteriPen in my pack.
Camping Stove: I love the MSR Reactor Stove System. I bought this after my Jet Boil broke down, and I like it a lot more. It works great at high altitude and takes only about 30 seconds to bring water to a boil.
Spork: I like these Light My Fire Sporks because you get a spoon and fork all in one. Your bases are covered.
Trowel: Nobody likes to talk about it, but to be a responsible outdoorsman/woman you need to bury your human waste. The Deuce of Spades Trowel is a fantastic lightweight option. When I went backpacking with my friends in Tuolumne a couple of months ago, all of my friend's trowel handles broke except for mine! Winning!
Sunglasses: My favorite pair for day hikes are Goodr Sunglasses. They come in a bunch of great color options and the best part... they are only $25! If you want something more classic Native Eyewear is also another good choice because they have a great lifetime warranty.
Food and Snacks: This should be slightly obvious, but make sure to pack enough food for the appropriate number of days you will be backpacking. I like to pack cliff bars, complete cookies, and lara bars for quick snacks. Good To-Go Dehydrated Dinners are some of my favorite dehydrate meals to bring on backpacking trips as well. The ingredients are great, and they are super delicious. My favorites are the Thai Curry and the Herbed Mushroom Risotto!
Treking Poles: I love the black diamond trail pro shock trekking poles. Michael and I both have these. They have a set for women (blue) and men (red). I've owned a pair of cheaper trekking poles in the past and they break fairly easily. These are almost indestructible. I've been using the same pair for almost 5 years now, and still going strong.
Sunscreen & Lipbalm: This should be a no-brainer, but always wear and bring sunscreen for a hike. I really like Neutrogena brand. Just like sunscreen, it is also important to bring lip balm that has sunscreen in it on your hike. My favorite lip balm is the either the Joshua Tree brand.
Bug Spray: If you have warmer weather, it’s always safe to just bring some of this just in case. I prefer the wipes for hiking and backpacking because it is lighter and easier to pack.
Camera: Don't forget to pack a camera or a phone to capture your hike! You can read our post on the Outdoor Adventure Photography Gear we use if you want details on the cameras we recommend for outdoor photography, but also you can't go wrong these days with your phone camera either. Your choice!
First Aid Kit: Another nice item to have is a small first aid kit to throw in your bag that has some basic first aid essentials in it, like the Lifeline Trail Light Day Hiker First Aid Kit. Better safe than sorry.
GPS: I mentioned this before, but I think having a GPS on this hike is smart. My favorite GPS is the Garmin GPS 64st.
Maps: Whether I print out a map from online or I buy one on amazon for my specific trail, I always like to have a map of some sorts. Depending on where you are hiking, many trails can have forks and split off in different directions, so it’s good to have something to ground yourself with. My favorite maps are the National Geographic Trail Illustrated Maps or the Tom Harrison Maps, if you can find one that includes your trail. I love this super detailed National Geographic Map of the John Muir Trail!
Clothing based on time of year you will be hiking: For details on clothing, hiking boots, and socks we recommend, I suggest reading our Essential Hiking Gear List. As for footwear, definitely bring a good pair of hiking boots and at least 2 pairs of wool socks.
For more detailed descriptions on gear that we like and recommend, check out our Essential Hiking Gear List.
GRAB MY [FREE] FULL BACKPACKING PACKING CHECKLIST!
Want a full list of everything I recommend to take backpacking with you? Download our free backpacking packing checklist below! This download also includes my layering tip-sheet PLUS 25+ backpacking food ideas.

HIKING SPLIT MOUNTAIN TRIP REPORT:
I honestly didn’t know what to expect when we set off to hike Split Mountain. On the one hand it seemed like an “easier 14er”, rated class 2 and only about 14 miles round trip. On the other hand the more I read about it, the more challenging it became in my mind. Some talked about the road to the trailhead being horrible, and others mentioned bushwhacking on unmaintained trails. I also didn’t really feel at all prepared for what lied ahead of me once past the Red Lake camping area. So if you are looking for a bit of insight into your attempt of Split Mountain, I’ll share my experience below.
At a high level, here is what our schedule hiking Split Mountain looked like, and then I’ll dive into details below:
Picked up our Split Mountain Permits at about 3 PM from White Mountain Ranger Station on Friday
Drove to Red Lake Trailhead Friday, and slept at trailhead (6,500 feet elevation)
Started hiking Saturday at 7AM, 6 hours to Red Lake
Camped at Red Lake
Started hiking Sunday at 4AM toward Split Mountain Summit
Decided to turn around at 12,700 ft. (On the ridge line toward Split Summit)
Back to Red Lake Trailhead by 4PM Sunday evening.
So lets get into the details here a bit. As I mentioned above, we drove to the White Mountain Ranger Station at about 3PM on Friday to pick up our Saturday/Sunday permits to hike the Red Lake Trail toward Split Mountain. Once we got our permits, we grabbed some dinner at Subway and filled up with gas and then made our way to Big Pine, California.
Following the directions I mentioned in the driving section above, it took us about 2 hours to get to the Red Lake Trailhead. I had been really anxious about the road conditions before I went, but with our higher clearance Jeep we ended up not having any issues getting to the trailhead. There were a couple of steeper sections with rocks, but mostly we just had to take our time and occasionally move a sharp rock off the road.
We got to the trailhead around 7PM with enough time to look around and find the trailhead we would be starting at the next morning and set up our sleeping bags. There was also a spectacular thunderstorm across the way in the White Mountain Range that we spent a bit of time watching before heading to sleep.

We woke up around 6AM on Saturday morning and started our hike around 7AM. I was amazed at how hot the weather quickly became, and was already wishing we had started our hike earlier in the morning.
The trailhead that you want to take (shown in our GPX tracks) is actually a bit north of the Red Lake Trailhead sign. We didn’t have a hard time finding it, but if you hadn’t known to go find it, you probably would’ve taken the less desirable bushwhacking trail toward Red Lake. The actual, and more pleasant trail takes you higher above the canyon.

It is pretty much a steep hike all the way to Red Lake, roughly 4,000 feet of elevation gain in about 4.4 miles. In the heat, with our heavier backpacking packs it took us about 6 hours to get to Red Lake from the trailhead (with stops).
I also mentioned this above, but its worth reiterating. The trail is easy to lose if you don’t have a gpx track. It's not very well maintained and at some points we would find ourselves crossing a tallus field and unable to find the “trail” again.
Other times we had to hik through a bit of “jungle”-esk creek terrain, until we emerged again on the high side of the canyon.

I don’t think you would get lost regardless, but I definitely think you might have a miserable hike if you ended up on the wrong trail or losing the trail. I'm not a personal fan of constant bushwhacking.

When we made it to Red Lake, we were the only ones there and so we had our pick of the camping spots. None of them were bad though, and the lake was absolutely gorgeous. We spent some time filtering water for the next day and soaking our feet in the cold lake, and were zipped away in our tents by 7PM.
We knew the forecast for the weekend showed a high chance of thunderstorms and rain on both Saturday and Sunday around 11AM, and so we wanted to get an early start for Split on Sunday morning.
We woke up on Sunday around 3AM, and were on the trail by 3:40AM. There was unfortunately no moon that evening, so we had to pretty much solely rely on our headlamps. We hiked along Red Lake for a bit until we met the first of the tallus fields.

From that point on we didn’t really have any true trails to follow. We weaved our way in, out, around, and on top of big boulders and loose scree toward the summit. Sometimes at the beginning we were able to find patches of grassier areas to walk around, but they were mostly short lived.
We were anticipating a very steep slog toward the summit with 3,500 feet in 2 miles, and steep it was indeed!
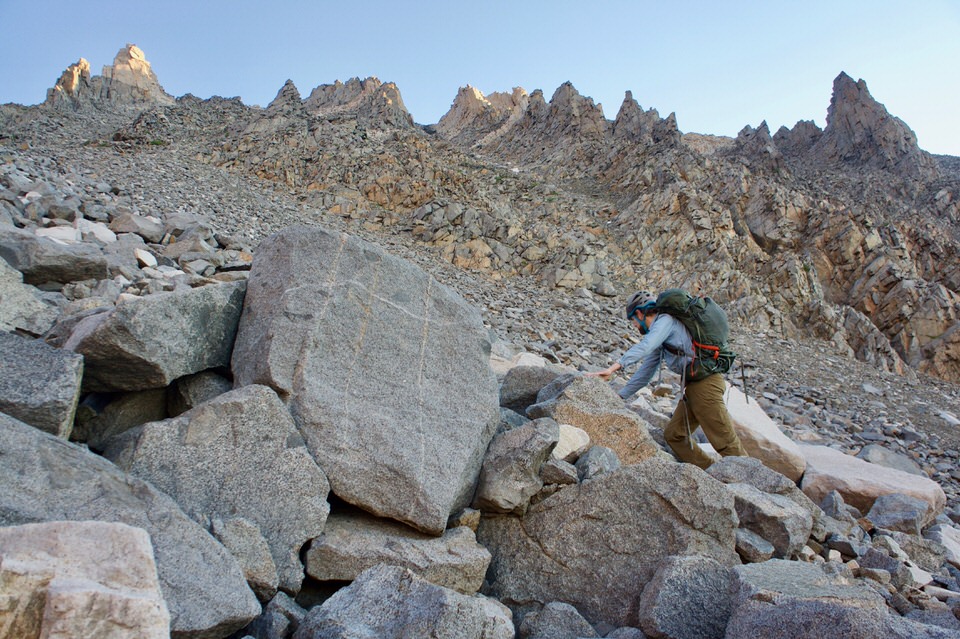
It seemed like there were 3 distinct banks of steep scree/tallus before reaching the ridge line to Split Mountain. Each of the scree fields got progressively more steep as we went higher as well.
At the top of the second steep scree field, there was some snow, and we decided to skirt around it by traversing across more scree to the right of the snow. In hindsight, we wish we would’ve just trekked across the snow, it would’ve been faster, and we ended up doing this on our way back down.
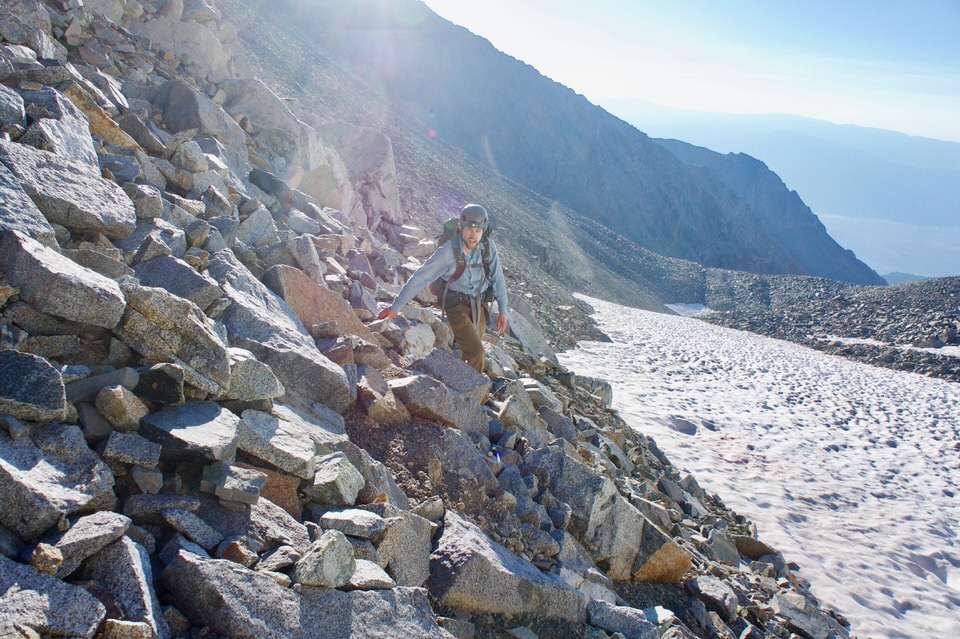
The first 2 scree fields, while steep, are relatively easy to flow through, your biggest challenge will be making sure that you are stepping solidly on the rock and ensuring it doesn’t move beneath you so you don’t twist and ankle.
However, the 3rd tallus/screen/dirt field is where things get a bit more tricky. It’s very steep, and the rout to the ridge isn’t obvious. Standing below this area you might see 4 different ways up to the ridge that look “OK”, but nothing really looks that great. We started at first up the center dirt “couloir”, but it quickly became a dirt fest that was one step forward and two steps back, so we opted to traverse across a rock band (possibly class 3-4) to the left couloir, which proved a little better, but still, the whole time I felt a bit sketched out.
There was a lot of, “Man I really don’t trust this rock”, and quickly climbing upwards to get to the next “stable” looking bank of rock and scree so you could rest a moment before continuing onward.

It was a relief to reach the ridge, as I felt I had put my mental toughness skills to the test heading up the steep loose Sierra Nevada slope, and finally we were on solid rock again.
We continued for a bit on the ridge, climbing over boulders and manteling onwards and upwards toward the summit, when I looked at my watch and my climbing partner and the loom of dark clouds in the distance. Knowing that most accidents happen in the mountains on the downclimb/hike, I decided to call it.
We were almost at my “pre-set” turn around time, and we still had 1,300 feet left to climb to the summit, and it had taken us much longer to get up there than I had planned for.
After coming up what we had just climbed up, I realized going down might take us longer than anticipated.
Storm clouds were coming.
I’d rather take our time to get back down what we had just climbed than reach the summit only to find that we needed to hurry off before the storm hit us.
It was sad to turn around, we were so close, but I don’t regret the choice. We turned around at 12,700 feet, at about 8:00 AM. I had wanted to be at Split Mountain summit by 9AM or earlier. The steep, and more technical terrain took us longer to get through, and we should’ve been moving faster. It took us about 4 hours to get from 10,500 feet to 12, 700 feet.

Fortunately, going down the steep third bank of scree and dirt actually proved much easier going down than it was going up, and it was also much easier to see some resemblance of “trails” others had taken down from the ridgeline, which were better than what we had climbed up. It was just really hard to see those trails from the bottom looking up.
From our turn around point at 12,700 feet, it took us only about 2 hours to get back down to Red Lake (half the time it took us to climb up). We packed up our tents, filtered water, and then headed back down to the trailhead. It took us about 3-4 additional hours from Red Lake to get back to the Red Lake Trailhead.
So even though we didn’t get a summit of Split Mountain (this time), I am really stoked we went, and now I feel even more prepared to attempt it again. The only thing I would probably change about my next attempt up Split would be to be in better physical condition so I could hike a bit faster on the second portion to Split Mountain summit, and I would take the left couloir up the steeper scree/dirt bank instead of starting up the right one. I would also walk through the snow, and maybe take a lighter summit pack so that I feel more agile on the steep terrain.
Even if you only get to Red Lake though on this trail, it is still beautiful, and I really loved how secluded everything felt out there. We almost had the whole climb to ourselves. We ran into only a couple of other people on the trail that weekend.
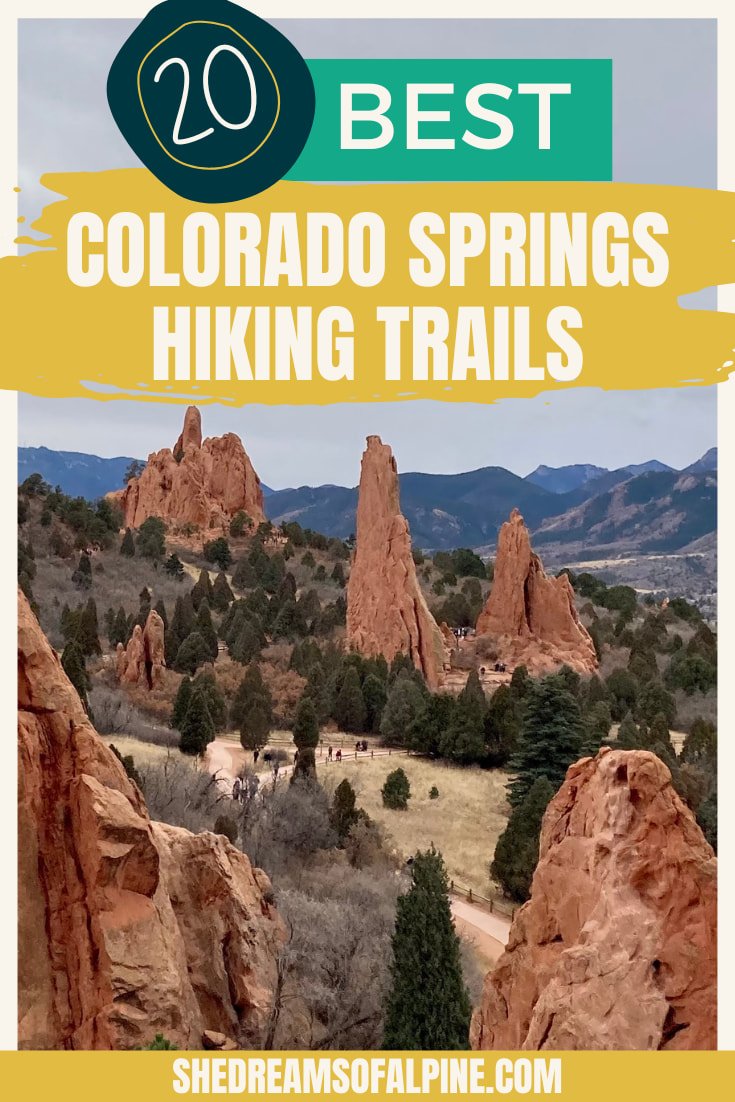
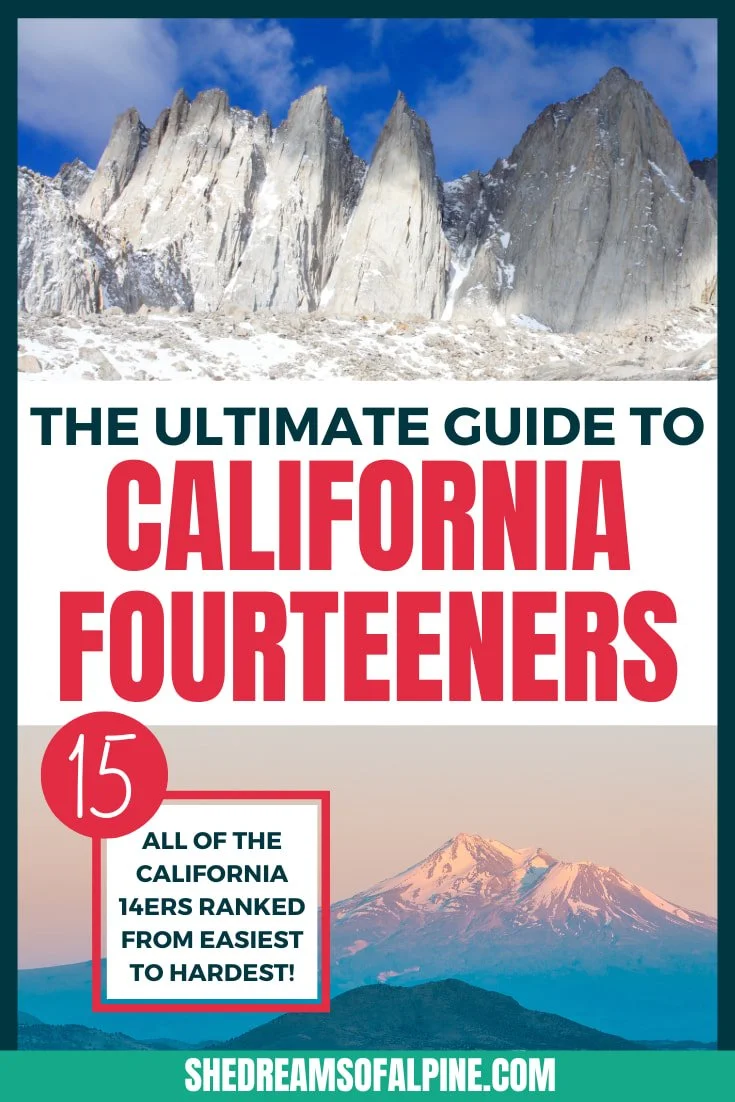
If you are looking for some other guides on California 14ers, be sure to check out our resources below:
Trail guides on popular California 14er's:
A Full List of All the California 14,000 Foot Peaks
Mount Whitney Trail – California 14er
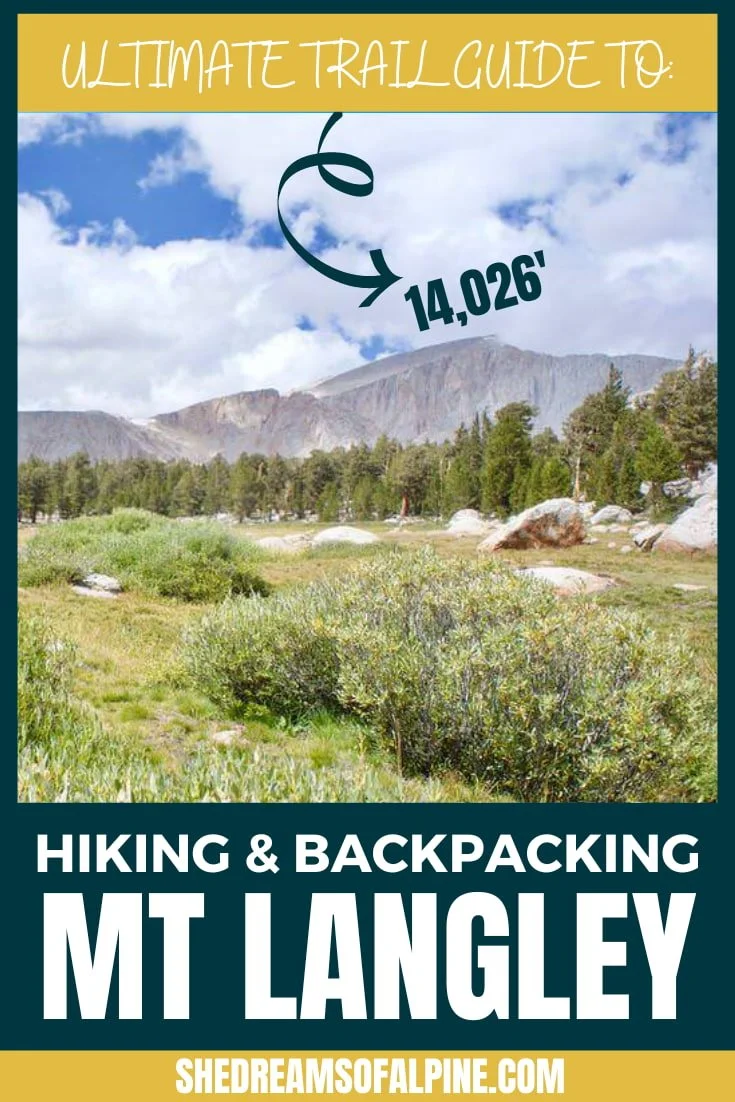
Mount Langley Hike – California 14er
Mount Shasta Hike – California 14er
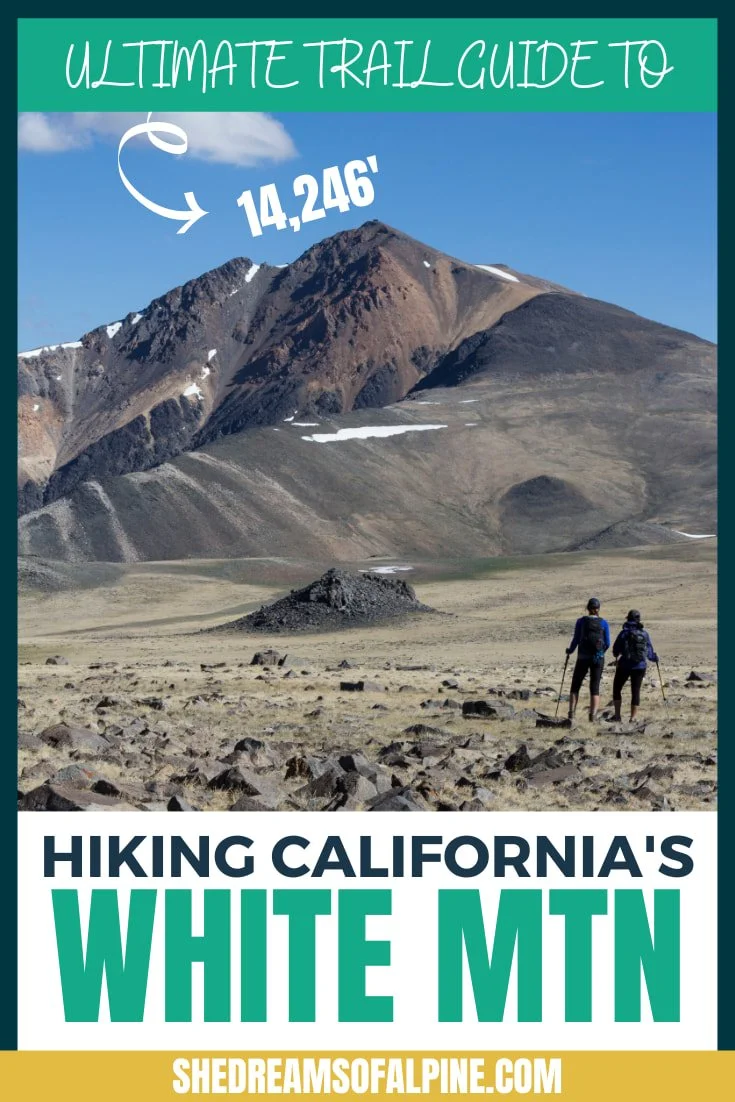
White Mountain Peak Hike - California 14er
Also be sure to check out these essential hiking resources!
7 Tips to Hiking and Summiting Your First Fourteener Mountain
Permit Deadlines and Reservations for Popular California Hiking Trails
Let me know if you’ve attempted Split Mountain below or if you have plans to and have any questions!
Also, please note that all directions and advice above are only meant to serve a guide and you should always asses your own physical and technical ability before climbing any peak or trail. You are responsible for your own safety and skills out in the backcountry. Be prepared, and most of all, be safe!
Cheers,
Allison - She Dreams of Alpine


Related Posts:


The 19 Best Hikes in Southern California | Southern California is a hiker’s paradise, and there are loads of great hiking trails in SoCal. To help you narrow it down, here is a list of the 19 very best hikes in Southern California. From easier hikes like the Hollywood Sign to multi-day backpacking excursions like the Trans-Catalina Trail, there’s something for everyone in Southern California! | shedreamsofalpine.com