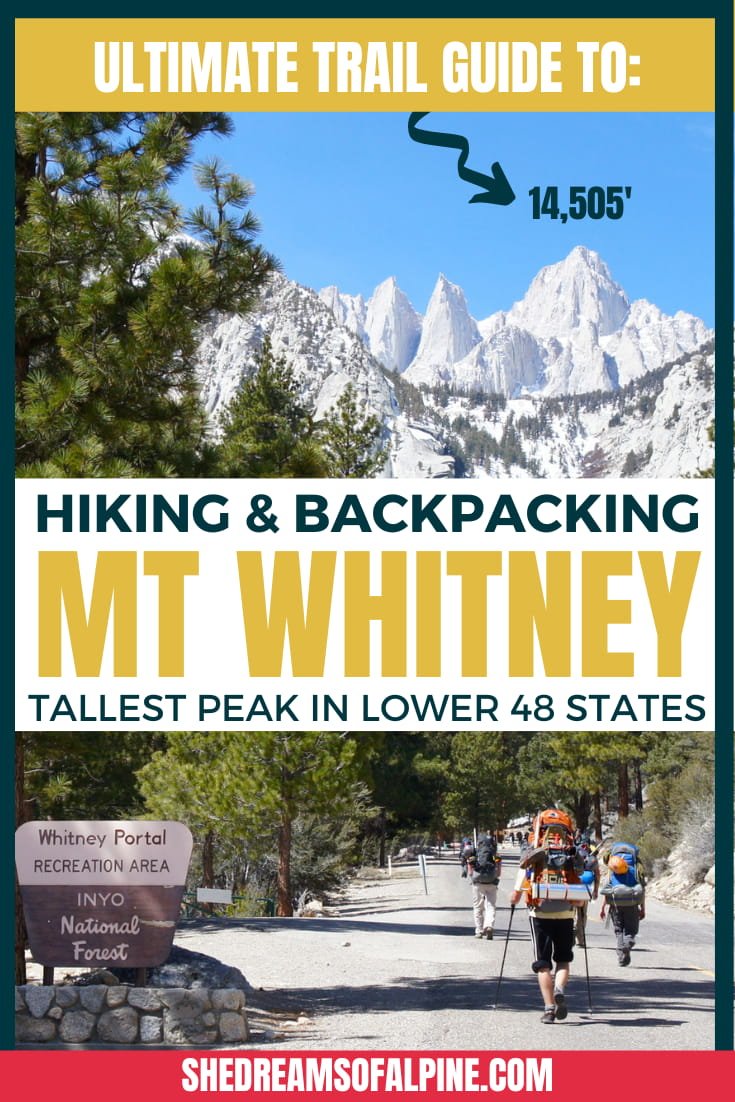
Hiking Mt. Whitney Trail Guide 2024: How to Successfully Summit the Highest Peak in the Lower 48

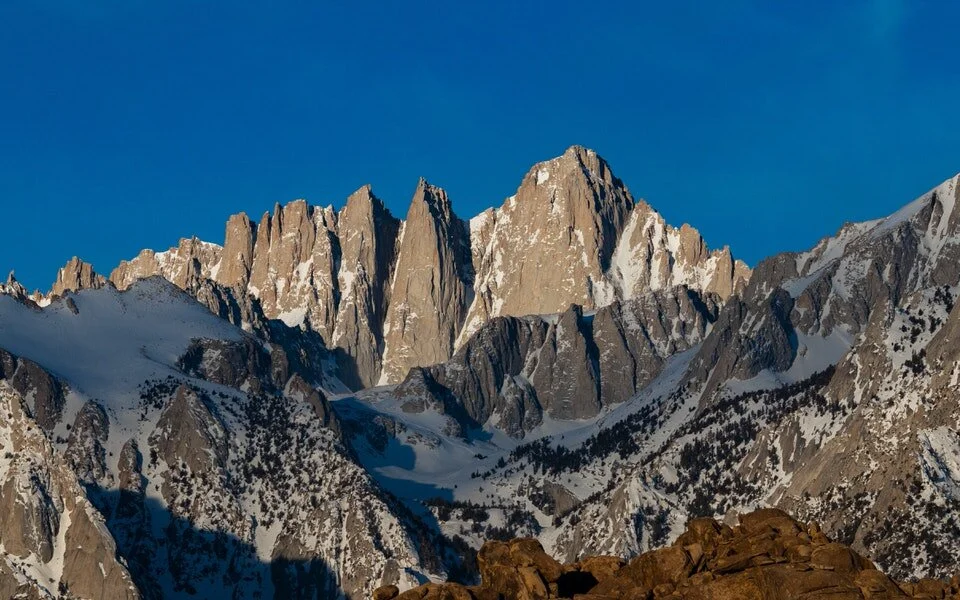
If hiking Mount Whitney is not already on the top of your bucket list, then it should be! The Mt. Whitney hike is one of THE MOST popular trails in California and the US, because Mount Whitney is the tallest peak in the contiguous United States, meaning, outside of flying to Alaska, this is the tallest peak you can hike here in the states.
It’s also a very attainable summit for most hikers and backpackers as it’s not an overly technical hike if you plan your trip during the right time of the year.
Mt. Whitney is also the tallest of California’s 14ers.
What’s a 14er you ask? A 14er is a peak whose summit sits at 14,000 feet or above. To be considered a true 14er, a peak usually must also have at least 300 feet of prominence, which means how high the summit rises from the saddle of neighboring peaks, which Mount Whitney certainly fits the bill at over 10,000 feet of prominence.
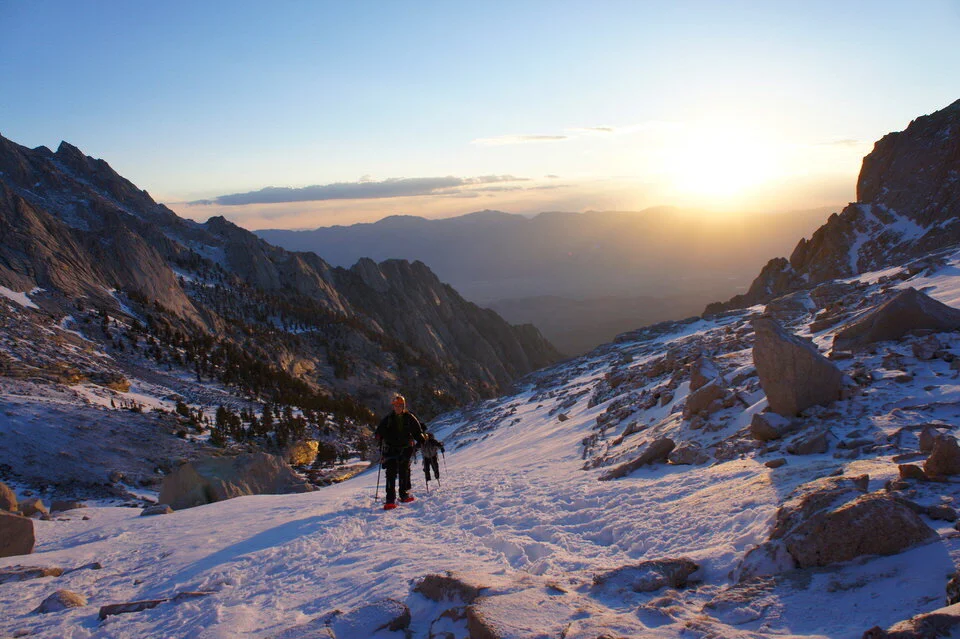
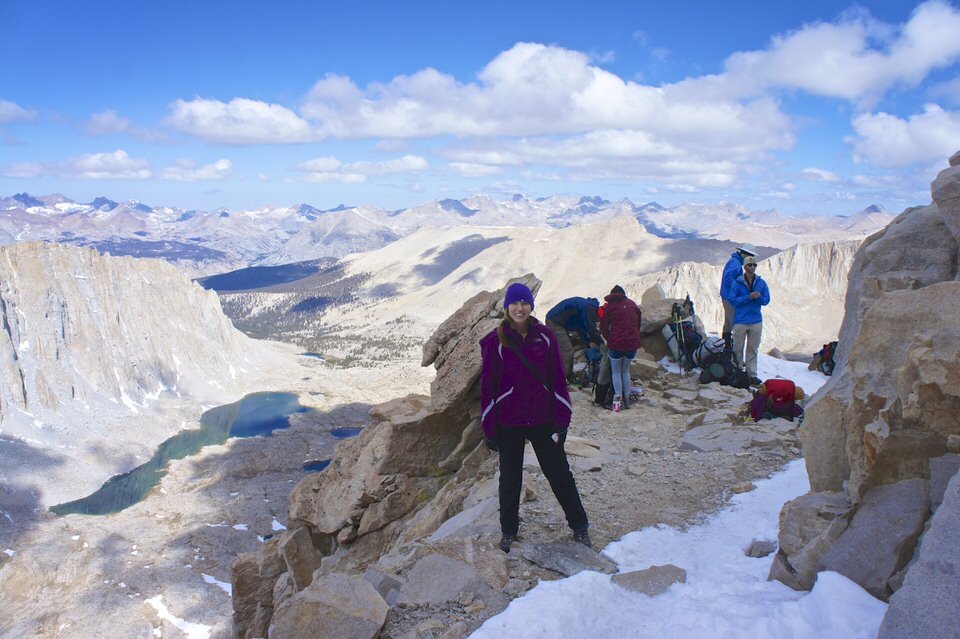
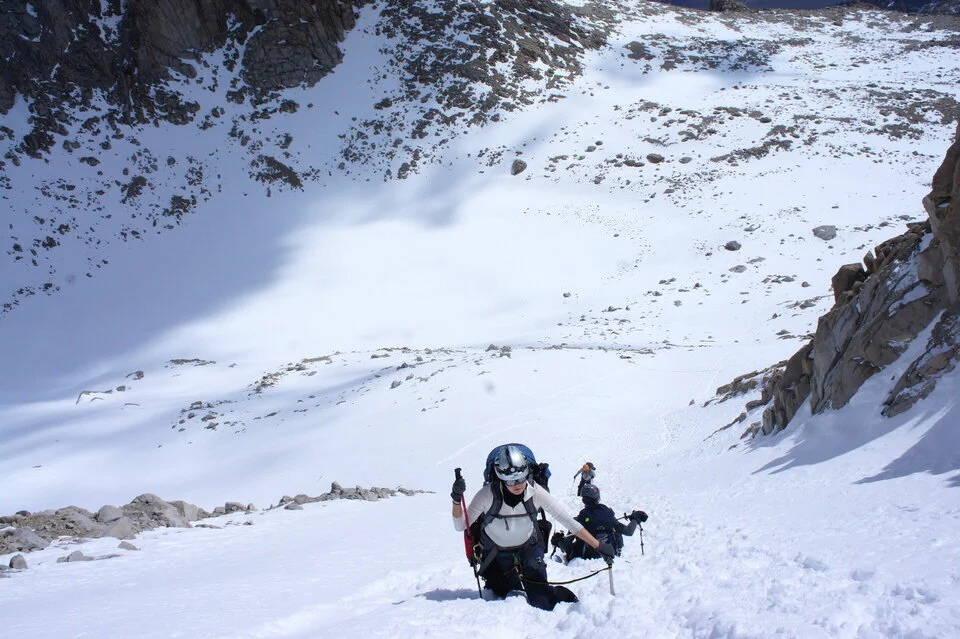
The first time I ever hiked to the summit of Mount Whitney was during the winter via the Mt. Whitney Mountaineers route. I’ve also hiked Mount Whitney from its backside as part of a larger backpacking trip from Onion Valley to Whitney Portal.
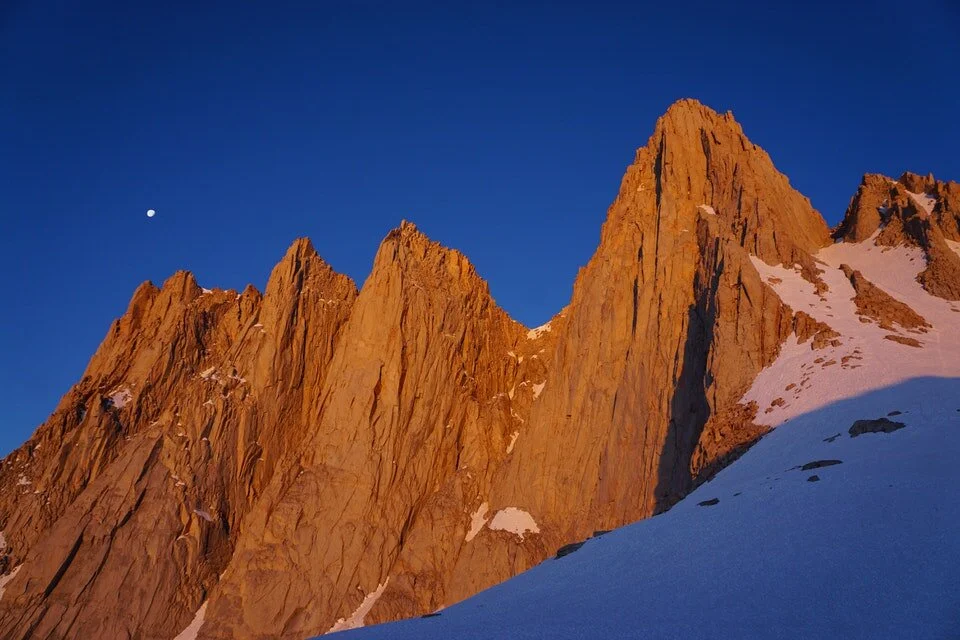
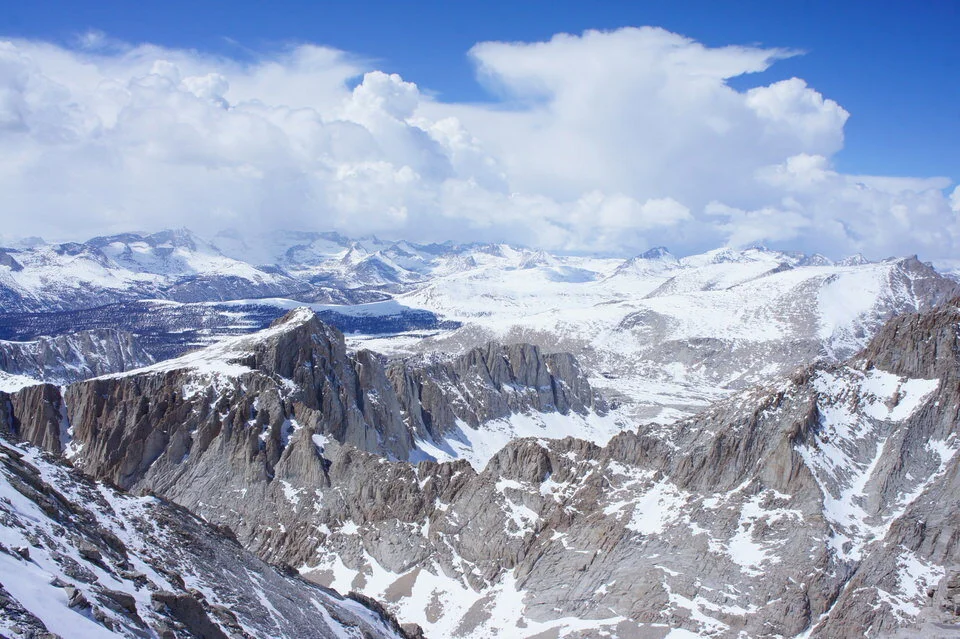
To experience the beauty of Mount Whitney and the surrounding trails is to truly get a taste of the grandeur of the Sierra Nevada Mountains. It’s absolutely one of my favorite places to hike, and in this guide, we will uncover everything you need to know in order to plan and execute your very own day hike or backpacking trip to summit Mount Whitney.
GRAB MY [FREE] OUTDOOR BACKPACKER STARTER KIT
I created the Ultimate Outdoor Backpacker Starter Kit for you (and it's FREE)! This starter kit is filled with 14 pages of my best hiking and backpacking tips to help you learn what it takes to become a safe, confident, and self-sufficient outdoor backpacker!
WHAT WE WILL COVER IN THIS MOUNT WHITNEY GUIDE
If you want to hike Mt. Whitney, you should know that the Mt. Whitney trail is extremely difficult, especially if you try to do it in just one day (as many do). The trail is 20 miles long, with about 6,600 feet of total elevation gain, which is A LOT for most hikers if they haven’t trained appropriately. However, you can also backpack this trail for a more enjoyable experience! The Mount Whitney hike begins quite high at 8,200 feet, and backpacking will give you time to help you better acclimate to the higher altitude.
While you can opt to day hike or backpack this trail, both require Mount Whitney permits during the lottery season, which is May 1 - November 1. It is super competitive to get a Mt. Whitney hike permit, but there are a few different ways to try to get one, including the main lottery, a mini-lottery for remaining permits, and cancellations (more on this below).
In this post, we will cover the following topics to help you plan and prepare for your very own successful Mt. Whitney hiking adventure:
Mt. Whitney Trail Stats - All the nitty-gritty details for the trail in one spot. How many miles, elevation gain, & more.
How to Get a Mt. Whitney Permit - Needed for hiking to the summit!
Day Hiking Mt. Whitney vs Backpacking Mt. Whitney – Explore which option is best for you!
Best Time to Hike Mt. Whitney – Details about the best time of the year to hike Mt. Whitney and typical weather to expect on your trip.
Mt. Whitney Hike Map & GPX Files - I've created a map detailing the whole trail that you can explore, including a look at the elevation gain/profile of the hike. You can also download this file as a GPX file to upload into your own personal GPS device.
How to Get to the Mt. Whitney Trail – Driving and parking recommendations.
Mt. Whitney Camping – Where to camp on and off the trail when hiking Mt Whitney.
Itinerary for Hiking the Mt. Whitney Trail - I’ll walk you through my experience and suggested itinerary for hiking the Mt. Whitney Trail.
Important Mt. Whitney Safety Tips – Tips about the top hazards to expect along the trail.
Training for the Mt. Whitney Hike – How to train effectively for a huge hike like Mt. Whitney.
What to Bring on Your Mt. Whitney Hike – The essential packing list for the hike. Don’t hit the trail without these things!
If you’re looking for something specific, feel free to skip straight to the section you’re looking for!
Plus, be sure to check out the bottom of this post to find more hiking trail guides in California, and other additional hiking, camping, and backpacking resources!
1. MT. WHITNEY TRAIL STATS
If you’re anything like me, the first thing you want to know about a trail is the high-level stats and information so you can quickly figure out what this hike is all about. So here ya go!

MT. WHITNEY TRAIL QUICK FACTS
Mt. Whitney Elevation: ~14,505 feet
Trail to Summit: The easiest trail up Mt. Whitney is the Mt. Whitney Trail which begins at Whitney Portal, near Lone Pine.
Type of Trail: Out & Back
How long is the Mt. Whitney Hike: ~20 miles roundtrip (Check out Section 5 ‘Mt. Whitney Hike Map, Itinerary, & GPX File’ for more details.)
Total Mt Whitney Elevation Gain: 6,600 feet total elevation gain
Mt. Whitney Trailhead: The Mt. Whitney trail starts from the Whitney Portal trailhead.
Trailhead Elevation: 8,330 feet
How long does it take to hike Mt. Whitney? Depending on your fitness level, it takes about 12-16 hours to hike Mt. Whitney.
Mt. Whitney Crowds: Hiking Mt. Whitney is extremely popular, which is why the permit system is in place to limit crowds to a safe number. But if you’re looking for solitude, Mt. Whitney is not the place to find it.
Do you need a permit hike to Mt. Whitney? Yes. Permits are required for both hiking and backpacking Mt. Whitney. The permits are distributed via a lottery, and it is very competitive. See my permit section below for more details on snagging a Mt. Whitney permit.
How difficult is hiking Mt. Whitney? This is definitely a difficult trail! With 6,600 feet of elevation gain over 10 miles (one way), you should not take the Mt. Whitney hike lightly. Plus, being at high altitude adds an extra layer of challenge to the hike. Doing Mt. Whitney as a backpacking trip makes can make it easier and gives you more time to adjust to the altitude.
How dangerous is hiking Mt. Whitney? Hiking Mt. Whitney is a serious undertaking, with the biggest safety concerns on Mt. Whitney being altitude sickness, snow travel (if attempted too early or late in the season), and thunderstorms. But with proper preparation and planning, you should be able to safely summit Mt. Whitney.
How do you train to hike Mt. Whitney? I highly recommend following at least a basic training plan to prepare for Mt. Whitney, since it is a long hike and a 14er. Doing training hikes for a few months before your trip, while ramping up mileage and elevation gain each week, is a great way to increase your fitness level for hiking Mt. Whitney. Being in shape will make your Mt. Whitney hike a much more enjoyable experience.
Is there drinking water available along the Mt. Whitney hike? Yes. You will find several water sources along the trail where you can filter and fill up. But there is no water after a spring at 12,400 feet, so make sure you have plenty of water with you after that to make it to the summit. Check out my packing list below for my recommended water filters.
How many switchbacks are on Mount Whitney Trail? There are 97 switchbacks that lead up to the summit of Mount Whitney
What is the Mt. Whitney day hike success rate? While nothing official has been collected as far as stats, a common belief is that about 1/3 of those who attempt to hike Mount Whitney in a day will actually summit.
Is hiking Mt. Whitney dog friendly? No. Dogs are not allowed on the Mt. Whitney trail.
Is hiking Mt. Whitney kid friendly? No. While some adventurous kids have conquered Mt. Whitney and reached the summit, it is not a particularly kid-friendly hike.
2. HOW TO GET A MT. WHITNEY PERMIT
Permits are required to hike Mt. Whitney from May 1-Nov 1. You will need a permit for both backpacking and day hiking, and there are three different ways to obtain a Mt. Whitney permit.
For all the nitty-gritty, step-by-step details about the Mt. Whitney permit process, check out my Ultimate Guide to Getting a Mt. Whitney permit.

WHEN TO APPLY
The main Mount Whitney permit lottery starts February 1st and ends March 1st, and you can apply at any time during those dates through Recreation.gov. The results of your lottery application will be made available on March 15th.
Any remaining permits become available on April 22nd at 7AM (Pacific Time) and can be purchased online. Permits will be sold for the rest of the season as long as they remain available.
During the season, you can also check for cancellations and last-minute openings up until the day you want to hike. There are NO walk-up permits for the Mount Whitney hike.
HOW MUCH DOES A PERMIT COST?
The transaction fee to apply for the permit lottery costs $6 per application.
If you are lucky enough to receive a Mt. Whitney permit, you will then need to pay an additional $15 per person in your group by April 21st. If you do not pay by this date, your permit will be canceled.
All Mt. Whitney permit fees are non-refundable. Fees cannot be transferred to alternate dates and there are no rainchecks for the weather.
OTHER USEFUL PERMIT CONSIDERATIONS
The trip leader (or alternate) must be present in order to use the Mt. Whitney permit on the day of the hike. They also must carry the signed permit at all times on the trip and show it to rangers upon request. The leader also takes full responsibility for making sure that the entire group follows all rules and regulations stipulated by the permit.
>> Read my Full How -To Guide on Getting Mt. Whitney Permits Here
3. MT. WHITNEY DAY HIKING VS. BACKPACKING MT. WHITNEY
You have two options to hike Mt. Whitney – day hiking or backpacking. While I usually recommend backpacking Mt. Whitney (especially if you’ve never attempted a big summit like this before), it is possible to do as a day hike if you are very fit and prepared. Here are the pros and cons of each option.
DAY HIKING MOUNT WHITNEY
The Mt. Whitney trail starts at an elevation of about 8,330 feet and ascends approximately 6,600 feet over 10 miles, taking you to an elevation of roughly 14,505 feet at the summit. The length and elevation gain of the Mount Whitney trail make it a strenuous hike on its own, and when you add in the high altitude that you’ll be hiking at – especially if you are coming from sea level – it becomes extremely difficult to complete in a day for many people.
However, if you really want to do Mt. Whitney in a day, it is possible. But in order to do it safely, I recommend you do the following:
Train for the hike! Check out the training section (section 10) of this post for tips on creating a training plan for Mt. Whitney. You’ll have a much better experience if you’re in shape and feeling strong heading into your Mt. Whitney hike.
Spend a day or two at higher altitude before beginning your day hike of Mount Whitney. This allows you to adapt better to the elevation change and hopefully reduce your symptoms of altitude sickness when attempting the hike. Everyone responds to this different though, so just pay close attention to your body. At minimum spend the night at Whitney Portal the day before your Mount Whitney climb.
Drink plenty of water. Another key aspect of helping your body adapt to the altitude and physically demanding climb ahead of you is keeping your body very well hydrated before and during your hike of Mount Whitney. Be diligent about this! It makes a huge difference.
Wake up early. Hiking Mount Whitney in a day is an all-day affair. Start VERY early. I’m not talking 7am early... I’m talking like 1 to 3AM early. Think about it... this is a very steep hike. It’s a leg burner the entire way up. It’s not forgiving. You’ll likely be going slow, especially if this isn’t something you do all the time. Add on the fact that you’ll probably be battling a bit of altitude sickness, which also can slow you down.
It’s also smart to plan to be on the summit before afternoon. This is a great best practice even though the Sierra Nevadas get fewer thunderstorms than say Colorado mountains. It’s just a good habit to get into with climbing and hiking.
THEN once you make it to the top, you’re only HALF WAY DONE. And going down, unfortunately, is NOT easy either. The Mt. Whitney trail is hard on your joints, as much of the trail is rock. You won’t necessarily be going that much faster on your way down, and you’ll also be exhausted.
Prepare for a long day, and start early to improve your chances of success. It will be better to hike in the dark when it’s earlier and you’re feeling fresher than later in the day when you’re tired and out of energy.

BACKPACKING MOUNT WHITNEY
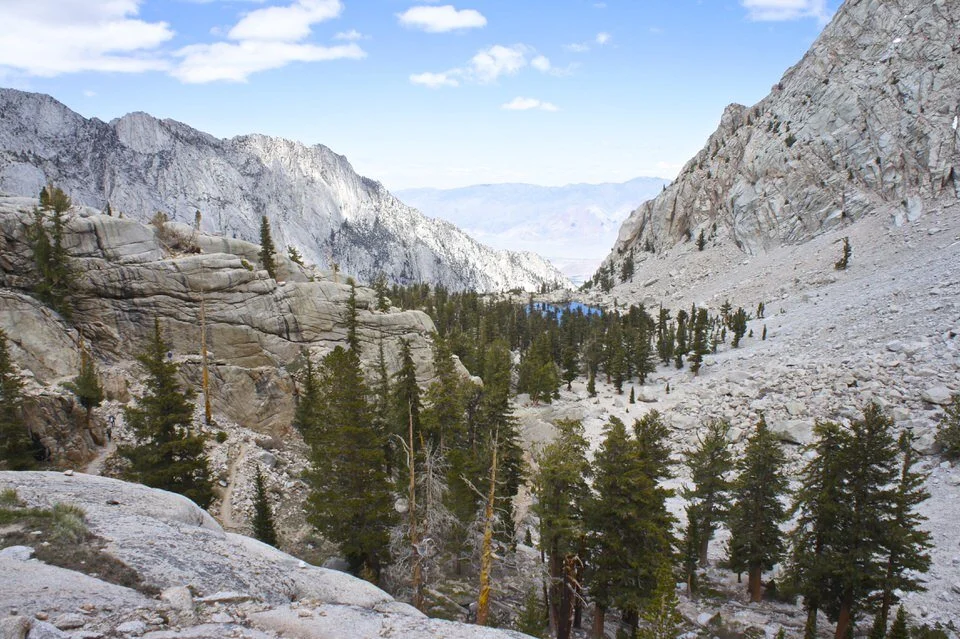
While you might be able to do the day hike if you’re extremely fit, choosing to backpack Mt. Whitney will make it a much more enjoyable experience and less of a slog through the long mileage and elevation gain, in my opinion. Plus I think that it gives you even more time to enjoy the experience of hiking Mount Whitney instead of hating your life the whole way through it. It’s really impressively beautiful out there, and worth spending some time soaking it all in!
Backpacking Mt. Whitney will also give you time to acclimate to the altitude, which is really important for a successful summit, and can increase your chances of a successful summit of Mount Whitney as many day hikers have to turn around because the challenge becomes too hard to take on for them in a day.
While you will have to bring a heavier pack and backpacking gear for the beginning of the trail, once you set up camp, you can leave most of your gear behind, and make a summit push with just a light daypack.
See the Itinerary section below (section 8) for more details on day hiking and backpacking itineraries.
4. BEST TIME TO HIKE MT. WHITNEY
By far the most popular time of the year to hike Mt. Whitney is in the summer. The lottery season (aka the most popular season, when you need a permit) is from May 1 through November 1.
It’s ideal to aim to do this hike sometime from July through early October for the best chance of a clear trail without any snow. Personally, I'd choose September if possible, since that should give you the most comfortable temperatures on your hike as well, with less bugs, and even often less crowds. It’s my favorite time of the year to hike in the Sierras. (Although judging by the past few years, you now might have to deal with wildfires and smoke in September.)
Check out the Mt. Whitney weather average temperature map below for reference. Please note that the temps below reflect Whitney Portal at around 8,830’, and temperatures on the summit will likely be much cooler. Plan and pack accordingly.

Be prepared before you go. Just like I teach my students in my backpacking program, it’s important that you research your weather conditions before you go, both weeks and days before your trip. You can check the weather conditions at one of the following resources:
Whitney Zone Weather – A good resource for a variety of Mt. Whitney weather forecasts
Mountain Forecast – One of my favorite sources for mountain weather forecasts when checking a few days before a trip
Important Notes: Keep in mind that depending on the snowfall during the year, the Mt. Whitney trail might not even be clear of snow until July. Unless you have a lot of experience navigating snow and ice in the mountains, it is very dangerous to attempt to hike Mount Whitney when the trail is snow-covered. You will absolutely need to use technical gear if there is snow. Always check in with the Ranger Station to get a current condition report before attempting your Mount Whitney day hike or backpacking adventure.
Can you hike Mount Whitney in the winter? The short answer is yes, but it is only advised if you are skilled in mountaineering or are being guided by a professional who is. Most people who hike Mount Whitney in the winter do so via the “Mount Whitney Mountaineers Route,” which is a different trail than I am talking about in this guide here. The mountaineers route is not as enjoyable in the summer months because the couloir is filled with a lot of loose scree.
5. MOUNT WHITNEY HIKE MAP & GPX FILES
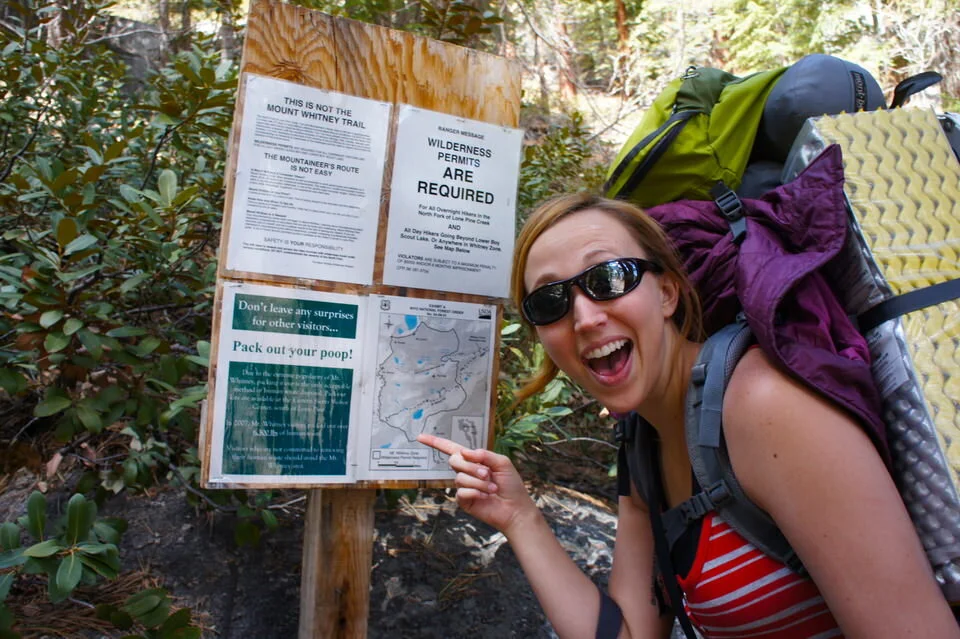
While the Mount Whitney trail is a hard hike, it is not too difficult to follow, and the trail is well-signed at forks. Make sure to stay on the main Mount Whitney trail and don’t head off on the North Fork of the Lone Pine Creek Trail (which would take you to the Mountaineers Route).
The most confusing parts of the trail are the rock slab sections, but if you pay attention, you should be able to stay on track.
I’ve created a map detailing the whole Mount Whitney hiking trail that you can explore, including a look at the Mount Whitney elevation gain profile of the hike. You can also download this file as a Mount Whitney GPX file to upload into your own personal GPS device to take with you on your summit of Mount Whitney.
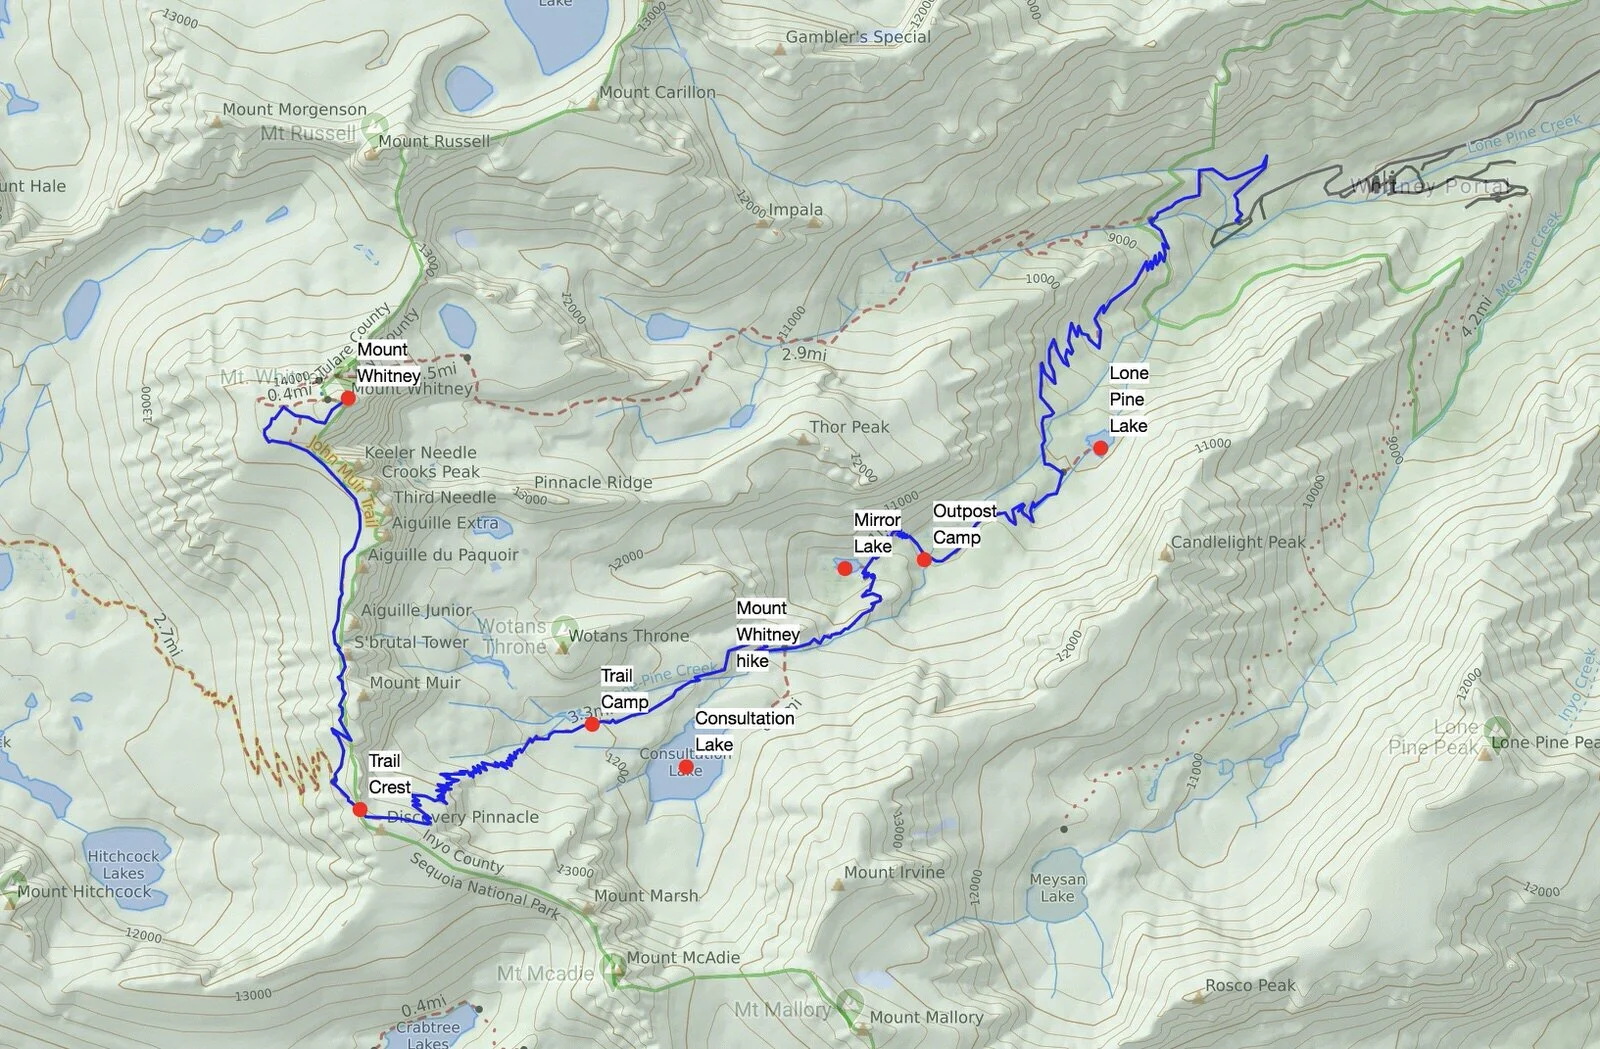
**I always recommend downloading a GPX file onto a GPS device, that way you can check in from time to time to be sure you’re on the right trail.
You can download the GPX files from Mt. Whitney Trail map below. It details all the key milestones of the hike including the trailhead start, summit, and more.
DOWNLOAD THE MT. WHITNEY GPX FILES FOR YOUR GPS HERE:
Knowledge is power my friend, and I'm a girl who loves data. Get access to this trails GPX file PLUS my library of GPX files with tracks and waypoints for all the trails loaded onto the She Dreams of Alpine blog.
Load this puppy into your trusted GPS and rest easy knowing you have tracks to follow on your next hike or backpacking trip.
DON’T HAVE A GPS? YOU SHOULD.
I believe every hiker and backpacker should strive to be self-sufficient, and that includes knowing how to practice smart navigational skills in the outdoors.
This is an important safety skill set that I teach in-depth inside of my backpacking program. There’s no reason to risk getting lost in the outdoors.
Here’s what I recommend to get started:
(Note: This list contains affiliate links)
Gaia is offering a special 20% discount on a premium account to those who subscribe online through my link.
Don’t know where to start? If you need help with some Gaia GPS basics, download my quick Gaia GPS navigation 101 guide.
2) Get an SOS Device: Once you are able to, I recommend investing in some sort of SOS communication device like the Garmin inReach Mini or the Garmin inReach Explorer+ . These devices provide not only GPS tracking capabilities, but also an SOS satellite search and rescue communicator and text communication abilities in the backcountry.
My Go-To Trail Setup: The Gaia GPS app (premium subscription) + the Garmin inReach Mini.
Alternative to Garmin: Pair your Gaia GPS App with the Zoleo SOS device . With this set up, the Gaia GPS App serves as your GPS navigation device, and the Zoleo serves as an SOS/communication device.
Learn more about the best GPS devices for hiking here.
MT. WHITNEY HIKE ELEVATION PROFILE
Here’s a look at the Mt. Whitney hike elevation gain profile heading up from Whitney Portal to the summit. Note that the switchback section is definitely a killer!

>> Jump to Section 8 for my suggested Mount Whitney Itinerary for backpacking this trail so you can break up the elevation gain and mileage on your trip.
6. HOW TO GET TO THE MT. WHITNEY TRAIL
Getting to the Mt. Whitney trailhead is pretty straightforward. It’s just a few hours drive from several major cities, including Los Angeles and Las Vegas.
If you are planning to fly to get to Mt. Whitney, Mammoth Lakes is the closest airport, but you’ll find more flight options flying into LAX, Burbank, or Las Vegas.
Driving times will vary depending on where you are coming from, but here are a couple of estimates from big cities nearby:
Mammoth Lakes to Lone Pine: ~2 Hours
Los Angeles to Lone Pine: ~3 Hours
Las Vegas to Lone Pine: ~4 Hours
Fresno to Lone Pine: ~4.5 Hours
Note: if you’re planning to spend some time in the Eastern Sierra I definitely recommend checking out Mammoth Lakes. There are some really awesome outdoorsy things to do in Mammoth Lakes.
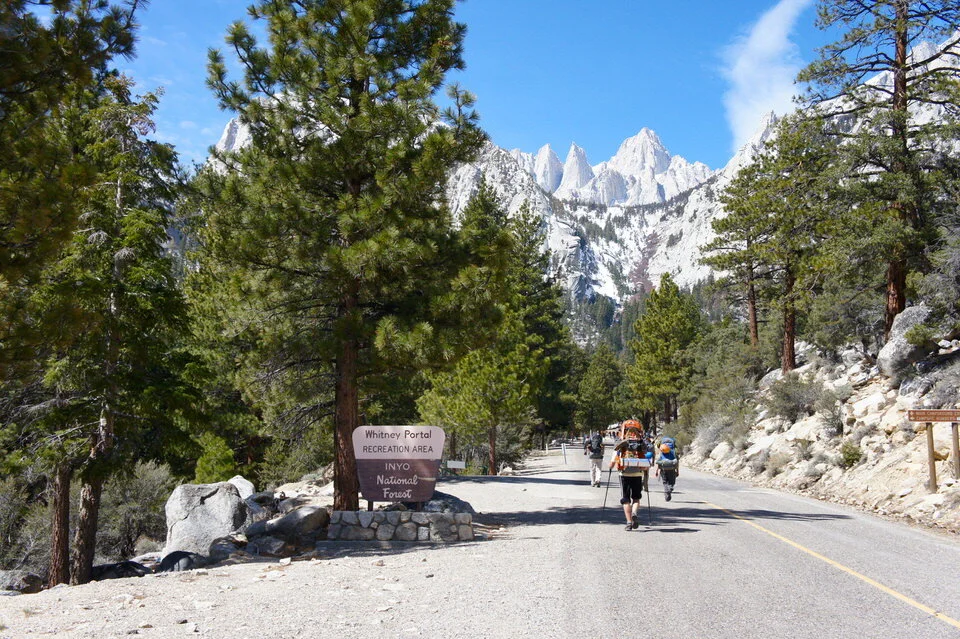
GETTING TO THE MOUNT WHITNEY TRAILHEAD
To get to the Mt. Whitney trailhead, take US 395 to Lone Pine, then turn west onto Whitney Portal Road. Follow this road for 13 miles, and you’ll find the Mt. Whitney trailhead just before the road ends.
Parking: You’ll find several parking lots at Whitney Portal, and it’s important to pay attention to the signs and park in the proper lot for either day use or overnight parking. If you are parking overnight, you need to display a permit, which you will receive with your Mt. Whitney hiking permit.
Here is a map of Whitney Portal to help orient you to the parking lots in relation to the Mt. Whitney trailhead. This photo resource comes from the US Forest Service here.

Important Note: You should not leave food or anything that would attract bears in your car at the trailhead. Bears have been known to break into cars to investigate anything that smells or looks like food. Bear lockers are available at the trailhead for any food that you aren’t planning to take on the trail with you.
7. MT. WHITNEY CAMPING
If you’re day hiking Mt. Whitney, you’ll need to get an alpine start, so camping at the trailhead the night before is the best way to go. And if you’re backpacking, here’s what you need to know about camping along the trail.

CAMPING NEAR THE TRAILHEAD (PRE-HIKE)
If you come in a day before your hike (which I 100% recommend), you have a couple options in the area for camping pre-hike:
Whitney Portal Campground is the main campground at the trailhead, and reservations are required. Individual sites are released 6 months ahead of time on a rolling basis. Whitney Portal Campground has 43 sites and costs $26/night. Reservations can be made through Recreation.gov.
A walk-in campground is also located at Whitney Portal – the Whitney Trailhead Campground. This campground does not require advance reservations, and you can usually snag a spot, especially at the lower sites in the ravine. Whitney Trailhead Campground is located near the hiker & overflow parking lots and has 25 sites. Camping costs $15/night.
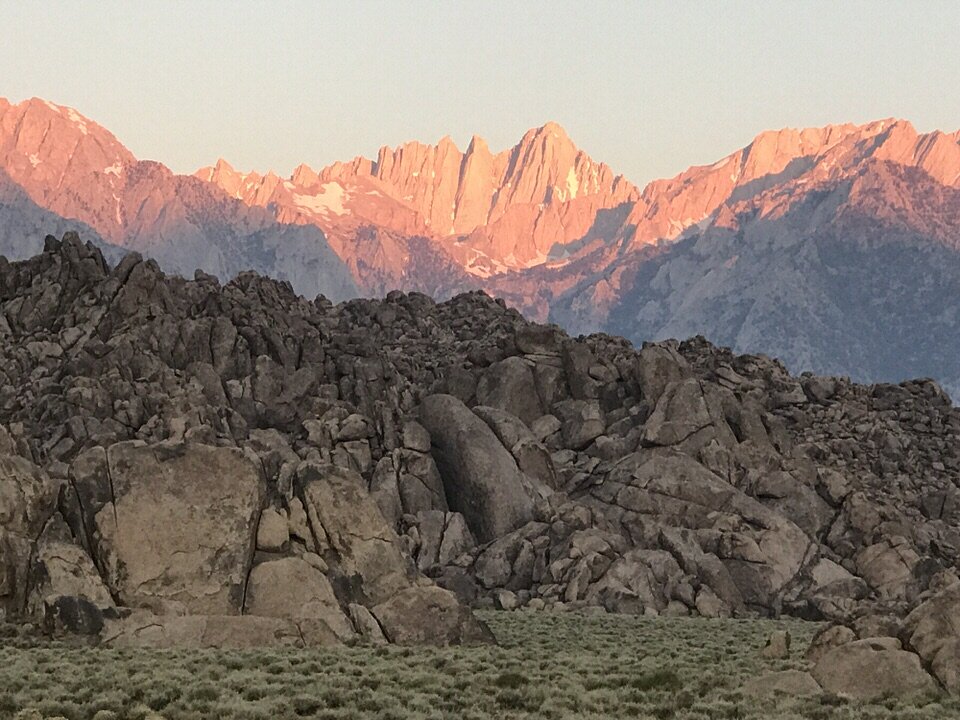
There are also tons of other camping areas in the Sierra Nevadas, including camping at Alabama Hills (at the foothills of Whitney Portal) if you cannot find any camping spots at the Portal. However, camping at Whitney Portal is definitely preferable so you can start to adapt your body to higher altitudes.

CAMPING ALONG THE MT. WHITNEY TRAIL
You have a few different options for camping when you’re backpacking Mount Whitney: Trail Camp, Outpost Camp, Consultation Lake, or Lone Pine Lake. Wherever you choose to camp, be sure to choose a well-established site at least 100 feet from the trail and any body of water, and always follow Leave No Trace principles.
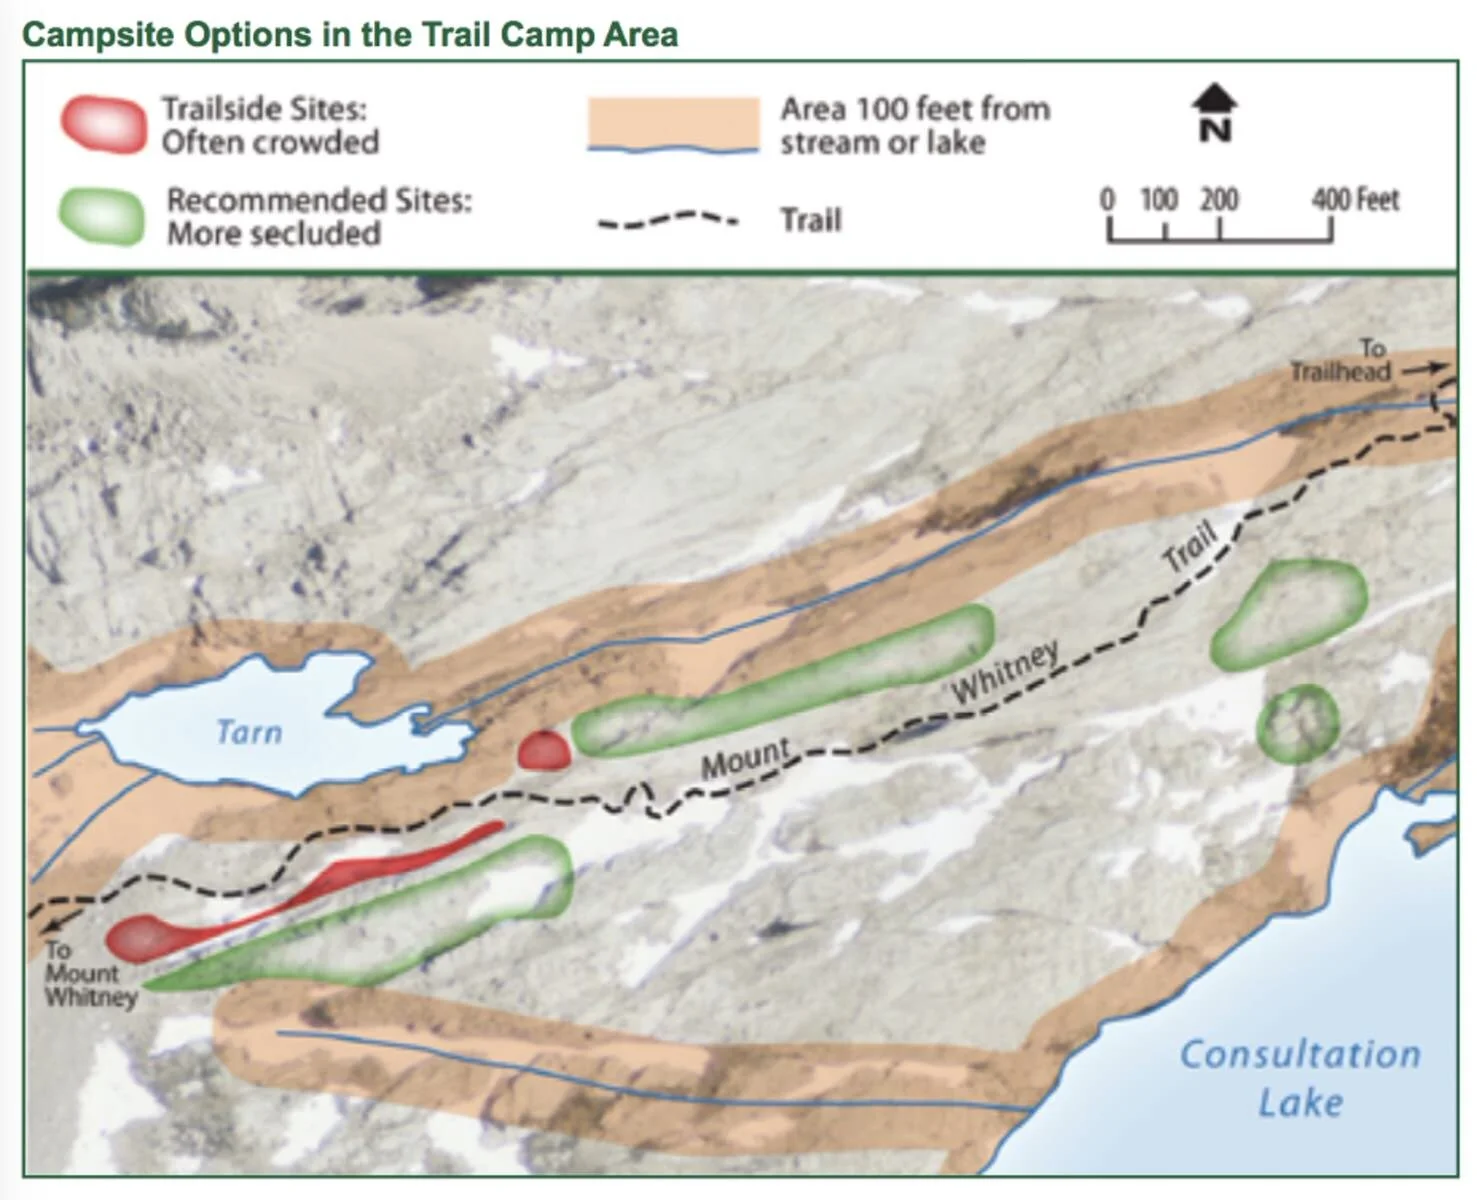
TRAIL CAMP – This camping area is located approximately 6 miles from the trailhead at 12,000 feet elevation. Trail Camp is a very popular spot to camp for the Mt. Whitney hike because it is the closest camp to the summit. However, if you’re feeling any effects of the altitude, it can be better for your body to sleep at a camp at lower altitude to acclimate.
Keep in mind that Trail Camp is above treeline, which means it can be quite windy. The terrain is also rocky, but you will find plenty of established campsites on flat ground. There is a water source at the camp, so you can fill up for the night and before you head up to the summit.
This map from the US Forest Service gives you the lay of the land for camping at Trail Camp, including which spots tend to be crowded and which are more secluded.
OUTPOST CAMP – Another very popular camping spot is Outpost Camp, which is 3.8 miles from the Whitney Portal trailhead at 10,300 feet altitude. This camp is located in Bighorn Park, in a meadow below treeline, with campsites sheltered by trees. There is also a stream running through it to provide a water source.
The disadvantage of Outpost Camp is that it is farther from the summit than Trail Camp, so if you choose to hike directly to the summit from here, you will have a longer day. But it makes a great camp to sleep lower and acclimate to altitude..
CONSULTATION LAKE – Located near Trail Camp, Consultation Lake is less popular so it offers a more secluded experience. But you do have to take a slight detour off the main trail to reach Consultation Lake, and this trail can be a little confusing to follow.
LONE PINE LAKE – Another camping option is Lone Pine Lake, which is only 2.8 miles from the trailhead at Whitney Portal. This will also be a less crowded option, but you’ll have a long way to go on summit day if you start from here.
PLEASE NOTE: Camping is not allowed at Mirror Lake or Trailside Meadow. And wherever you decide to camp, make sure to follow Leave No Trace principles and pack out all your waste (more on that in section 9).
GRAB MY [FREE] BACKPACKING STARTER KIT
I created the Ultimate Outdoor Backpacker Starter Kit for you (and it's FREE)! This starter kit is filled with 14 pages of my best hiking and backpacking tips to help you learn what it takes to become a safe, confident, and self-sufficient outdoor backpacker!
8. ITINERARY FOR HIKING THE MT. WHITNEY TRAIL
I’ll walk you through a suggested itinerary for both day hiking and backpacking the Mt. Whitney trail, so you can make your plans accordingly.
A TYPICAL MT. WHITNEY DAY HIKE ITINERARY
Because you’ll need to leave super early in the morning, I would recommend driving in to Whitney Portal the night before and setting up camp at one of the campgrounds.
Make sure you set your alarm and have your headlamp ready, because you should be on your way to the Mt. Whitney trailhead between 1am-3am.
You’ll start hiking uphill and will soon enter the John Muir Wilderness area, where you might get some nice sunrise views. After about 3 miles, you’ll pass Lone Pine Lake, and after that, you’ll officially enter the Mt. Whitney Zone where permits are required. You’ll see Outpost Camp at 3.5 miles then you’ll pass Mirror Lake and Consultation Lake. Soon you’ll head above treeline and pass Trail Camp at 6 miles in.
Make sure to fill up & filter your water at Trail Camp before heading up to the Whitney summit because after Trail Camp, you won’t have any other opportunities to fill up on water until you are back down from the summit. Also, be mindful of the time of day, the clouds, the weather, and how you feel. There is never any shame in turning around. Listen to your body, and be smart out there.
>> Read more about backpacking & hiking safety best practices
After Trail Camp is where you have to dig deep and start the serious uphill slog through the 97 switchbacks. Once you make it through the switchbacks, you’ll be relieved to find the trail evens out as you hit Trail Crest. After you reach the junction with the John Muir Trail, you’ll know you’re getting close!
Head up the rock trail to the summit of Mt. Whitney! Make sure to celebrate by signing the register and taking some epic summit selfies. But make sure you’re off the summit by noon, especially if thunderstorms are in the forecast.
When you’re ready, start the long 10 mile descent back to Whitney Portal. If you need some motivation, think about the well-deserved burgers & beers waiting for you at the Portal store once you make it back down.
A TYPICAL MT. WHITNEY BACKPACKING ITINERARY
I think the most enjoyable way to experience Mt. Whitney is backpacking the trail over the course of 3 days (this can also be shortened to 2 days as well). Here is my recommended 3-day backpacking Mount Whitney itinerary:
3 DAYS BACKPACKING MT. WHITNEY
DAY 1 – Make it to Base Camp (Whitney Portal to Outpost or Trail Camp)
Start at the Mt. Whitney trailhead at Whitney Portal. The first few miles will be mostly uphill. As you hike, you’ll enter the John Muir Wilderness area and also start to get some amazing views. Nearly 3 miles in, you’ll pass Lone Pine Lake and can choose to take a short detour to visit the lake.
After Lone Pine Lake, you’ll officially enter the Mount Whitney Zone where permits are required. At 3.8 miles, you’ll reach Outpost Camp. You can choose to camp here or continue another 2.2 miles to Trail Camp.
Roughly 3.6 miles (Outpost Camp) or 6 miles (Trail Camp), with 2,200 to 3,600 feet of gain.
DAY 2 – Summit Mount Whitney (Base Camp to Whitney Summit and Back)
This is summit day! Whether you’re starting from Outpost Camp or Trail Camp, today is going to be some serious uphill.
Just before Trail Camp, the trail will start to get rocky, and you will pass above treeline. After Trail Camp, you’ll start the interminable 97 switchbacks.
After what seems like forever, the trail will start to flatten somewhat as you reach Trail Crest. Then you’ll hit a junction with the John Muir Trail, where you’ll take a right and head the last part of the trail to the summit of Mt. Whitney!
At the summit, make sure to sign the register and take some awesome photos. Then head back down and retrace your steps back to basecamp.
About 6.4 miles (from Outpost Camp) or 4 miles (from Trail Camp), with 4,400 to 3,000 feet of gain to the summit, followed by the same distance on the descent.
Day 3 – Hike Out (Base Camp to Whitney Portal)
After what will surely be a good night’s rest at basecamp, it’s time to hike back out to Whitney Portal.
Head straight to the Portal store for a burger, fries, and a refreshing beer to treat yourself for summitting the tallest peak in the lower 48!
Roughly 3.6 miles (Outpost Camp) or 6 miles (Trail Camp), all descent.
OTHER MT. WHITNEY BACKPACKING TRIP ALTERNATIVES
You can also summit Mount Whitney by backpacking in from a different trail like the Cottonwood Lakes Trail, or the Cottonwood Pass Trail, just south of Mount Whitney.
You could also come in from the North of Mount Whitney and backpack South to summit and exit at Whitney Portal, like I did backpacking from Onion Valley to Whitney Portal.
Some people also add on a summit of Mount Whitney when they backpack the John Muir Trail. You’ll need a John Muir Trail permit though, so be sure to look into that.
In these alternative backpacking trip options, you do not need a separate hiking permit for Mount Whitney (aka, you can avoid the complicated Mount Whitney lottery process). You just need to specify that you’ll be exiting Mount Whitney (if this is part of your plan) in your Inyo National Forest Wilderness Permit (which is required but less competitive to obtain).
The point is, if you don’t win the Whitney lottery, there are ample opportunities to still get a chance to summit Mount Whitney. The question is... are you willing to start a little further out in order to do so? In my opinion, more time spent in the backcountry of the Sierra Nevada mountains is always time well spent.
9. IMPORTANT MT. WHITNEY SAFETY TIPS
While the Mount Whitney trail is the easiest way up to the summit of Mt. Whitney, that does not mean it easy. There are a lot of factors that can make this trail dangerous, so you need to be aware and be prepared. When planning your Mt. Whitney hiking trip, pay particular attention to these hazards.
ALTITUDE SICKNESS
One key thing to take into consideration when hiking Mt. Whitney is the altitude. If you’re not used to hiking at altitude, it is super important to prepare for how it will affect you and learn how to properly acclimate before attempting the Mt. Whitney hike.
Altitude sickness is extremely serious, and you should be prepared to turn around and descend if you or anyone in your hiking party starts showing symptoms of Acute Mountain Sickness (AMS). The main symptoms include persistent headache, difficulty sleeping, dizziness, fatigue, loss of appetite, and nausea or vomiting.
If you notice these symptoms, you should descend immediately (no matter how close you are to the summit), because continuing up will only make things worse. AMS can also affect your own thinking, so it’s important to look out for each member of your group and watch for the symptoms or other unusual behavior.

Backpacking Mt. Whitney is a really great way to acclimate to the altitude so you feel much better when you head for the summit. Trail Camp (at an elevation of 12,000 feet) and Outpost Camp (10,400 feet) are the most popular places to stay in order to acclimate to the altitude. Don’t forget to spend a night at the trailhead as well before getting started on your hike.
A good recommendation for acclimating is “climb high, sleep low,” and if you want to follow that advice, Outpost Camp is the best choice. However, Trail Camp is farther along the trail which means you will have less distance to cover on your summit push. If you really want to take it slow, you could camp at Outpost Camp one night, then spend a second night at Trail Camp before attempting to hike to the summit.
SNOW ON MOUNT WHITNEY
Hiking Mt. Whitney when there is snow on the trail can be incredibly dangerous if you’re not properly prepared and don’t know how to handle this kind of technical terrain. This is why I recommend you try to do this hike in July, August, or September. While these months are more popular when you’re vying for a permit, it’s worth it to have a less nerve-wracking experience on the trail.
It’s a good idea to bring microspikes for potential slick sections of the trail, and if you’re doing the hike in a season where snow is a possibility, you must bring crampons and an ice axe – and know how to use them (seriously, this is more than just watching a YouTube how-to video, take a class!). At higher elevations on the trail, you are more likely to encounter sections of snow and ice that cannot be crossed safely without proper gear and training.
You can find a Mt. Whitney hike guide to help you tackle the Mount Whitney climb if you’re interested in a winter ascent or a more technical route to the summit. Check out the Sierra Mountain Guides for a great Mount Whitney winter mountaineering experience.
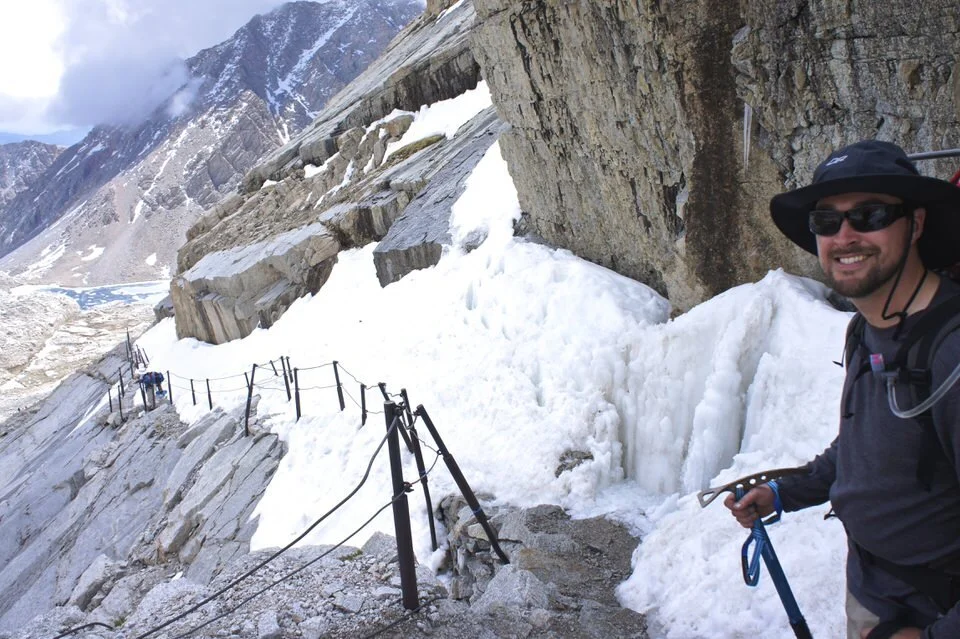
THE MT. WHITNEY SWITCHBACKS
Near the top of the Mt. Whitney trail, you will encounter so many switchbacks – 97 to be exact! While switchbacks help make the trail less steep than going straight up, to be brutally honest, the switchback section on the Mt. Whitney trail is still going to suck. You’ll be near the summit, so the effects of altitude will be kicking in, not to mention the mileage you’ve already hiked to that point. But if you’ve been training, you’ll know that you can push through.
The switchbacks are often where you’ll find ice and snow though, so it’s important to be prepared with the proper gear. Move slowly (which you’ll probably want to do anyway), and watch your step. One section of the switchbacks has cables to hold onto if you need extra support.
I highly recommend bringing trekking poles as well for this hike. Your knees will thank you.
STAY HYDRATED
Staying hydrated on a hike is always important, but it’s especially important when you’re hiking at high altitudes. You should pay extra attention to making sure you’re drinking plenty of water as you hike. Bringing a hydration bladder, like a Camelback, is really helpful in making sure you have enough water – and that you can easily drink it along the way.

Bring a water filter or some sort of water treatment, so you can access the water sources you’ll find along the trail. There are a lot of water sources, so you should have plenty of opportunities to fill up. But the last one is at 12,400 feet (and that is seasonal) or at Trail Camp at 12,000, so you must make sure to fill up there with enough water to reach the summit – and then get back to down.
EARLY START
If you’re doing Mt. Whitney as a day hike, it is essential that you get an early start. And I mean early – leaving between 2-4am is ideal. Leaving this early will give you enough time to finish the Mt. Whitney hike in a day, and should also get you off the summit before any afternoon thunderstorms roll in.
Since you’ll be leaving well before sunrise, you definitely will want a headlamp (and extra batteries) to see where you’re going on the trail.
THUNDERSTORMS
It’s super important to be aware of the weather when hiking Mt. Whitney. On any 14er, you really want to be off the summit and heading down by the afternoon because of the risks of being caught in a thunderstorm above treeline.

Lightning is a real danger in the mountains that should absolutely be taken seriously. And even if you don’t encounter lightning, descending during a storm can be super sketchy.
Though the thunderstorms on Mt. Whitney are not as bad as the ones you’ll find on Colorado 14ers, summitting before the afternoon is still a good rule to abide by. This means you’ll have to get a super early start on your Mt Whitney hike, especially if you’re day hiking. And always bring a headlamp! If you don’t want to get stuck at the end of the day, you’ll probably be getting your alpine start in the dark.
BEARS & OTHER WILDLIFE
Another thing to remember is that Mt. Whitney is in bear country. If you’re choosing to backpack Mt. Whitney, you should know that you are required to use a bear canister to hold your food and anything else with a smell that might attract a bear.

While a bear canister is not required for day hikers, you must keep your pack with you at all times and make sure not to leave food out unattended. Also, definitely don’t leave food in your car at the trailhead – use one of the bear lockers for anything you don’t bring with you on the trail.
Rangers ask that you DON’T bring bear spray with you. The black bears are pretty skittish, and bear spray is likely not needed here in this part of the US. This is what is stated by park rangers when you pick up your permit.
OTHER NOTES
The U.S. Forest Service has created a nice guide covering the basics of hiking Mt. Whitney safely. It’s worth taking a look at and referencing as you prepare for your hike.
BE PREPARED TO PACK OUT YOUR HUMAN WASTE. Yes, I’m talking about packing out your poop on Mount Whitney. Because of the popularity of the Mount Whitney hiking trail, you are required to carry “WAG bags” to pack out your human waste. You will get these when you pick up your permit at the ranger station. I know it sounds gross, but its not so bad honestly and it’s an important part of preserving the Mount Whitney area for future generations to come, and so please do your part.
>> Check out more essential backpacking hygiene tips here
10. MT. WHITNEY HIKE TRAINING
Hiking Mt. Whitney will be a lot more fun if you’re physically prepared for the extremely tough hike. I highly recommend following a training plan in the weeks or months leading up to your big hike. A super simple way to design a training plan is to base it on the Mt. Whitney hike mileage and elevation gain of the actual Mt. Whitney trail – approximately 20 miles round trip and 6,600 feet of gain.
Simplified, this means that you’ll want to (at minimum) build up to a total weekly mileage goal of 20 miles over several weeks, and incorporate increasing elevation over the weeks as well. Training for Mt. Whitney is definitely worth it, and you will enjoy your hike much more.
For more suggestions on training for the Mt. Whitney hike, check out my tips for hiking 14ers post, which provides more details on how to structure a training plan.
It’s also a really good idea to do your training with the pack you plan to hike with to help get used to carrying it. Ideally, fill it with weight of some kind (a water bladder is great for this, since it is heavy, and you can drink the water as you hike) and increase the weight over time until you reach the weight you plan to bring with you on the trail.
If you’re planning to take on Mt. Whitney as a day hike, you should also try to get in at least one big hike of 15 to 20 miles or more under your belt so you will know how it feels to actually hike for that long. This will give you a lot of confidence when it’s time for your Mt. Whitney hike, since you’ll already know you are capable of hiking 20 miles.
11. WHAT TO BRING ON YOUR MT. WHITNEY DAY HIKE
The gear you carry will vary whether you’re hiking or backpacking the Mt Whitney hike. We have some EXCELLENT resources on day hiking and backpacking gear so I highly recommend you check them out.
Full day hiking gear checklist here
Full 3 to 5 day backpacking packing list here
Watch this video below on what I pack for a typical day hike.
Whether you’re day hiking or backpacking, there are a few absolutely essential items to make sure you have when you’re prepping for your Mt. Whitney hike:
Note: The list below may contain affiliate links.
**Other** The day hike is brutal on your feet. Consider bringing some padded insoles for your boots, otherwise your “dogs will be barkin” (sorry, that’s the Texan in me) at the end of the day. You can thank me later.
Again, the above is NOT your full day hiking checklist (just some of the super important items to remember), check out my day hiking checklist for my full gear recommendations.
DOWNLOAD OUR HIKING PACKING CHECKLIST:
Hit the trails with peace of mind knowing that you didn’t leave anything essential behind!
Now you’re officially. ready to go into your Mt. Whitney hike prepared to have a fun adventure and summit the tallest peak in the lower 48 states!
This summit is TOTALLY doable if you plan ahead and prepare, and I hope you found this guide useful in getting ready for the big day on the trail. Be sure to let me know if you have any questions below in the comments.
LOOKING FOR MORE CALIFORNIA ADVENTURES?
If you are looking for additional California hiking adventures, check out our resources below:
A Full List of All the California 14,000 Foot Peaks
ESSENTIAL HIKING (OR BACKPACKING) RESOURCES
Also be sure to check out these essential hiking resources!
7 Tips to Hiking and Summitting Your First Fourteener Mountain
California Backpacking Permit Process for Popular Trails and Campsites
Cheers,
Allison - She Dreams of Alpine


Hiking Mt. Whitney Trail Guide: How to Successfully Summit the Highest Peak in the Lower 48 | This Mount Whitney Trail Guide is your A to Z resource on any and all things involving the Mount Whitney Hike. From day hiking Mt. Whitney to backpacking Mt Whitney, you’ll find everything you need to successfully summit and tackle one of the tallest peaks in the United States. A bucket list hike for every outdoor lover! | shedreamsofalpine.com