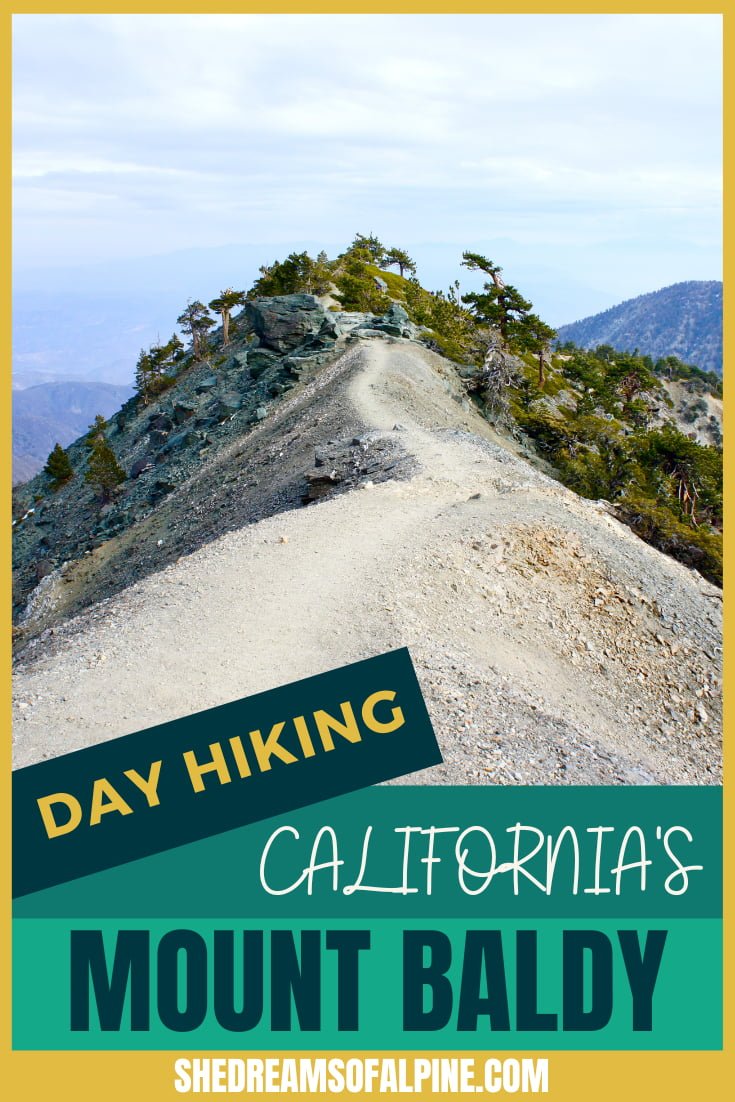
Your Ultimate Guide to Hiking Mount Baldy

If you ask almost any avid hiker in Southern California for a great training hike, there is a good chance that they are going to suggest hiking Mount Baldy. At 10,064 feet tall, Mount Baldy (also known as Mount San Antonio) is the highest peak in Los Angeles County, making it an extremely popular hike for those living in the LA or greater LA area, and, boy, is it a leg burner!
Even though this is a super popular hike (meaning it is usually quite crowded), I really enjoy hiking Mount Baldy because you can hike it in a loop, and it's a great workout. If you want to train your uphill muscles and take it easy on your knees on the downhill, there is a ski lift which runs in the summer that can take you about 1,500 feet down the trail.
You will find people hiking the trail to the Mount Baldy summit year round, and it makes a great summer and fall training hike due to its intense elevation gain and leg burning switchbacks on the Baldy Bowl Trail. However, in the winter, the Mount Baldy hike typically requires special snow gear and mountaineering skills.
The guide below goes in-depth on everything you need to know logistically about the Mt. Baldy trail. If you are training for a bigger peak, such as a California 14er, be sure to check out our post on the best hikes in Southern California for training as well as our 7 crucial tips to hiking and summiting a 14er peak.
WHAT WE WILL COVER IN THIS GUIDE
Mount Baldy is also known as Mount San Antonio and is the highest point in Los Angeles County. The fact that this peak is the county high point makes it a very popular hike with the locals. You can even see Mt Baldy standing tall amongst the San Gabriel Mountains behind Los Angeles on a clear day. The name Mount Baldy comes from the lack of trees on its summit.
There are two main trails you can take to get to the summit of Mt Baldy and both of them start at the Manker Flats Trailhead. If you want an "easier" uphill elevation gain, take the Devil's Backbone Trail on the way up. If you want more leg burn and extra conditioning, then start your hike up the Baldy Bowl Ski Hut Trail. Combine the two trails to make a fantastic loop, which is what we discuss in detail in this guide.
In this post, we will cover the following topics to help you plan and prepare for your very own successful Mount Baldy hiking adventure:
Mt. Baldy Trail Stats - all the nitty gritty details for the trail in one spot. How many miles, elevation gain, & more.
Best Time to Hike Mt. Baldy – Details about the best time to hike Mount Baldy and typical weather to expect on your trip.
Mt. Baldy Hike Map & GPX Files - I've created a map detailing the whole trail that you can explore, including a look at the elevation gain/profile of the hike. You can also download this file as a GPX file to upload into your own personal GPS device.
How to Get to the Mt. Baldy Trail – Driving and parking recommendations.
Mt. Baldy Camping – Where to camp on and off the trail when visiting.
Itinerary for Hiking the Mt. Baldy Trail - I’ll walk you through my experience and suggested itinerary for hiking the Mt. Baldy Trail.
Important Mt. Baldy Safety Tips – tips about the top hazards to expect along the trail.
What to Bring on Your Mt. Baldy Hike – the essential packing list for hike, don’t hit the trail without these things!
If you’re searching for something specific, feel free to skip ahead to the section you’re looking for!
Plus, be sure to check out the bottom of this post to find more hiking trail guides in California and other additional hiking, camping and backpacking resources!
GRAB MY [FREE] OUTDOOR BACKPACKER STARTER KIT:
I created the Ultimate Outdoor Backpacker Starter Kit for you (and it's FREE)! This starter kit is filled with 14 pages of my best hiking and backpacking tips to help you learn what it takes to become a safe, confident, and self-sufficient outdoor backpacker!

1. MT. BALDY TRAIL STATS
If you’re anything like me, the first thing you want to know about a trail is the overview and high-level information, so you can quickly figure out what the hike is all about. Here you go!
MT. BALDY TRAIL QUICK FACTS
Mt. Baldy Elevation: 10,064 feet
Trail to Summit: Start at Manker Flats Trailhead and take Baldy Bowl Ski Hut Trail to Devil's Backbone Trail back down to Manker Flats Trailhead
Type of Trail: Loop
How long is the hike to the Mt. Baldy summit: ~11 miles (Check out Section 3 ‘Mt. Baldy Hike Map, Itinerary, & GPX File’ for more details.)
Total Elevation Gain: ~3,900 feet total elevation gain
Mt. Baldy Trailhead: Manker Flats Trailhead
Trailhead Elevation: 6,000 feet
How long does it take to hike Mt. Baldy? 6-8 hours, making it a perfect day hike
Mt. Baldy Crowds: This is a very popular hike, and the trail can get extremely busy.
Do you need a permit to hike Mt. Baldy? No, but you do need a parking pass.
How difficult is hiking Mt. Baldy? Strenuous
How dangerous is hiking Mt. Baldy? Mt. Baldy is not a technical hike, but there are some steep drop-offs, so be very cautious about hiking Mount Baldy in the rain. Also, you should only attempt Mt. Baldy when the trail is free of snow unless you have strong mountaineering skills.
Is there drinking water available along the Mt. Baldy hike? Don't rely on water sources along the Mt. Baldy trail, so bring plenty of water for your hike.
Is hiking Mt. Baldy dog friendly? Yes! Dogs are allowed on the Mt. Baldy hike.
Is hiking Mt. Baldy kid friendly? It is a very strenuous hike and might not be the best one to take children on, unless they are older and experienced hikers.
2. BEST TIME TO HIKE MT. BALDY
While Mount Baldy is a great peak to hike year-round temperature wise, the best months to attempt hiking this trail are the summer months from June to October. Do not attempt this hike in the winter unless you are skilled in mountaineering. The Devil's Backbone Trail in particular is especially dangerous when wet and icy due to its steep drop offs that allow little room for error. There are deaths every year from hikers attempting to do this trail in the winter.
I have done this hike in January before, but it was when California was going through a drought and the trail was completely dry. Make sure to check the weather before you go, and if there is snow on the mountain (or chance of snow/rain in the winter), opt to do one of the LA area’s lower elevation peaks instead. If you’re looking for some good alternative hikes, check out our list of best hikes in SoCal.
Also, you should know that this trail can get very, very busy. To avoid the crowds, try hitting the trail early in the day, or even better, go on a weekday!
Check out the Mt. Baldy weather average temperature map below for reference.

Be prepared before you go. Just like I teach my students in my backpacking program. It’s important that you research your weather conditions before you go, in the weeks and days leading up to your trip. You can check the weather conditions at one of the following resources:
On the Snow – Local resource for Mt. Baldy conditions
Mountain Forecast – One of my favorite sources for mountain weather forecasts when checking a few days before a trip.
Winter at Mt. Baldy: I do not recommend attempting to hike Mt. Baldy in the winter, and absolutely do NOT attempt this hike if it has snow on it or if there is a threat of snow. Even rainy conditions could be suspect and cause slippery conditions on sections of the trail where there are steep drop offs. The Devil’s Backbone trail is particularly dangerous in the winter when there is snow and ice.
Only attempt this trail in adverse winter weather conditions if you are extremely experienced in mountaineering. People die every year trying to complete this hike in winter conditions when they do not have the appropriate skills to do so safely.
3. MT. BALDY HIKE MAP & GPX FILES
In this guide, we recommend hiking Mount Baldy by connecting the Ski Hut Trail with the Devils Backbone Trail, which makes a great loop that allows you to experience the best parts of the Mt Baldy Trail. This loop starts at Manker Flat Trailhead (also noted as Mt Baldy Trailhead on Google Maps).
On this route, you'll hike on Falls Road and Baldy Road for a bit. If you want to start your hike up the Baldy Bowl Ski Hut Trail, keep a lookout on your left for this trail (it's easy to miss!). If you want to hike up the Devil's Backbone Trail instead, continue on Mt. Baldy Road until you get to the Mt. Baldy Notch (ski lift) area. You can connect to the Devil's Backbone Trail at Baldy Notch.
Below is a map of the hiking trail. If you click on the image below you will be taken to an interactive map that you can further explore.

DOWNLOAD THE GPX FILE FOR THIS TRAIL!
I always recommend downloading a GPX file onto a GPS device, that way you can check in from time to time to be sure you’re on the right trail.
You can download the GPX files from Mt. Baldy Trail map below. It details all the key milestones of the hike including the trailhead start and other waypoints.
DOWNLOAD THE MT. BALDY GPX FILES FOR YOUR GPS HERE:
Knowledge is power my friend, and I'm a girl who loves data. Get access to this trails GPX file PLUS my library of GPX files with tracks and waypoints for all the trails loaded onto the She Dreams of Alpine blog.
Load this puppy into your trusted GPS and rest easy knowing you have tracks to follow on your next hike or backpacking trip.
DON’T HAVE A GPS? YOU SHOULD.
Look, I believe every hiker and backpacker should be self-sufficient, and that includes knowing how to practice smart navigational skills in the outdoors. This is something I teach in my backpacking program, but I want to give you a couple GPS options to get started. Don’t ever risk getting lost, and don’t rely on other people for your safety. Be empowered, take 100% ownership for yourself my friend. Here’s what I recommend:
1) GAIA GPS Phone App: At a bare minimum, consider getting a premium subscription to GAIA GPS App. This App allows you to download maps in advance and take them offline into the backcountry. You can record your tracks, upload tracks from online to follow (like the one I have above), and so much more with this phone app, and GAIA is offering a special discount to those who subscribe online through my link above, 20% off their normal prices. But even if you don’t use my link... please, at a minimum get a GPS phone app to help you navigate outdoors!
2) Handheld GPS: If you hike often or go backpacking, then I highly recommend you investing in a handheld GPS. I own a Garmin 64st and LOVE this device.
3) Handheld GPS with Satellite Communicator: However, if you have a little bit more money to spend, if I were starting over, I’d get the Garmin inReach Explorer+ which provides not only GPS tracking capabilities, but also an SOS satellite search and rescue communicator. I own the Garmin inReach mini now and I pair it with my Garmin 64st, but you can save weight by getting this all-in-one solution.
4. HOW TO GET TO THE MT. BALDY TRAIL
Mount Baldy is the tallest peak in Los Angeles County and is located in the San Gabriel Mountains and Angeles National Forest.
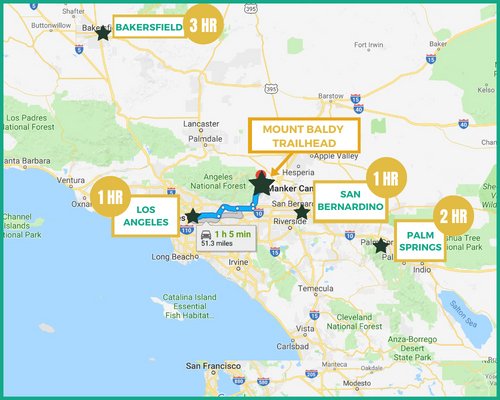
Driving times will vary depending where you are coming from, but here’s a couple estimates from big cities nearby:
Los Angeles to Mt. Baldy: ~1 Hour
San Bernardino to Mt. Baldy: ~1 Hour
Palm Springs to Mt. Baldy:: ~2 Hours
Bakersfield to Mt. Baldy: ~3 Hours
San Diego to Mt. Baldy: ~3 Hours
GETTING TO THE TRAILHEAD
Once you enter the Angeles National Forest Area, take Mt. Baldy Road all the way up to Manker Flat Campground. The Mt. Baldy Trailhead is located near the Manker Flat Campground area, and this is also where you will begin to look for parking (make sure to get there early if you want to easily find parking). Once you drive past the campground you should see a bunch of cars parked on Mt Baldy Road.
In order to park here, you must have a parking pass. See info below for more details about the parking passes. Alternatively, you could park your car at the Mt. Baldy Ski Lift Area, but I believe it costs a bit extra to park there (even with the parking passes).

MT. BALDY PARKING PASS INFO
In order to park your car at Mount Baldy you must have a parking pass. There are several options for this:
You can also buy a $5 day permit from the Rangers Office/Mt. Baldy Visitor Center, REI, or the list of vendors mentioned above. You can buy this pass ahead of time, and it doesn't have to be used the same day you purchase it.
5. MT. BALDY CAMPING
While most people just visit Mt Baldy as a day hiking adventure, you could certainly make a weekend of it by camping near the area. Here are a few Mt Baldy camping options nearby:
CAMP AT MANKER FLATS CAMPGROUND
This campground is in a prime location for starting your Mount Baldy hike, as the trailhead is right by the campground. There are 21 sites to choose from, each with picnic tables and fire rings, and there are flushable toilets on site. These sites are first come/first serve. If you have an Adventure Pass, it will cost you $10 a night, otherwise the sites are $14 per night (though rates could change, so be sure to check the Manker Flats Campground site for updated information).
STAY THE NIGHT AT THE SAN ANTONIO SKI HUT
This can be a unique way to make a weekend visit of Mt. Baldy. The hut is managed by the Sierra Club and can sleep up to 16 people. Be sure to contact the scheduled host in advance if you want to stay here. Also, be aware that this hut is only accessible via a steep 3 mile hike. For more information, check out the Sierra Club’s site.
RENT A TENT CABIN
There are 12 tent cabins available to rent at the Mt Baldy lift area, within walking distance from the Top of the Notch Restaurant. Tent cabin rental includes round trip lift tickets, as well as arrival night dinner and breakfast. You can book a tent cabin here.
6. ITINERARY FOR HIKING THE MT. BALDY TRAIL
On our visit to Mt. Baldy, we did the hike as a loop starting up the Baldy Bowl Ski Hut Trail to the summit and down the Devil's Backbone Trail. Ironically, it was an extremely dry winter in California, so we did this hike in mid-January as part of our training for the Rim to Rim Hike in the Grand Canyon.
There wasn't any snow, so that is the only reason it was safe for us to attempt in the winter. Normally this isn't the case, so check out our suggestions above on when to do this hike, particularly the Devil's Backbone portion.
A TYPICAL MT. BALDY HIKE ITINERARY
Here is an overview of the Mt Baldy hike loop, going up Baldy Bowl Ski Hut Trail and down the Devil’s Backbone Trail:
Start hiking up Mt Baldy Road. The Baldy Bowl Ski Hut Trail is definitely a more strenuous uphill workout than Devil’s Backbone, so choose this route if you’re looking for a good leg workout!
You'll hike on a paved road that turns into gravel as you pass San Antonio Falls until you reach a side trail on your left. The signs for this turnoff are often stolen, so make sure to pay attention, so you don’t miss it!
Hike up to the Sierra Club's Teal Ski Hut. This is pretty much halfway to the summit, making it a good place for a break and a snack.
Hike on a meandering and sometimes confusing trail to the summit. Just try to pay close attention so you don’t get off track. It will be like hiking a big zig zag toward the summit.
Once you reach the summit, you’ll find plenty of space to relax for a bit, as well as a nice summit sign for a photo op. If you’re lucky and the weather is clear, you can see the coast and maybe even Catalina Island in the distance.
When you’re ready to head back down, continue east toward the Devil’s Backbone Trail, and hike all the way down this steep trail to Baldy Notch (the Mt Baldy Ski Area). Watch your step because the top portion of this trail has steep drop offs, so you don’t want to stumble.
If you’re hungry, you can grab some food at Top of the Notch Restaurant at the ski area, then either hike the remaining way down back to trailhead or take the Mt Baldy lift down.
MT. BALDY TRIP REPORT
We drove up early in the morning to start the hike and beat the crowds. From the parking area above the Manker Flat Campground, we started hiking up the Mt Baldy Road until we saw the turn off for the Baldy Bowl Ski Hut Trail. Try not to rely on signs being there to mark the turn-off. The signs are frequently stolen in this area.

The trail up Baldy Bowl Ski hut trail is a more challenging uphill than the hike up Devils Backbone trail, but that is exactly why we decided to go up this direction... for a better workout! We hiked a bunch of switchbacks onwards and upwards toward the Mt. Baldy summit.
Keep an eye out for San Antonio Falls on your hike up (a little over a half a mile on you way up) the Baldy Bowl Ski Hut Trail. It was barely a trickle the time we went in the winter (during the drought), but you could still pick it out. There were patches of snow here and there where it stayed shady, but mostly it was snow free.
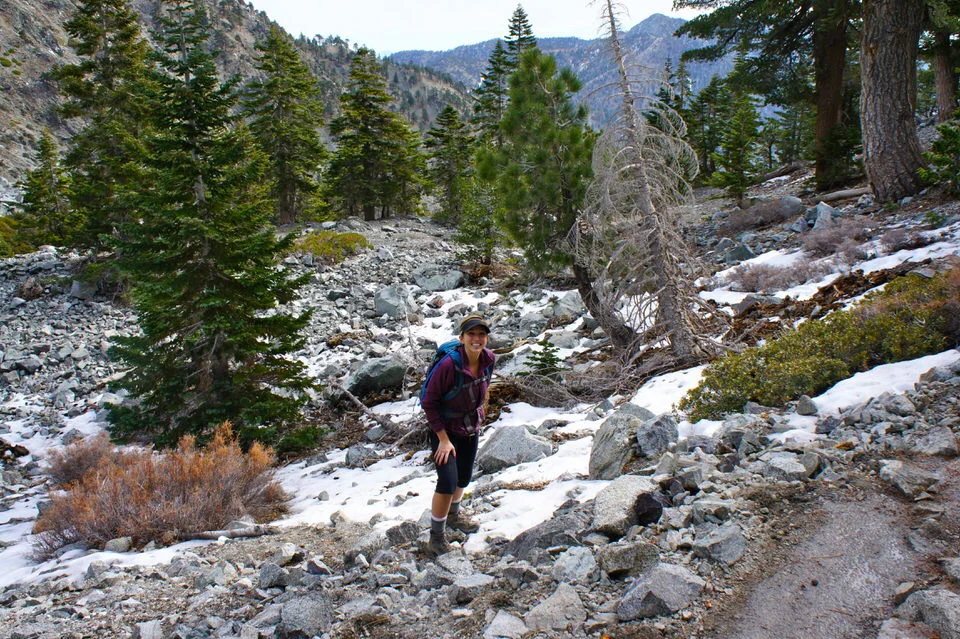
I don't know what it is about Texans (aka me), whenever we see snow, we always feel inclined to take a photo by it. Still to this day (even though I see snow all the time now in the winter here in California) I still always want to take photos next to it. I wonder if I'll ever get used to it...
At a little over the 2.5 mile mark, you'll see a teal hut. Hike up to this! This made a great spot for us to grab a snack and take a quick break from our uphill hike. This hut will mark the half way point till you get to the Mt Baldy Summit.

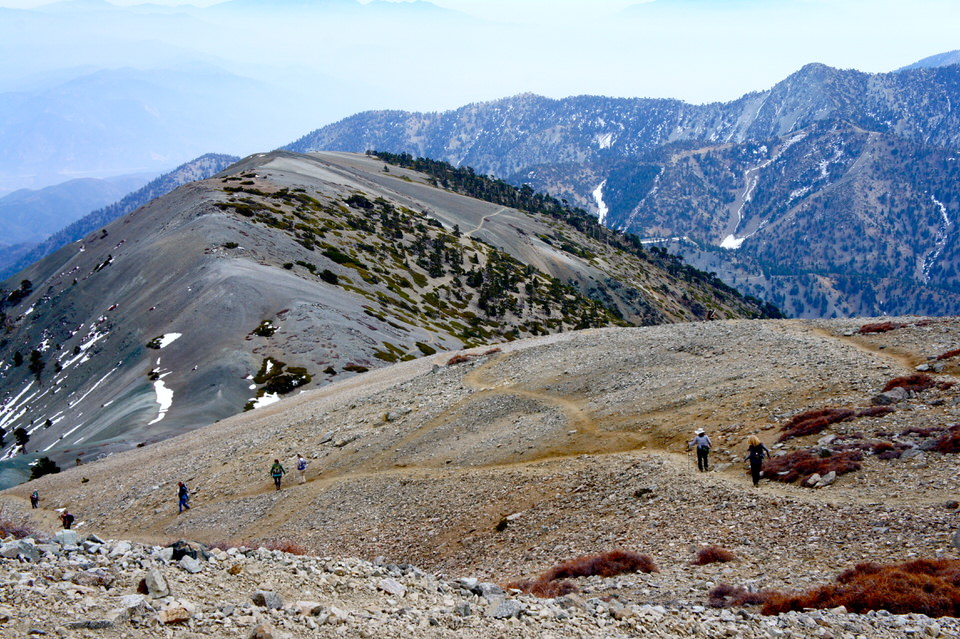
I'd say after this hut is when the trail can sometimes get confusing. Just try to pay close attention and not get off track. It will be like hiking a big zig zag toward the summit. You can sort of see in the picture below how patchy the trail looks.

The trail breaks up even more towards the final 30 or so minutes to the summit. Just pay attention and keep an eye out on where you are going, or better yet, invest in a GPS so you can make sure you are staying on trail.

The summit has a very large area to relax, and a cool summit sign to take a photo next too. Spend some time up here and enjoy the excellent views all around. Make sure to pack some layers though because the summit can get very cold and windy, even in the summer!
On a clear day you can see the coast (and maybe even Catalina Island) and possibly even San Gorgonio in the distance.

You'll head eastward to find the Devil's Backbone Trail. While the start might not be well "signed", it's not hard to find. You will see a long trail heading down the steep side of a ridge line.
I remember being worried about this portion at first because of the name of the trail, but as long as the trail is dry, it is a fairly safe trail. You definitely need to be mindful of where you are walking though, and be sure not to trip over anything. A stumble down the side of the trail could be dangerous or even fatal.
You'll traverse along a the side of a steep hill next. The trail is thin, and there may be people hiking up the trail while you are descending. Just be sure to be safe, and share the trail with others.

This portion (below) looks especially eerie with its steeper drop-offs on both sides of the trail. Can you see why it is not recommended to hike when it has recently snowed?
Trekking Poles are nice to have on your downhill hike of Devil's Backbone.
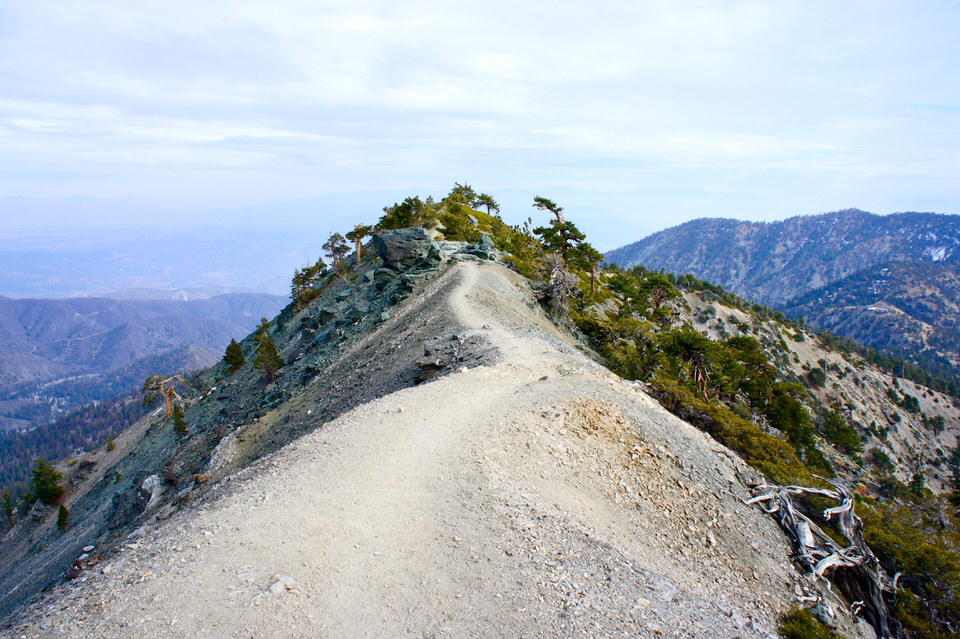
Hiking when there has been recent snowfall or there is wintery conditions should only be attempted by those who know what they are doing with mountaineering skills and have the technical know-how.

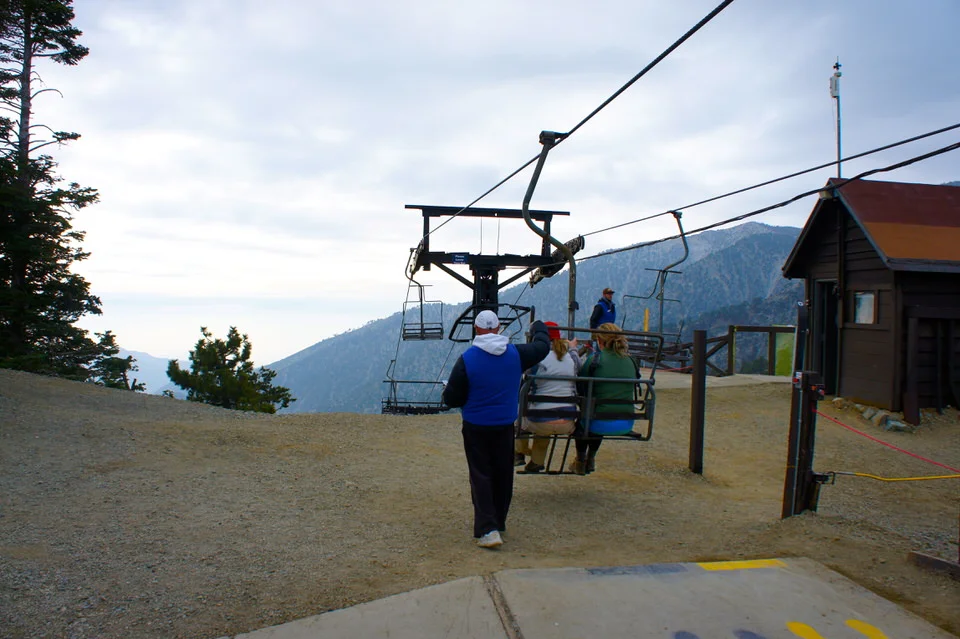
After a bit of knee-busting down hill hiking, you will make it to Mt Baldy Ski Area, where you can either continue to hike down to the trailhead or take the Mt Baldy lift. At the time when I first did this hike, my friends knees were really bothering her so we opted for the ski lift back to the trailhead.
The ski lift cuts out about 1500' of descent (or ascent if you are hiking the loop in the opposite direction) and costs $25 round trip for adults, and it runs 7 days a week.
If you want to grab a bite to eat before you head down, you could treat yourself to some grub at the Top of t Notch Restaurant, another great reason to hike this trail from Baldy Bowl Ski hut trail and down Devil's Backbone trail.

The Mt Baldy Lift runs during the summer months and takes about 20 minutes to get to the bottom.
An excellent day hike, and a fantastic training hike! If you live near Los Angeles, Mt. Baldy should be very high on your must-hike list. I wish we lived a bit closer so I could come and train here more often.
7. IMPORTANT MT. BALDY SAFETY TIPS
While Mt. Baldy is not considered a technical hike, it still can be dangerous if you’re unprepared. When planning your Mount Baldy hiking trip, pay particular attention to the hazards listed below and plan ahead accordingly.
SNOW
As mentioned above, Mt. Baldy becomes extremely dangerous in the winter. The hike turns from a straightforward, non-technical effort into a serious undertaking requiring both mountaineering skills and proper gear.
I strongly discourage anyone who does not have advanced skills from attempting Mt. Baldy in the winter. Unprepared people die or have to be rescued on Mount Baldy each year because they do not fully grasp the dangers of hiking Mount Baldy in the snow.
RAIN
Another concern on Mt. Baldy is rain, which can cause the trail to become slippery and treacherous. The steep drop offs you encounter on the Devil’s Backbone Trail become much more of a concern when the trail is wet, and you don’t have solid footing.
COLD
Finally, keep in mind that the elevation of Mt. Baldy combined with the wind will make the temperatures on the trail much lower than you might be used to in Southern California. Bring extra layers, and check the weather forecast for Mt. Baldy (not just the nearby cities) ahead of time, so you know what to expect on your hike.
8. WHAT TO BRING ON YOUR MT. BALDY HIKE

Note: This post contains affiliate links.
There is not a whole lot "extra" you need besides the basics for this hike, but I would like to recommend a few things that will improve your Mt. Baldy hiking experience!
Don't forget to check out our post on Essential Day Hiking Gear, for more of our outdoor gear personal recommendations, and be sure to download our packing list below so that you don't forget anything next time you are packing up for a trip!
Grab My Day Hiking Packing Checklist
Let us know if you get a chance to go hiking on the Mt Baldy trail!
LOOKING FOR MORE CALIFORNIA ADVENTURES?
If you are looking for additional hiking adventures in California, check out our resources below:
A Full List of All the California 14,000 Foot Peaks
ESSENTIAL HIKING (OR BACKPACKING) RESOURCES
Also be sure to check out these essential hiking resources!
7 Tips to Hiking and Summiting Your First Fourteener Mountain
California Backpacking Permit Process for Popular Trails and Campsites
Cheers,
Allison


Related Posts:


Your Ultimate Guide to the Angels Landing Hike in Zion National Park | The Angels Landing Trail is one of the most iconic hiking trails in the Untied States for a reason. It has every quality an amazing day hike needs: physical challenge, beautiful views, and epic adventure! This trail will test your mental strength as you make your way up the narrow steep spine toward the top of Angels Landing, but, trust me my friend, it’s well worth it! Check out our full trail guide & safety tips for hiking the Angels Landing trail here! | shedreamsofalpine.com