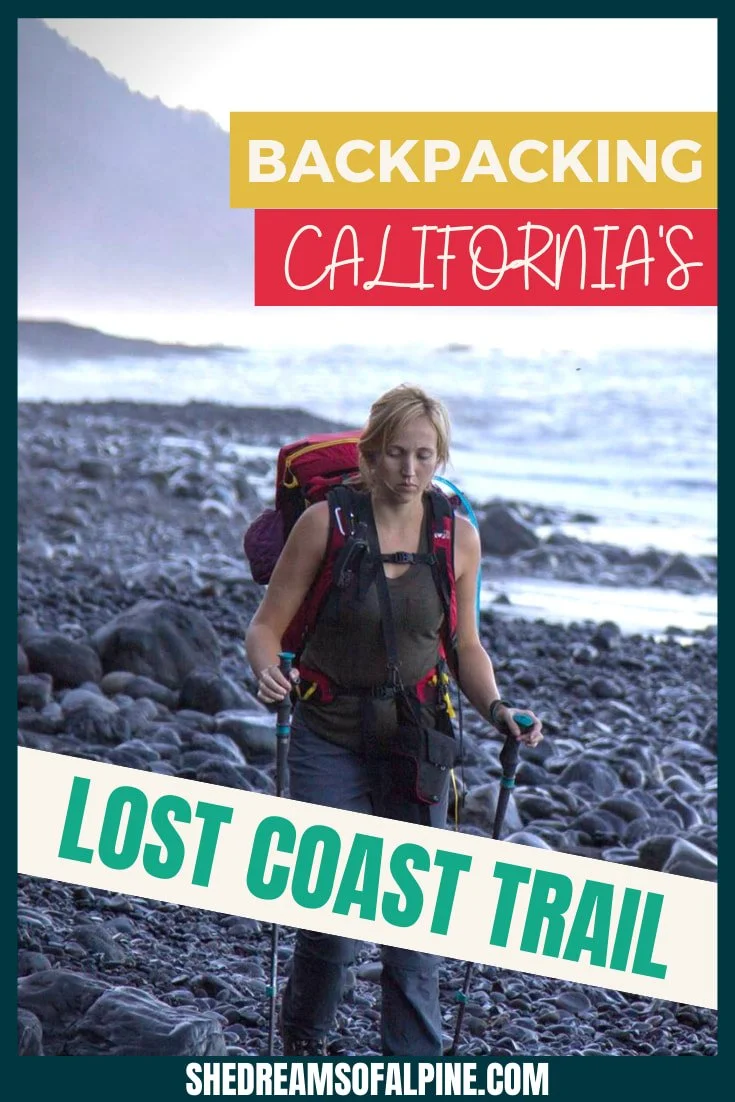
Your Ultimate Guide to Backpacking the Lost Coast Trail in California in 2024 - Trail Details, Camping, Permits, Weather, Tide Tables, and More
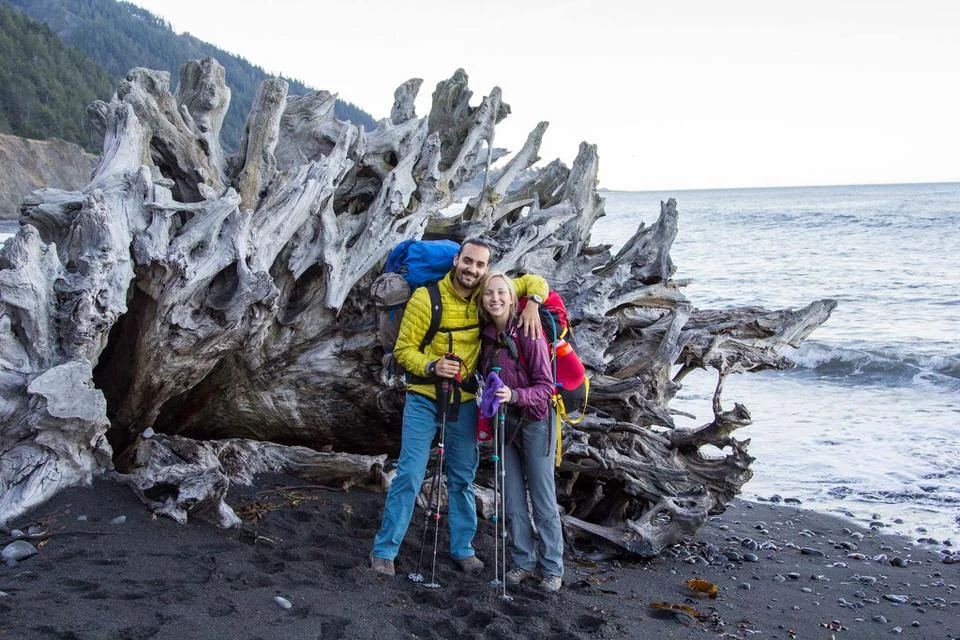
If you’re dreaming of backpacking on the Lost Coast Trail, I should first start off with a warning.
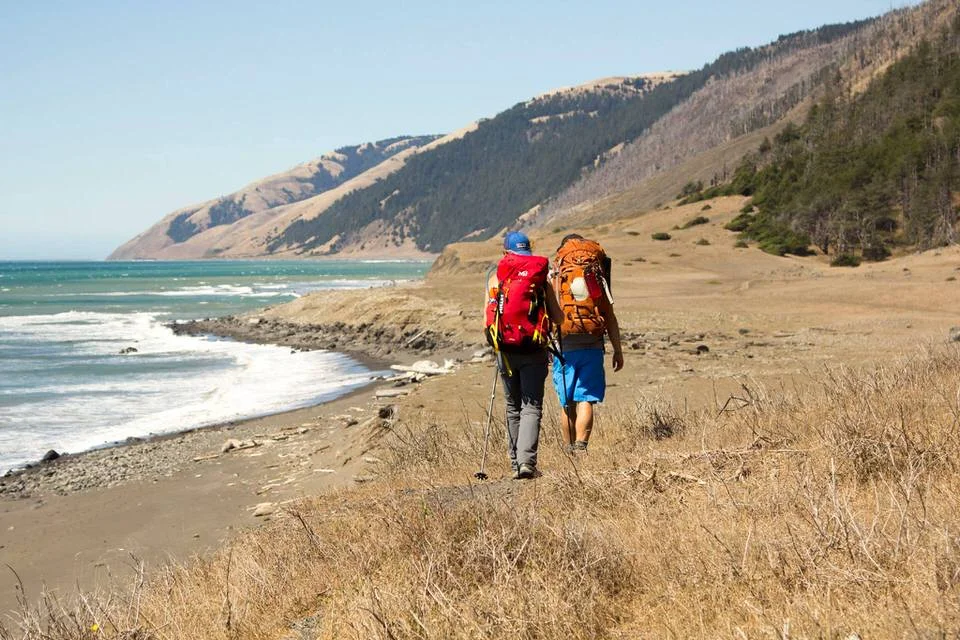
Be prepared to backpack along miles and miles of isolated, breathtaking California coastline. Be prepared to experience California in a way that most people never will. Brace yourself for jaw-dropping sunsets and beach-side camping. There may even be stretches of this hike where you will have an entire beach to yourself.
This is not a trail for those seeking an average backpacking experience. The isolation and beauty of this trail are real. You’ve been warned.
In all seriousness though, The Lost Coast Trail is probably one of the most unique backpacking trips I’ve ever gone on. It is so completely different from the backpacking trips I’ve done in the Sierras (like backpacking Mt. Langley or backpacking in Tuolumne).
The Lost Coast trail lies along one of California’s most beautiful rugged coastlines and follows some of its most isolated and breathtaking beaches. It’s stunning, to put it mildly, and I’m really excited to share this trail guide with you so you can experience it yourself!
There are a lot of resources out there for the Lost Coast hike and a lot of good trip reports, but I always do my best to give you everything you need. This post as an awesome one-stop-shop for planning your Lost Coast backpacking trip.
I’ll help make the process simple for you and cover everything you need to know about backpacking the Lost Coast Trail from getting a permit, trail details and GPX files, to what you should pack on your trip.
WHAT WE WILL COVER IN THIS GUIDE TO THE LOST COAST TRAIL
There is a lot of information in this post, so if you are looking for something in particular, feel free to skip ahead to one of the specific sections. This Lost Coast Trail guide will cover the following:
About The Lost Coast Trail - Get to know the area before you go!
Lost Coast Hike Details - Stats baby! All the data for the trail. How many miles, elevation gain, & more…PLUS a video from my trip on the Lost Coast Trail.
How To Get a Lost Coast Trail Permit - Everything you need to know about getting a Lost Coast backpacking permit. It used to be really easy to get a permit, but now there are reservation regulations in place, so be sure to read this section!
How to Get to the Lost Coast Trail - Lost Coast trailhead details, options, and Lost Coast Shuttle information.
Lost Coast Trail Map & GPX File - I've created an interactive map in Google detailing the most popular sections of the trail. You can also download this file as a GPX file to upload into your own personal GPS device.
When to Hike the Lost Coast Trail - Details about the best time to hike the Lost Coast Trail and typical Lost Coast trail weather to expect on your trip.
Lost Coast Camping - Your options for Lost Coast campgrounds when backpacking this trail.
Hazards of the Lost Coast Trail - The key hazards you need to be aware of when backpacking the Lost Coast Trail.
What to Bring on the Lost Coast Trail - The essential items you should bring when hiking California’s Lost Coast Trail.
Itinerary for Hiking the Lost Coast Trail in California - I’ll walk you through my experience and suggested itinerary for backpacking the Lost Coast Trail.
Plus, be sure to check out the bottom of this post to find more hiking trail guides in California and other additional hiking, camping and backpacking resources!
GRAB MY [FREE] OUTDOOR BACKPACKER STARTER KIT
I created the Ultimate Outdoor Backpacker Starter Kit for you (and it's FREE)! This starter kit is filled with 14 pages of my best hiking and backpacking tips to help you learn what it takes to become a safe, confident, and self-sufficient outdoor backpacker!
1) About The Lost Coast Trail
The coastline of the Lost Coast Trail is rugged and remote. So rugged, in fact, that the state of California was unable to continue the famous Highway 1 (otherwise known as “The One” to Californians) along this stretch of California coastline, and instead they had to continue the highway inland.
Also unlike other areas of California, you won’t find mansions or homes tucked away on the cliffs along the beach. The King Range Wilderness area is truly a remote gem, a rarity in California.
The only true way to experience the magic of this area is exploring it by foot. Thanks to the remoteness of this area, one can backpack this trail and watch the seals bobbing around in the ocean waves, sea lions sunbathing along the coast, and the occasional starfish washed ashore all while hiking the Lost Coast Trail.
There are two primary sections to the Lost Coast Trail, but most people are more familiar with the northern section, which is what will be covered in this guide. For clarity, here are a few more details on the two sections of the trail:
The Northern Section: From Mattole Beach to Black Sands Beach (near Shelter Cove), this is the most well-known portion of the Lost Coast Trail, and what will be covered in this trail guide.
The Southern Section: This portion of the Lost Coast goes deep into the Sinkyone Wilderness State Park from Black Sands Beach down to Usal Beach (roughly 32 miles). This trail is beautiful in its own right, but doesn’t explore the coastline like the northern section of the trail.
If you have a long time to spend in Northern California, consider adding the southern section of this hike onto your trip. However be aware that the Sinkyone Wilderness State Park has stricter regulations on camping, and coordinating a shuttle may take a bit more planning in advance.
2) Lost Coast Hike Details
Whenever I’m gearing up for a backpacking trip and doing research on a trail, I like to know the quick information right off the bat – how many miles is my backpacking objective, what is the trailhead name, how many days should I set aside for it? Here you’ll get a high-level overview of what to expect on your Lost Coast hiking adventure.

Note: This trail guide only covers the northern (and most well-known) portion of the Lost Coast Trail which runs between Mattole Beach and Black Sands Beach (near Shelter Cove).
Where is the Lost Coast Trail? The trail is located in Northern California in the King Range National Conservation Area
Trail Name: The Lost Coast Trail (Northern Section)
Trailhead Name: Depends on whether you hike the trail from North-to-South or South-to-North. The northern trailhead is Mattole Beach Trailhead, and the southern trailhead is Black Sands Beach Trailhead
Lost Coast Trailhead Elevation: Sea Level :)
Type of Trail: Most people hike this trail point-to-point (which requires a shuttle), though you could hike it out-and-back if you want a longer adventure.
How long is the Lost Coast Hike? Roughly 25 miles long if hiking point-to-point. Check out Section 4 ‘The Lost Coast Trail Map, Itinerary, & GPX File’ for more details.
Total Elevation Gain? Negligible!
How many days to spend backpacking the Lost Coast Trail? Most people backpack this trail in 2-3 days. Check out Section 4 ‘The Lost Coast Trail Map, Itinerary, & GPX File’ for more details.
Lost Coast Trail California Crowds: Medium. This trail has gotten more popular over the years, however, a permit system does keep the crowds down. Also, due to the remoteness and planning required to do this trail, it’s not as popular as other California backpacking trails.
Lost Coast Trail Hike Difficulty: The biggest difficulty in backpacking this rugged California coastline is that hiking in the sand and among the rocks can be difficult on your knees. The terrain is uneven and can take a toll on your body even though the elevation gain and mileage are not too intense.
Is a permit required to hike California’s Lost Coast? Yes. See the permit section below.
Is there drinking water available along the Lost Coast Trail? Freshwater streams are available frequently along the Lost Coast Trail, usually at most only a few miles apart. However, it’s always smart to plan ahead, because there will be some stretches of coastline with no opportunities to fill up on water. And you should ALWAYS filter your water in the backcountry. Skip to the Hazards section of this post to see what we found in one of the streams we filtered water at!
Can you bring dogs on the Lost Coast Trail? Technically dogs are allowed, but this trail isn’t super friendly on their paws due to the sand and uneven pebble terrain. I’d advise to leave the dogs at home on this hike.
Is backpacking the Lost Coast Trail kid-friendly? This trail isn’t advised for younger children, but older children may be able to handle this trail if they are a confident and good hikers/backpackers. As always, you should always consider you and your family’s hiking abilities before taking on any hiking or backpacking trip with your kids.
Other Important Notes: Your are required to store your food in an approved bear can on this hike.
Lost Coast Surfing
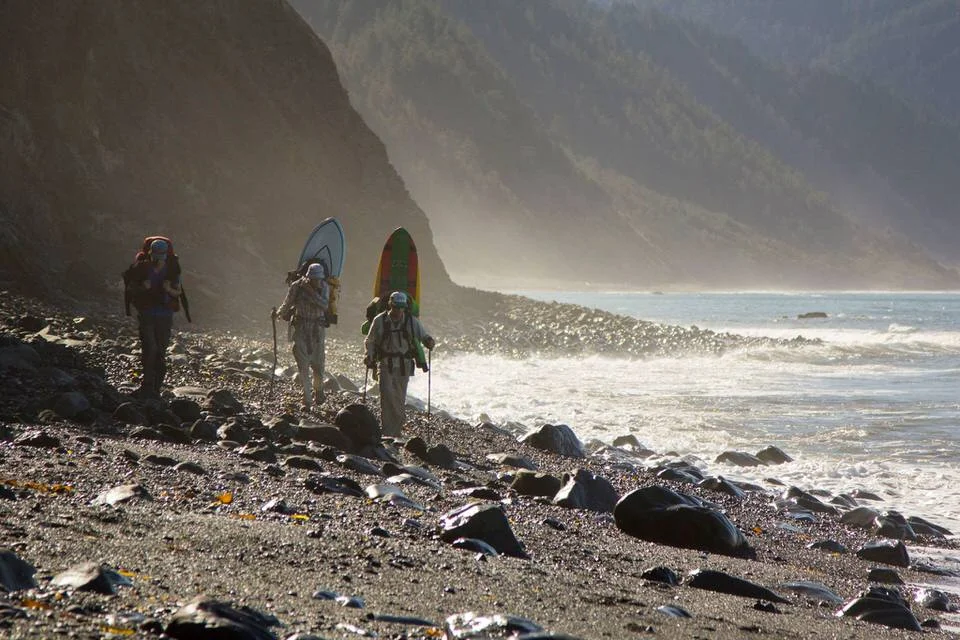
When I backpacked the Lost Coast trail I definitely didn’t do any surfing, but we saw a group of people (shown in the above photo) on the trail with not only backpacking backpacks strapped to their bodies, but also surf boards! While I can’t really comment on the quality of the surfing on the Lost Coast Trail, an article from Teton Gravity states, “Scoring a perfect swell in Northern California is always unlikely. Because the coastline is so exposed, conditions are often too rough or too windy. But supposedly, there’s a nameless break on the Lost Coast that lines up a few times a year.”
Lost Coast Trail Video
Check out this fun video we made of the Lost Coast Trail hike when we went back in 2015. This video will just give you a quick taste of what to expect on the trail and the kind of terrain (and wildlife) you’ll encounter!

3) How To Get a Lost Coast Trail Permit
In the past, you didn’t have to reserve Lost Coast Trail permits in advance because you could pick them up at the trailhead. Now the rules have changed and all backpacking reservations MUST be made in advance. Permits for the Lost Coast Trail are also known as King Range Wilderness Permits.
WHEN TO APPLY FOR LOST COAST BACKPACKING PERMITS:
Permits are required for overnight camping on this trail. Day hiking does not require a permit.
All Lost Coast Trail permits used to be released on October 1st for the following year. New as of Oct 1, 2023, Lost Coast Trail permits will now be available on a 3-month rolling window reservation system. Each day at 7:00am PT, new permits will become available for 3 months in advance. For example, on 1/1/24, permits will open for 4/1/24; on 1/2/24, permits will open for 4/2/24 and so on.

HOW TO APPLY:
You can apply for your Lost Coast permits online at Recreation.gov. The permits are first-come, first-serve, and there are no lottery or walk-in permits available, so you must book in advance.
There are daily quotas for entering the trail, as follows:
May 15 - September 15: 60 people allowed to enter the trail per day
September 16 - May 14: 30 people allowed to enter the trail per day
HOW MUCH DOES IT COST:
There is currently no recreation fee for a King Range Wilderness Permit to hike the Lost Coast Trail. However, there is a non-refundable reservation fee of $6 per person.
OTHER USEFUL INFORMATION:
You are required to begin your trip on the permitted entry date, with NO exceptions. This is a very strict policy, and early or late starts are not authorized.
Each individual permit is restricted to a size of 3 people. If you have a bigger group (up to 15 is allowed), you would need multiple permits.
Permits are non-transferrable.
Check out our guide to important California permit and reservation deadlines for more info on Lost Coast Trail permits as well as permits for other popular California trails.
4) How to Get to the Lost Coast Trail
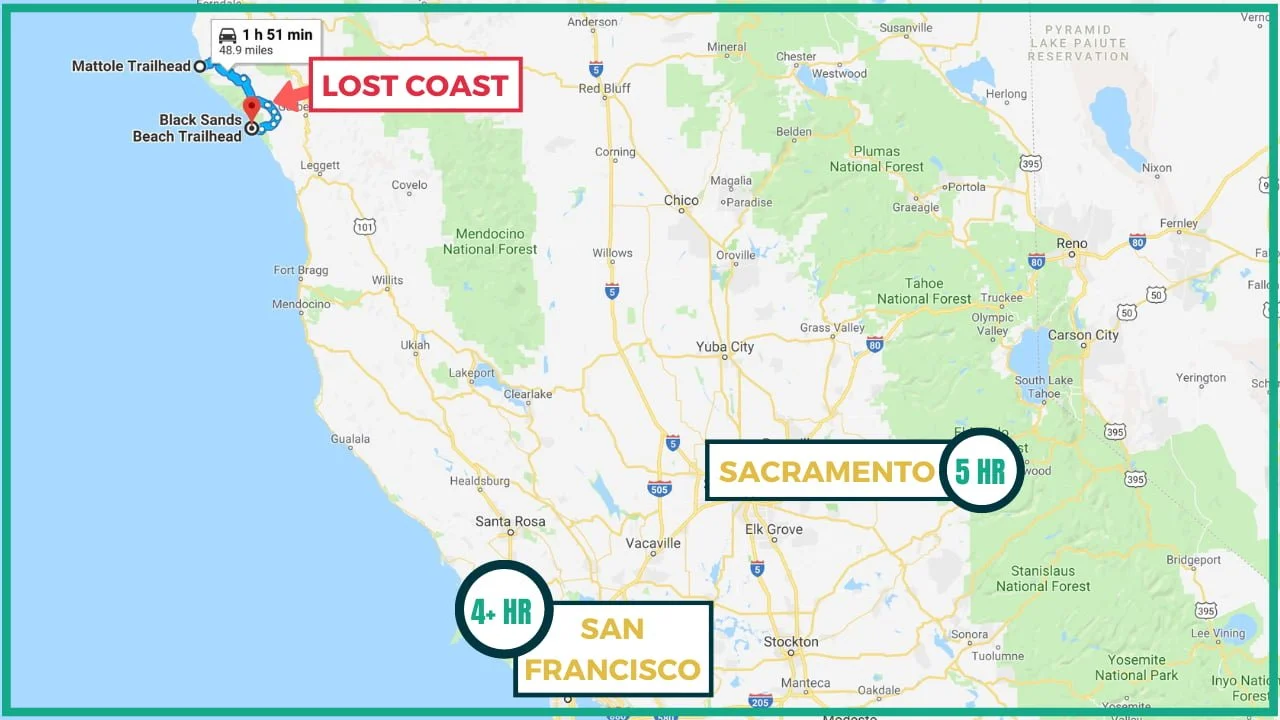
The Lost Coast Trail is located in the King Range National Conservation Area in Northern California. It is part of one of the longest stretches of coastline of the US outside of the state of Alaska. This area is far removed from California’s big cities. Here are some drive times you can expect in order to get to the southernmost trailhead (Black Sands Beach Trailhead).
San Francisco to Black Sands Beach Trailhead: 4 and 1/2 hours
Sacramento to Black Sands Beach Trailhead: 5 hours
Los Angeles to Black Sands Beach Trailhead: Over 10 hours
Options for Transportation Between Trailheads
If you hike this trail as an out-and-back trail, you’re in for a much longer hike (about 50 miles), but you won’t have to hassle with shuttle transportation. However, if you backpack this trail as a point-to-point trail (as most do), you have a few options:
Arrange Shuttle Transportation: This is the most common option people opt for on the Lost Coast Trail, and you can read more details in the section below.
Plan to Go with Two Separate Hiking Parties: If you plan ahead and have two separate groups, one group could start at the northern end of the trail and the other group could start on the southern end of the trail. You could plan to swap car keys along the hike and drive home accordingly. This would take a lot of coordination and planning, but is actually doable.
Park Two Cars, One at Each Trailhead: This is by far the the least efficient option. If you do this, you should expect some very long driving times. The trailheads are roughly 2 hours from each other.
Lost Coast Trail Shuttle
On our backpacking trip of the Lost Coast Trail, we decided to hike the trail from south-to-north, but only one way. This meant we had to leave our car at the Mattole Beach Trailhead (the northern trailhead), and take a shuttle to Black Sands Beach Trailhead, all of which had to be arranged in advance. The shuttle drive is long, about 2 hours, and covers about 50 miles of winding road in order to navigate the rugged land.
We opted to take our shuttle drive on the beginning portion of our backpacking trip so we could just head straight home after we finished our trip and not wait for a shuttle.
You can arrange shuttle transportation with one of the following approved BLM Lost Coast Trail shuttle organizations:
Lost Coast Adventure Tours: 707-986-9895 or 707-502-7514 or info@lostcoastadventures.com
Mendo Insider Tours: 707-962-4131 or info@mendoinsidertours.com
Cost of Shuttle: Costs vary depending on the size of the group and a minimum number of passengers is usually required. Check the websites above (or call) for more details from the providers, and book your shuttle in advance.
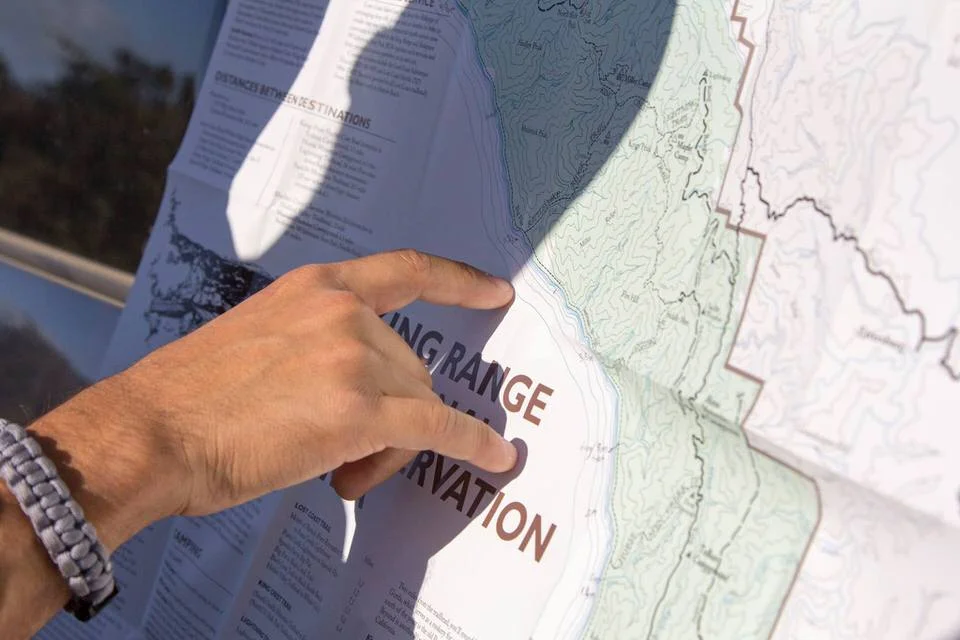
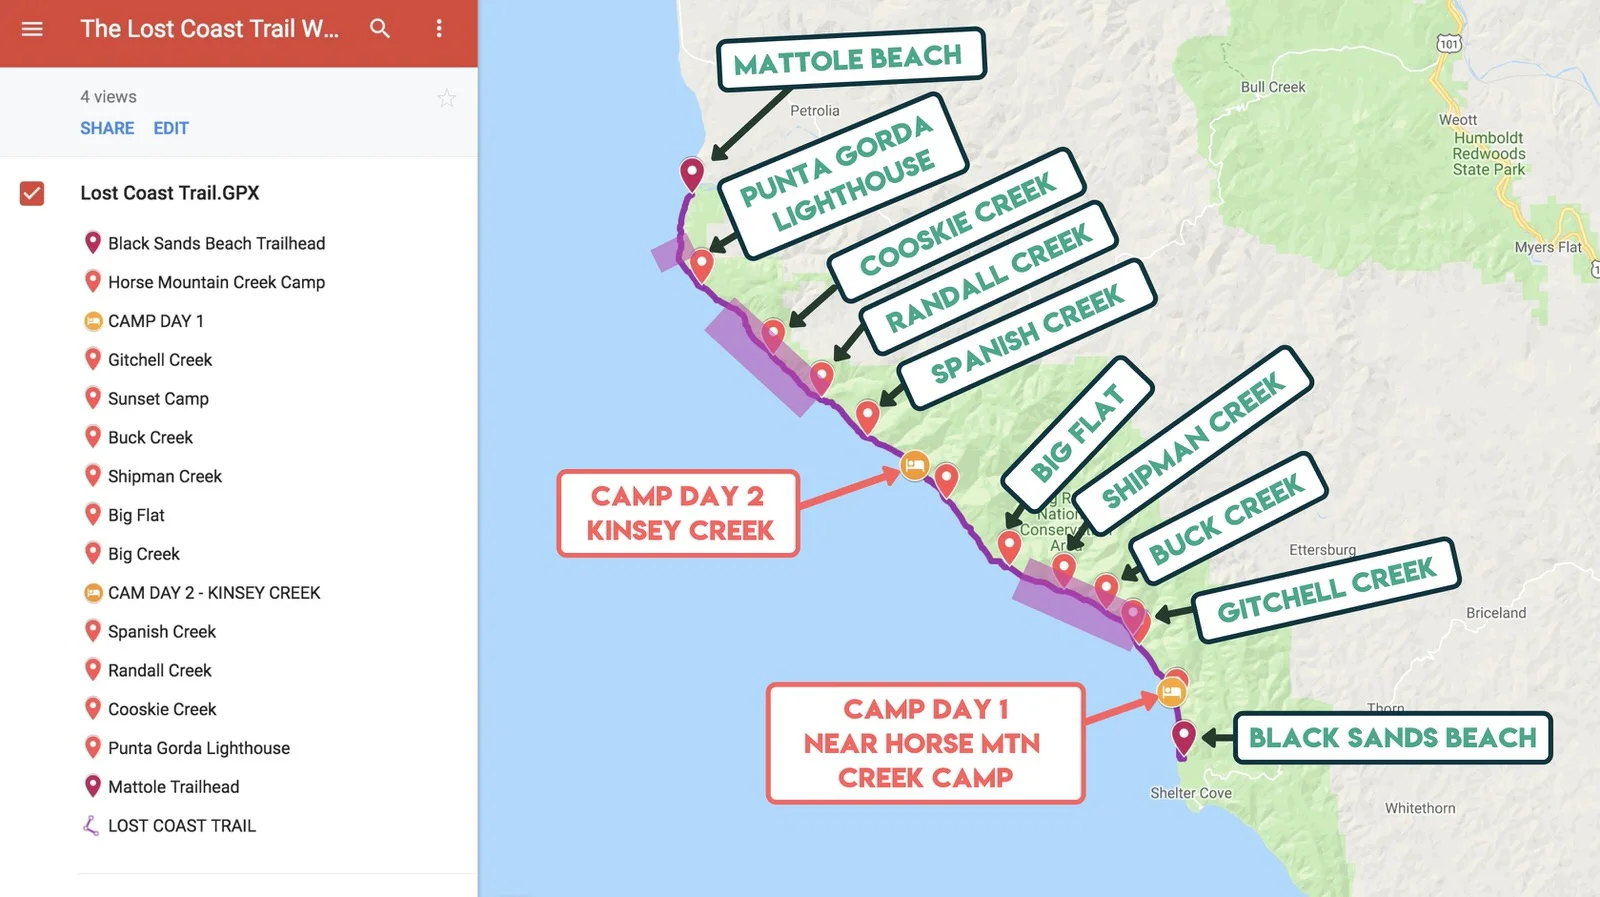
5) The Lost Coast Trail Map & GPX File
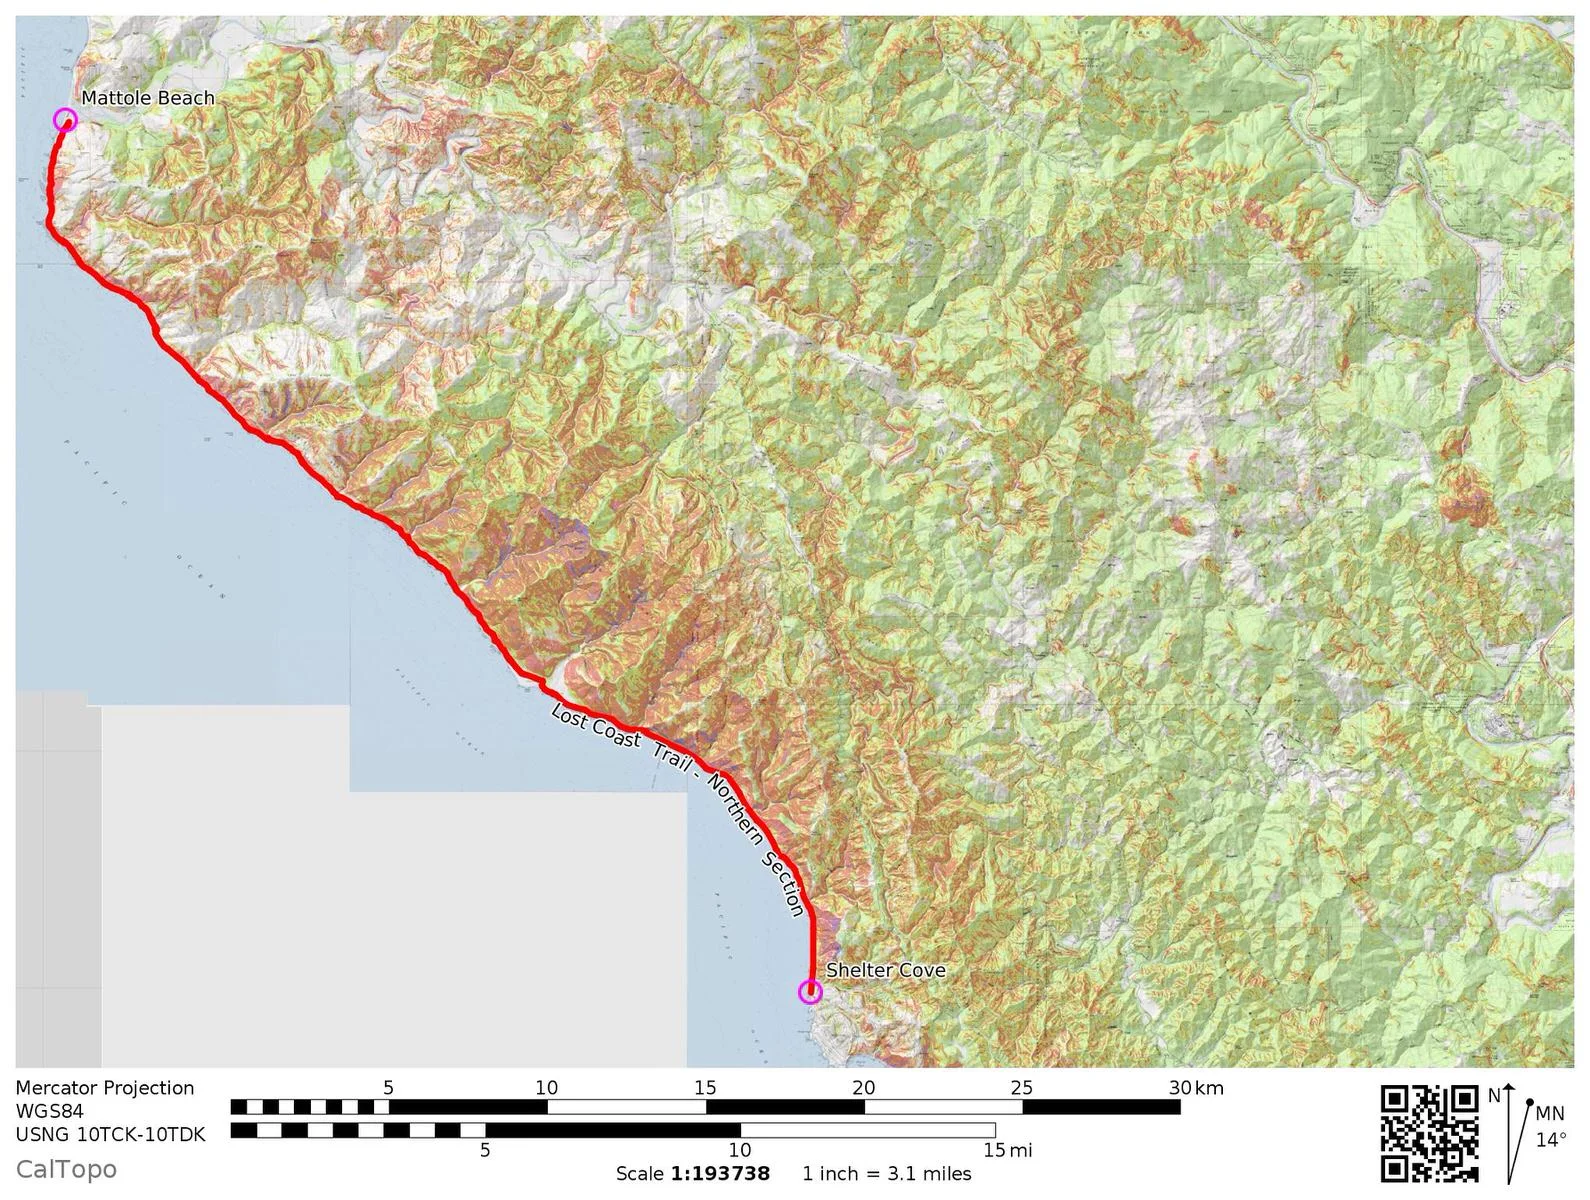
Backpacking the Lost Coast Trail would be pretty straight forward if you didn’t have to make sure to plan your hike according to the low tides. The trail pretty much just follows the coastline. Below is a Lost Coast map detailing many of the important landmarks along the trail from Black Sands Beach to Mattole Beach.
The important thing to note here are the 3 purple sections, which represent the general areas along the Lost Coast Trail that can become impassable during high tide.
This Lost Coast Trail map details all the key milestones of the hike - including the 2 campsites we choose to camp at on our specific journey on the Lost Coast Trail. If you click on the image below (or click here) you will be taken to an interactive map that you can further explore.
DOWNLOAD THE GPX FILE FOR THIS TRAIL
Knowledge is power my friend, and I'm a girl who loves data. Get access to this trails GPX file PLUS my library of GPX files with tracks and waypoints for all the trails loaded onto the She Dreams of Alpine blog.
Load this puppy into your trusted GPS and rest easy knowing you have tracks to follow on your next hike or backpacking trip.
DON’T HAVE A GPS? YOU SHOULD.
I believe every hiker and backpacker should strive to be self-sufficient, and that includes knowing how to practice smart navigational skills in the outdoors.
This is an important safety skill set that I teach in-depth inside of my backpacking program. There’s no reason to risk getting lost in the outdoors.
Here’s what I recommend to get started:
(Note: This list contains affiliate links)
Gaia is offering a special 20% discount on a premium account to those who subscribe online through my link.
Don’t know where to start? If you need help with some Gaia GPS basics, download my quick Gaia GPS navigation 101 guide.
2) Get an SOS Device: Once you are able to, I recommend investing in some sort of SOS communication device like the Garmin inReach Mini or the Garmin inReach Explorer+ . These devices provide not only GPS tracking capabilities, but also an SOS satellite search and rescue communicator and text communication abilities in the backcountry.
My Go-To Trail Setup: The Gaia GPS app (premium subscription) + the Garmin inReach Mini.
Alternative to Garmin: Pair your Gaia GPS App with the Zoleo SOS device . With this set up, the Gaia GPS App serves as your GPS navigation device, and the Zoleo serves as an SOS/communication device.
Learn more about the best GPS devices for hiking here.
>> Jump to Section 10 for a suggested Lost Coast Trail itinerary.
6) When to Hike the Lost Coast Trail
The beauty of the Lost Coast Trail hike is that it can be pretty much be done year-round thanks to the fabulous nature of California coastal weather. However, there is a more optimal time to do this trail which is from approximately May to October due to the higher precipitation and colder weather experienced during the winter and early spring.
If you do dare to hike this trail in the winter, be prepared with extra rain gear and expect some of the streams that enter into the ocean to be in full rage, which can make them somewhat difficult to cross! Check with the local BLM office before you set out on your hike for the most current weather conditions.
Here is the Lost Coast weather average temperature map for reference.
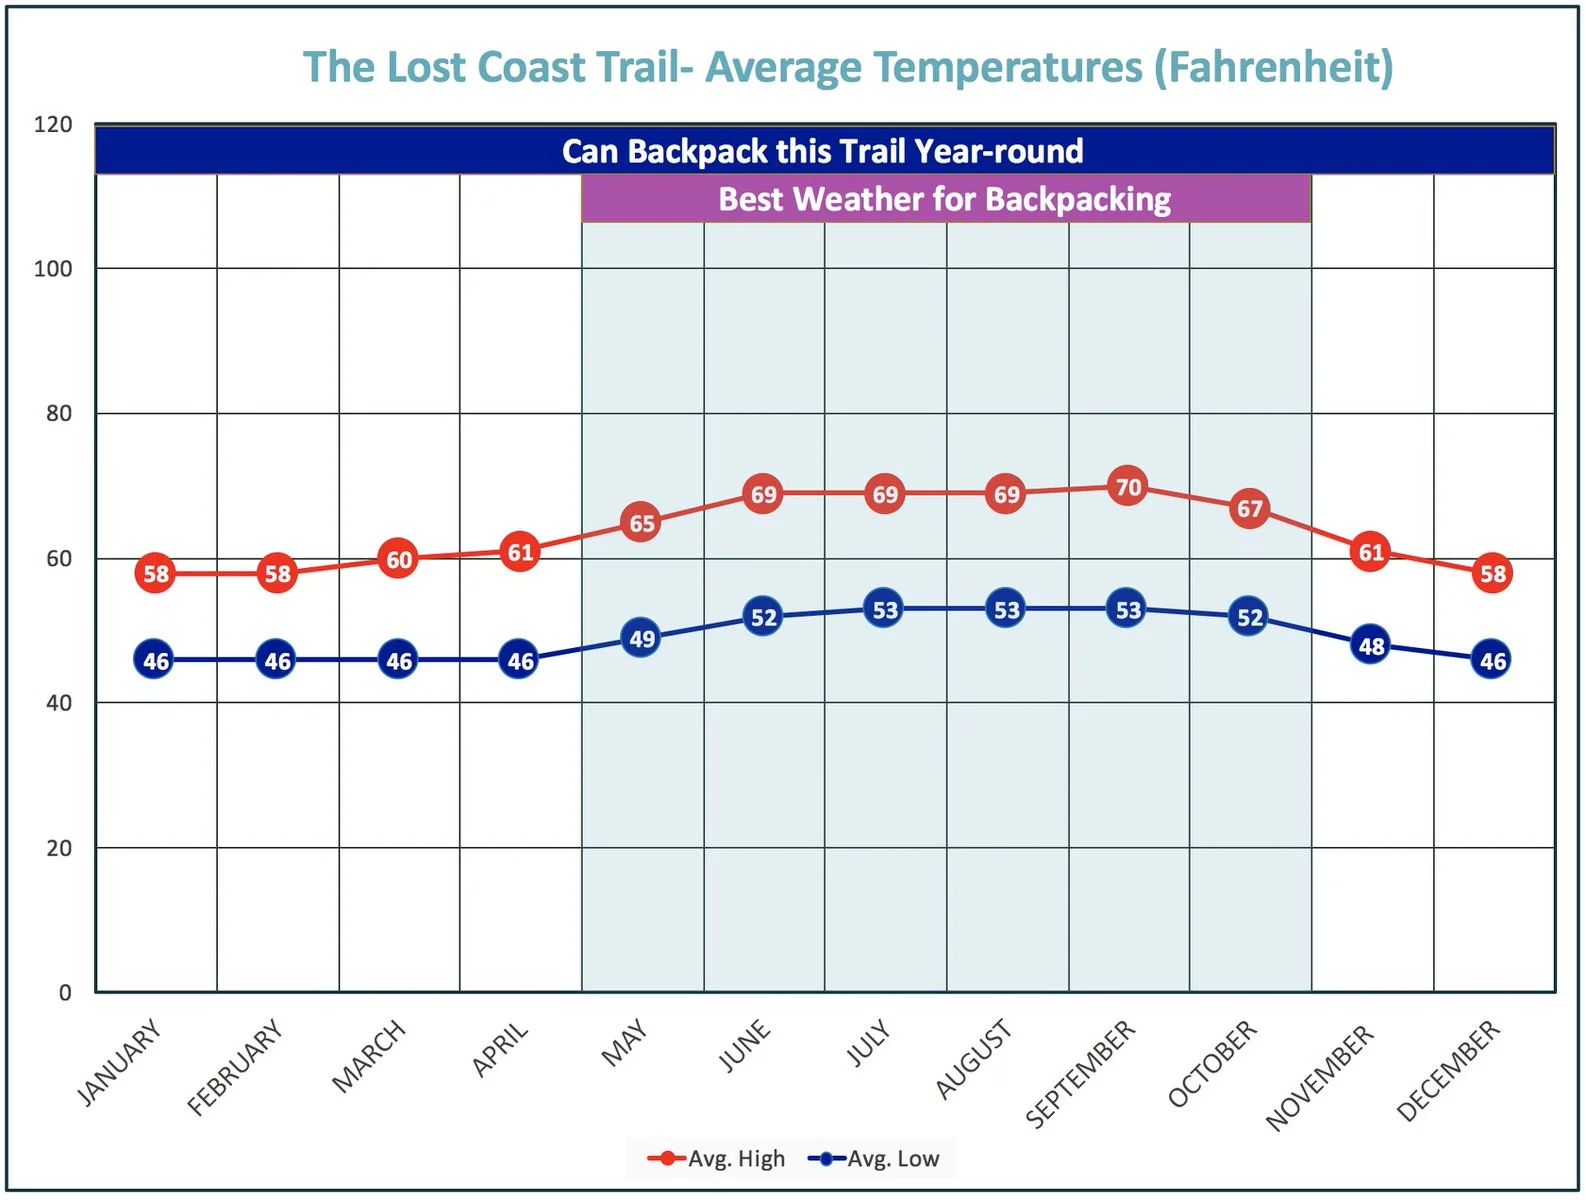
Also, you will have to plan your hiking time in order to avoid high tide – parts of the trail will be completely impossible to continue on at certain times of the day. Definitely grab a Lost Coast Trail tide chart before your hike, and make sure it is the current tide table as the high tide times change throughout the year.
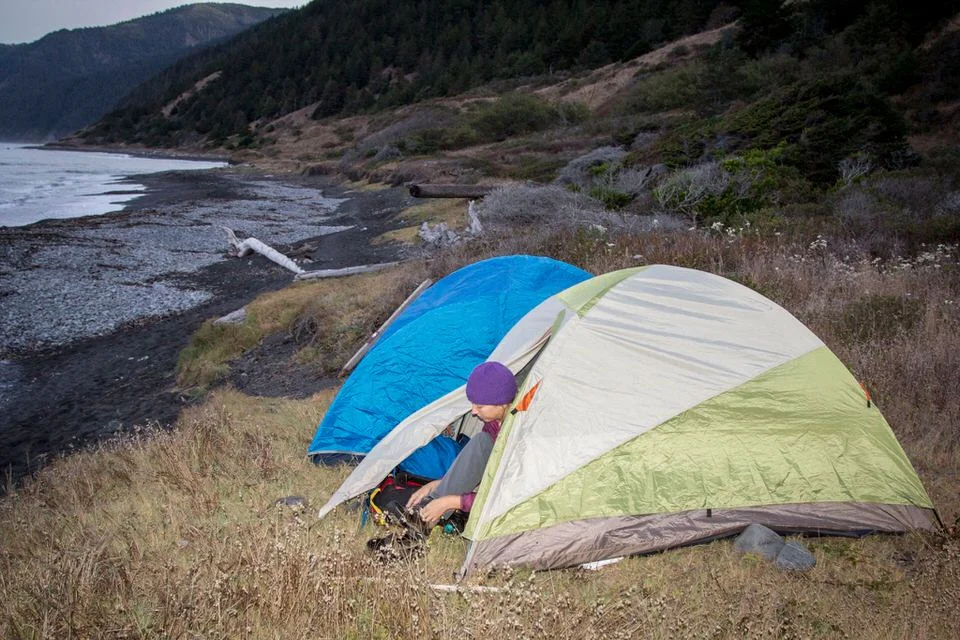
7) Lost Coast Camping
Camping Near the Trailheads (Pre-Hike)
If you come in a day before your hike, you have a few options for camping.
Camping at Mattole Trailhead Area: There is a car campground at Mattole that has several sites and potable water. You can also camp along the beach here.
Camping near Shelter Cove: The closest options to Shelter Cove are the BLM Wailaki Campground, the Nadelos Campground, or even a bit further out, the Tolkan Campground.
Camping Along the Lost Coast Trail

Along the Lost Coast Trail, there are not specific campsites, but you should always practice Leave No Trace and try to minimize your impact on the environment by camping in areas that appear to already have been used as campsites. Many of the primary campsites along the trail are located near the major streams that meet the ocean (as seen on the map above). Any of the below sites would make great camping options (listed from south to north):
Horse Mountain Creek (where we camped on night 1)
Gitchell Creek
Buck Creek
Shipman Creek
Big Flat
Big Creek
Kinsey Creek (where we camped on night 2)
Spanish Creek
Randall Creek
Cooskie Creek
8) Hazards of the Lost Coast Trail
While it’s tempting to want to try this trail as a beginner backpacker, even though the elevation gain is minimal, this trail has quite a few hazards that could definitely stress out a new backpacker. When planning your Lost Coast backpacking trip, pay particular attention to these hazards and plan ahead accordingly.
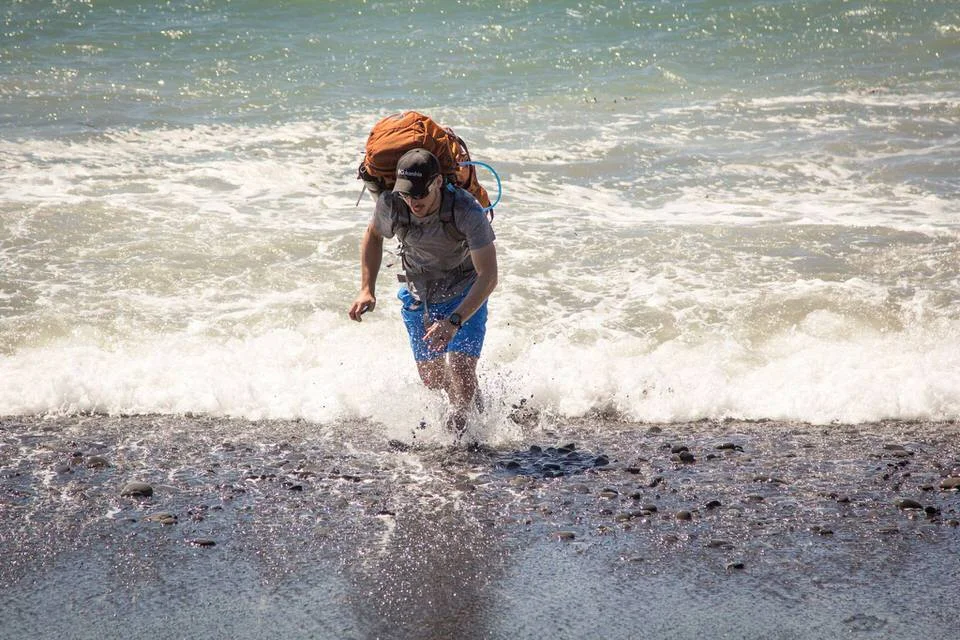
High Tides

You must plan your backpacking trip along the Lost Coast Trail a bit more strategically than other hikes because twice per day there are sections of the trail where the beach will be completely covered by the high tide. You do NOT want to find yourself stuck in these sections of the trail during high tide!
In particular, there are 3 stretches of the trail that are completely impassible during high tide. Two of these sections are around 4 miles long, so you absolutely must plan ahead of time to stay out of those areas during high tide. Keep in mind that on this rougher terrain you may only hike about 1.5 miles per hour, so take that into consideration when planning the timing of your Lost Coast Trail hike.
Before your trip, look at the tide schedule and print out a tide table. Failing to plan accordingly could be deadly.
Sneaker Waves
Never turn your back to the sea! Big rogue waves have been known to surprise hikers on the Lost Coast Trail, and conditions can change rapidly. There are powerful undertows in the water, so be very aware of what’s going on around you as you hike.
Uneven Terrain
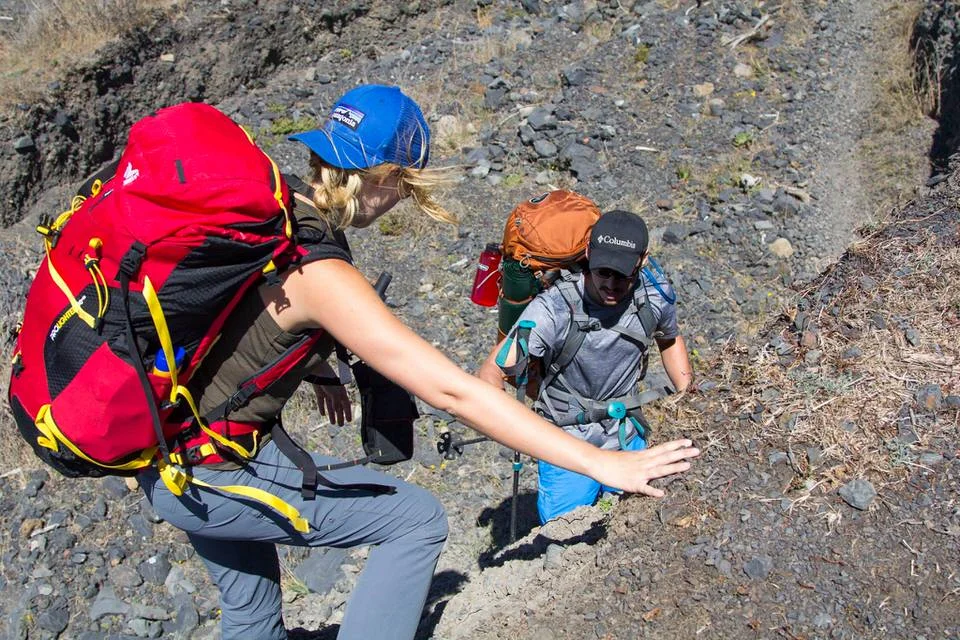
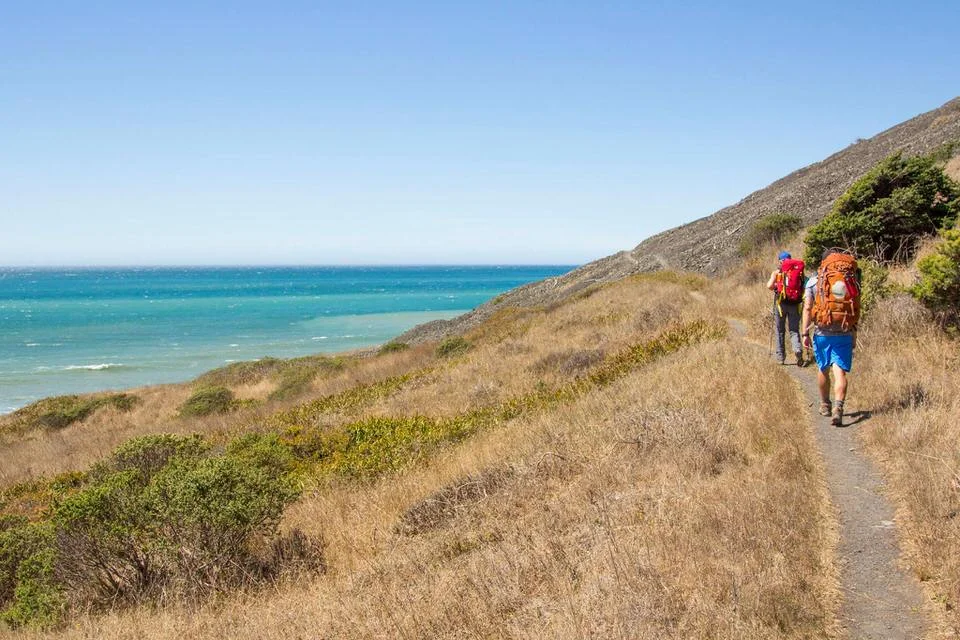
This was one of the things I completely underestimated on the Lost Coast Trail. The uneven terrain of hiking on sand (both loose and packed sand) plus long sections of trail that went on for miles over uneven pebbled rocks took a serious toll on all of our knees. After hiking miles of shoreline where there are bigger smooth stones, you’ll be relieved when you hit a stretch of firm sand.
Honestly, if you know you have issues with your knees, this might not be the best trail for you. If you think you can manage, I highly (highly!) recommend that you bring trekking poles to help stabilize yourself on the rough terrain and bring some padded insoles for your hiking boots to take some of the force away from your feet. I share my favorite recommendations for both in the “What to Bring” section of this post.
Also, be aware that there are sections of the trail where the cliffside juts in toward the water. In order to avoid getting wet, you may find yourself having to scramble over rocks a times, so make sure your shoes have good traction.
Poison Oak
There is lots of poison oak along the leafier portions of the Lost Coast Trail. Make sure you can identify what poison oak looks like (remember, leaves of 3, let it be), and know how to treat it if you happen to brush up against it. Of course, your best course of action will be to prevent coming in contact with it entirely, which is why wearing pants is advisable on this trail.
Wildlife

There is all kinds of wildlife along the Lost Coast Trail! We saw deer, seals, sea lions, hawks, starfish, and even bear tracks in the sand. While it was really cool to see all those animals, you should still take a few precautions when hiking the Lost Coast Trail to prevent any unwanted wildlife encounters.
Bear cans are required on the Lost Coast Trail (and can be rented ahead of time if you need them). Make sure to pack away anything that smells (including sunscreen and lipbalm, etc.) into your bear can at night and store the bear can away from your tent.
Also be on the look out for rattlesnakes (rare) and possibly ticks.
Contaminated Water Sources
There are plenty of freshwater streams available along the Lost Coast Trail, usually at most only a few miles apart. However, no matter how clear the water looks, it’s still super important that you always filter your water in the backcountry.
Here’s a great example of why!
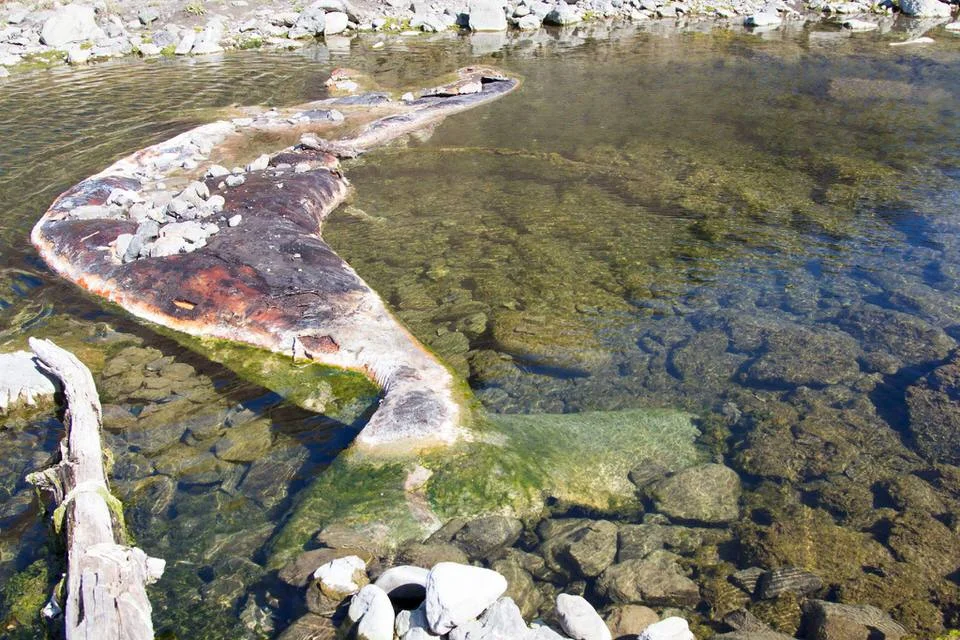
The photo above shows a dead whale we found in one of the streams we were considering filtering water at. We ended up not filtering water here because of the dead whale, but if you hadn’t walked up further in this stream and instead filtered water closer the beach, you might have never even noticed the dead whale. In fact, on our way back we had to warn some hikers who were filtering water closer to the trail about the dead whale. Always filter your water, folks. You never know what might be upstream.
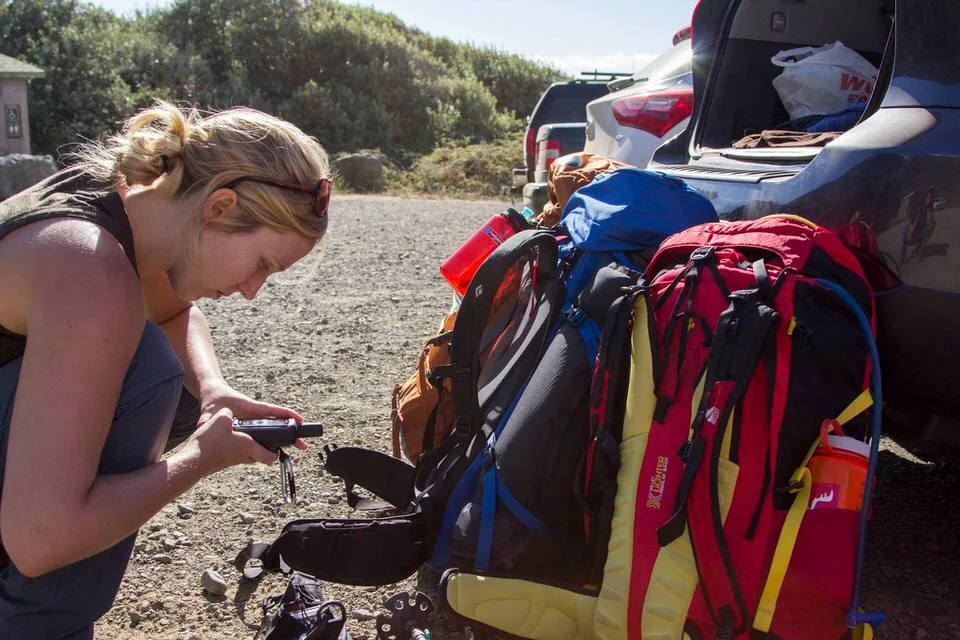
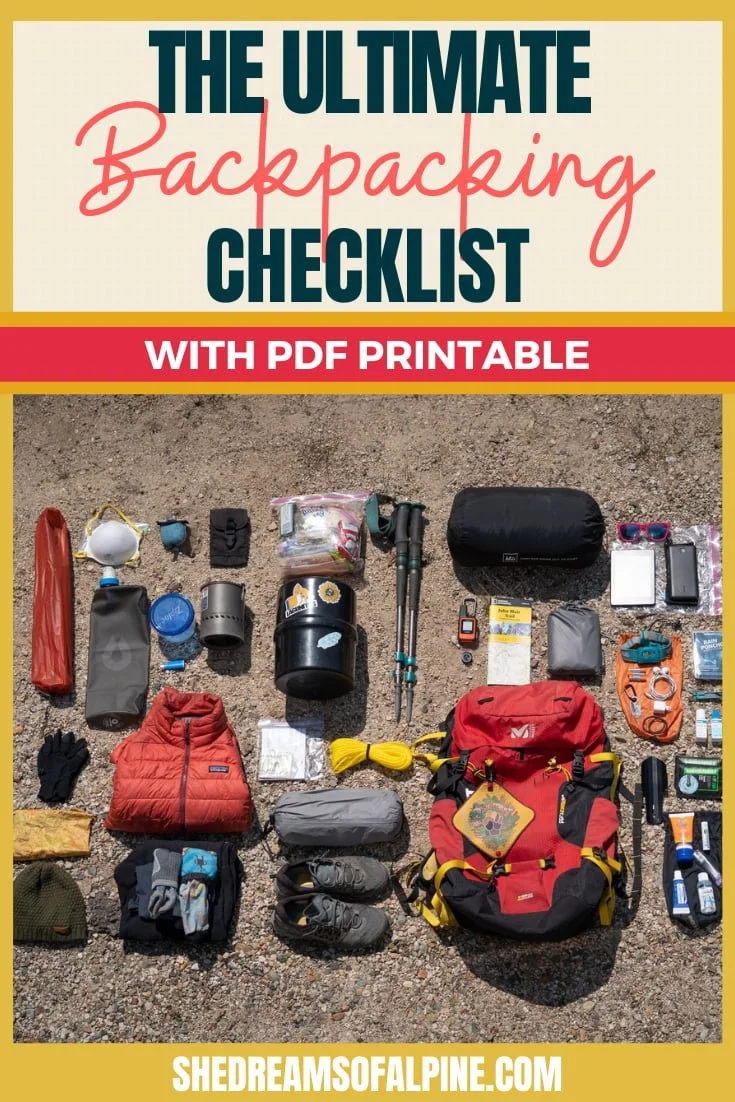
9) What to Bring on the Lost Coast Trail
Note: This list may contain affiliate links.
17) Camera Gear: Check out the photography gear we recommend for Outdoor Photography here!
18) Season-Appropriate Hiking Clothing: Check out My Essential Hiking Gear List for my recommendations on hiking clothing and layering - and don't forget to pack rain gear!
A GPS IS NICE TO HAVE: I swear by the premium version of the Gaia GPS app for your phone. It allows you to download maps in advance and take them offline into the backcountry - perfect for the Lost Coast Hike!
For my full backpacking gear list check out the link below:
WANT MY FULL BACKPACKING PACKING CHECKLIST?
Don’t leave anything behind on your Lost Coast Trail backpacking trip. Grab my Packing Checklist below!
In this freebie, you’ll get access to:
A Full Backpacking Gear Checklist for 2-5 Day Backpacking Trips
A Visual Backpacking Gear Checklist
Layering Essentials Tip-Sheet
25+ Backpacking Food Ideas for your upcoming Lost Coast Trail Hike

10) Suggested Itinerary for Hiking the Lost Coast Trail in California
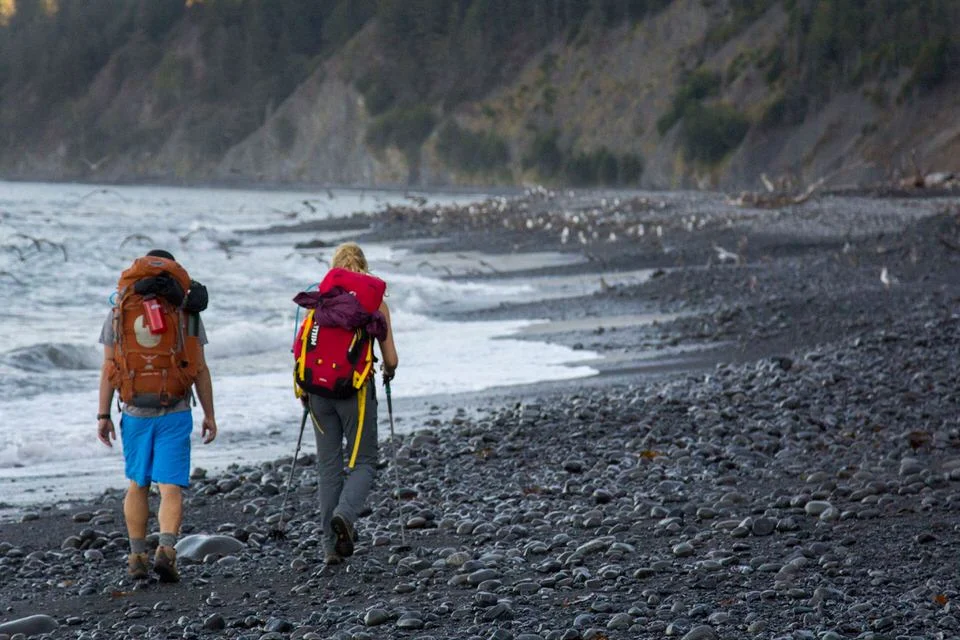
My group hiked this trail in 2 nights and 3 days, but you could also choose to backpack this trail in 3 nights and 4 days. You also need to decide whether to hike northbound or southbound. We choose northbound, however hiking southbound has its advantages because the wind tends to blow south, which could be better for your overall experience on the trail if it happens to be really windy.
The Lost Coast Hike is roughly 25 miles point-to-point (from Mattole Beach to Black Sands Beach). Here is how we split up our hike on the Lost Coast Trail into 2 nights and 3 days.
Day 1 - Shuttle Day + a Few Miles on the Lost Coast Trail
On our first day we parked a car at Mattole Beach Trailhead, then took a shuttle to Black Sands Beach Trailhead. We started our hike that evening, and hiked a couple miles away from Black Sands Beach and camped along side the trail (a little ways past Horse Mountain Creek Camp).
It was a long day in the sense that we did a lot of driving, but the backpacking was short and sweet, and we were off to the races straight away on day one, even though we only hiked a couple miles total.
Day 2 - Hike from Horse Mountain Creek Camp to Kinsey Creek Camp

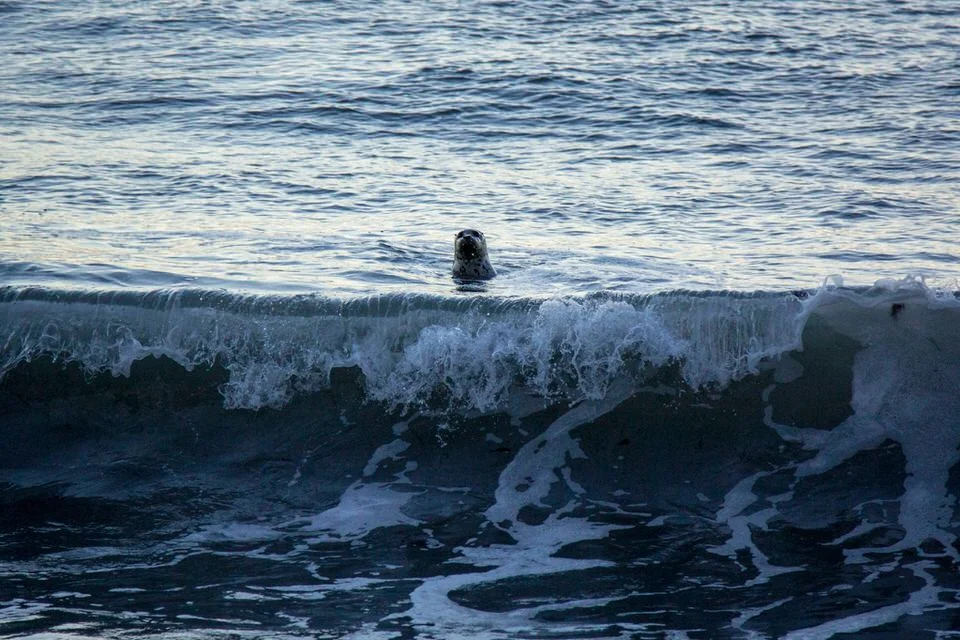
The second day was one of our longer backpacking days, and the views were absolutely stunning. We even made a friend (whom we called “Henry the Seal”) along our hike. I swear he followed us the entire way to Mattole beach.
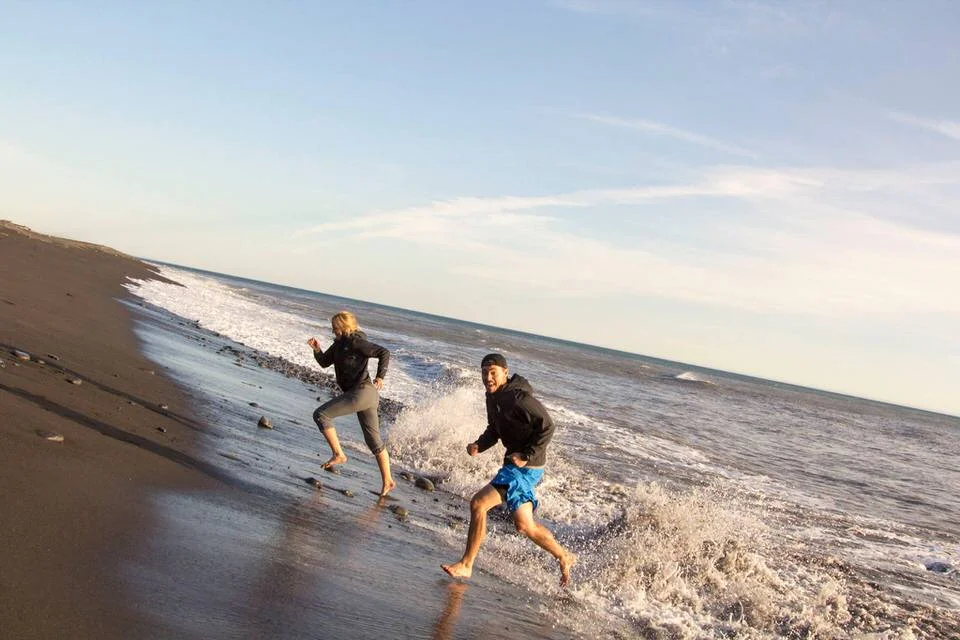
At the end of day 2, we made camp at Kinsey Creek and had enough time to enjoy the beach, play in the waves and watch the sunset over the ocean.
Day 3 - Hike from Kinsey Creek to Mattole Beach Trailhead
Day 3 had some rough terrain, but the hiking was beautiful and we saw so much wildlife on this section of the trail!

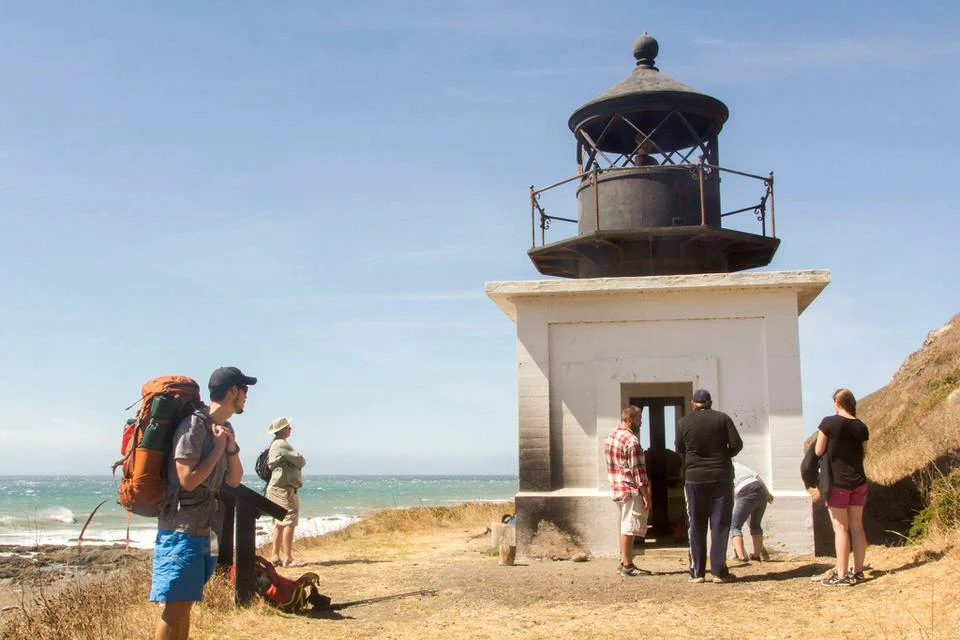
We eventually made it to the Punta Gorda Lighthouse, and then back to the Mattole Beach Trailhead where we started our long drive back home.
I had an absolutely amazing experience backpacking the Lost Coast Trail in California, and I hope this guide will help you do the same! If you plan to go, let us know in the comments below!
LOOKING FOR MORE CALIFORNIA ADVENTURES?
If you are looking for additional California hiking adventures, check out our resources below:
ESSENTIAL HIKING & BACKPACKING RESOURCES
Also be sure to check out these essential hiking & backpacking resources!
7 Tips to Hiking and Summiting Your First Fourteener Mountain
Important Permit & Reservation Deadlines for Popular California Hiking Trails & Campsites
Essential Backpacking Hygiene Tips & Feminine Care in the Outdoors
Cheers,
Allison - She Dreams of Alpine


Related Posts:


Backpacking the Trans-Catalina Trail in California | The Trans-Catalina Trail is a gorgeous trail where land meets the sea, set off the coast of the California mainland. So if you're looking for a hiking trail that is challenging but beautiful, "mountainous" but near the ocean, isolated feeling but still very close to civilization, then this is the perfect trail for you! It is one of a kind, and one you aren't likely to forget. | shedreamsofalpine.com