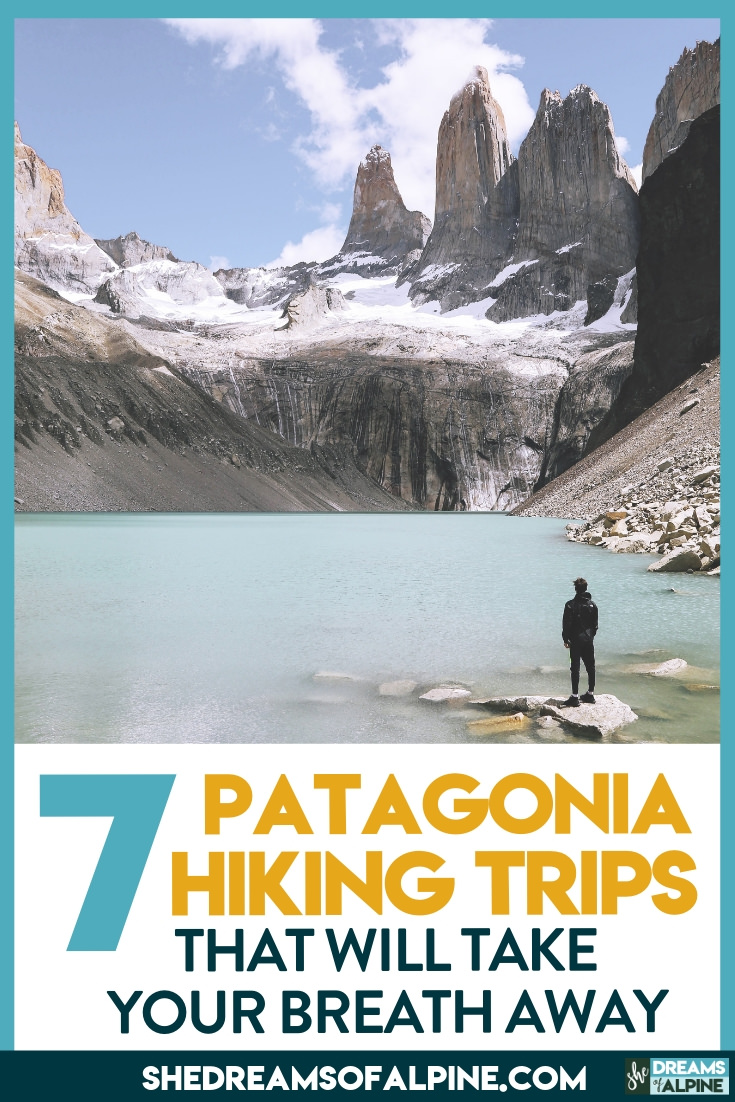
7 Breathtaking Patagonia Hiking and Backpacking Trips to Put on Your Trekking Bucket List!

It has always been a personal dream of mine to go on an epic Patagonia hiking or backpacking trip. To stand surrounded by the beautiful mountains of Patagonia, and stare up at iconic traverses like the Fitz Roy traverse.
I know that one of these days I will make it down to Chile with Michael to do some trekking and backpacking in Patagonia, but today I’m excited to introduce a guest writer, Jacob, who has been fortunate enough to play and explore all around the Patagonia Mountains and knows some of the best hikes in Patagonia. In fact, he’s a go-to expert on South American travel and is a fellow climber and hiker himself.
So without further ado, let’s dive into Jacob’s Guest Post about 7 breathtaking Patagonia Hiking and Patagonia Backpacking Trips to Put on Your Bucket list!
To learn more about Jacob, check out his full bio at the bottom!
7 Breathtaking Patagonia Hiking trips :

Trekking in Patagonia… this is the dream right?
Wake up in your cozy sleeping bag. Your eyes are still closed, but you hear the sound of a nearby stream soothingly trickling.
As you get out of bed to prepare your fresh coffee, you look over to see the first rays of sunlight hitting the spotless granite walls in the distance, glowing red.
You’re in the mythical land of Patagonia.
GRAB MY [FREE] OUTDOOR BACKPACKER STARTER KIT:
I created the Ultimate Outdoor Backpacker Starter Kit for you (and it's FREE)! This starter kit is filled with 14 pages of my best hiking and backpacking tips to help you learn what it takes to become a safe, confident, and self-sufficient outdoor backpacker!
During my 8 month solo trip through South America, I was able to see the best of what this pristine corner of the world has to offer. From massive granite peaks, massive calving glaciers and untouched pristine crystal blue waters.
Realistically, most people don’t have the luxury of taking the months of time off it takes to see all Patagonia in its entirety and to go hiking in Patagonia for months on end. For that reason, I’ve put together this list of the 7 most absolutely amazing Patagonian hikes which you need to put on your bucket list!
1. The Torres del Paine W Trek Loop

Trekking Torres del Paine Quick Facts:
Required hiking time: 4-5 days
Total Mileage: 80km (~50 miles)
Hike Difficulty: Moderate
Cost of Trek: $150-$200 (without tour)
Difficulty to Arrive to Trailhead: Easy
Difficulty to Navigate Trail: Very Easy
“Wow” Factor: 8/10!
When To Hike: October to May
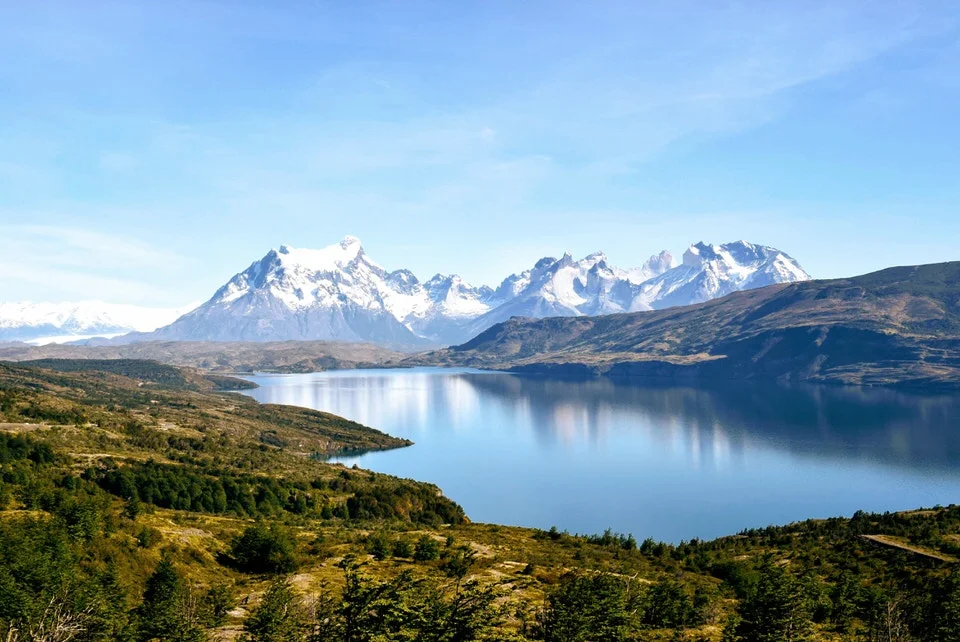
In the past few decades, the Torres del Paine National Park has risen from a fabled location far far away to a major global tourist attraction. It is easy to see why. It is famous for its icy blue glaciers, pristine rivers and lakes and incredible natural rock formations.
This park is one of the most naturally beautiful places on this planet, and the W Trek is one of the best Patagonia hikes.
I had the opportunity to do the W Trek Loop (and “O” loop explained later) back in 2017. Apart from this, I have over one year of collective travel experience in South America and without a doubt, the Torres del Paine National Park still remains, hands down, one of the most beautiful places I’ve ever been and one of my most memorable South American experiences.
It is an absolutely incredible natural wonder, and I suggest anyone with the ability to do so to go see if for themselves!
Hiking Patagonia’s W Trek Loop Logistics
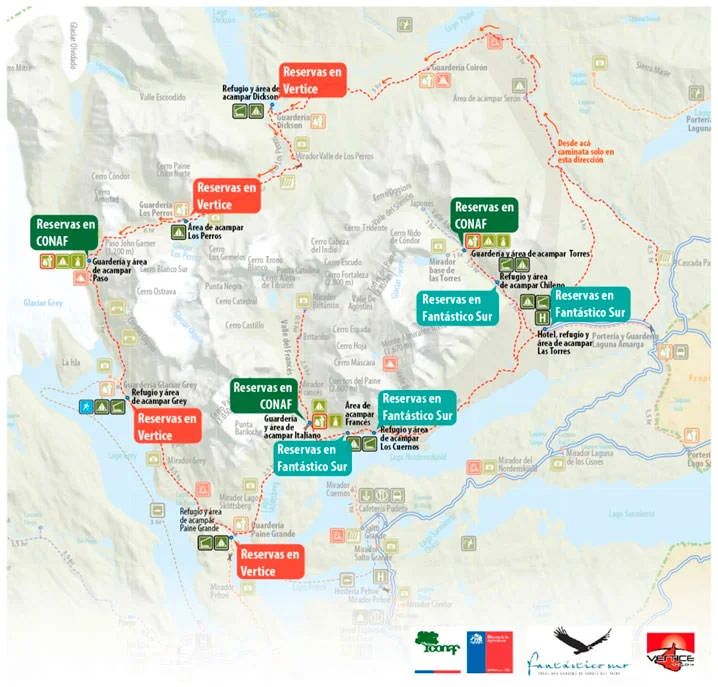
Note: Blue Dotted Line Marks the Route: Image Source
The hike is called the “W” loop because as this map shows, the path follows the shape of a W as it weaves up three separate valleys.
Though it is possible to start from either the West or the East sides, it is most common to start from the West and work your way East towards the park entrance.
You can do the W Trek loop in as much time as you’d like, but most people do it in 4 days. With a 4 day itinerary, you will be hiking about 6-8 hours with an average distance of 18-20km (11-12.5 miles) every day. If this sounds like too much, you can easily modify this to 5 days. If you’re pressed on time, the full loop can be done in 3 days.
When I hiked the loop in 2017, I only had reservations for 3 nights (more on reservations later) so I was forced to hike a bit faster than I would’ve liked.
With only 3 nights reserved I was hiking about 9 hours a day. It was a difficult pace, but if you are in good hiking shape it isn’t incredibly difficult.
If you’re short on time and don’t wish to hike this much, you can always simply modify the route, skipping certain parts as needed, in order to shorten the distance!
How to get to The Torres Del Pain W Trek in Patagonia
With the explosion of popularity surrounding the national park, getting to the Torres del Paine National Park is easy. Though it is possible to arrive to Southern Patagonia by bus, it is very far from any major city (and also expensive). For this reason almost everyone will arrive by plane, flying into the Punta Arenas Airport.
From the airport, there are daily buses to Puerto Natales, and from there you can purchase supplies, rent gear, and take one of the many daily buses directly to the park entrance.
There are three bus companies which can take you from Puerto Natales to the national park. The buses are all nearly identical, and charge around the same price of $15,000 CLP ($23 USD) for a round trip ticket.
The main bus companies are
The earliest busses leave around 7:30am, and arrive at Laguna Amarga (this is where you pay the entrance fee) around 9:30am.
Once you arrive to Laguna Amarga, you can either take the ferry to the west side of the loop to arrive at Pain Grande, or take the short bus ride to Torres Central, the east side of the park to begin your trek.
camping & accommodations at Torres del Paine National Park
EXTREMELY IMPORTANT: Due to the overwhelming popularity of this trek, all accommodations must be booked well in advance. Your reservations will be checked at the entrance to the park.
If you do not have accommodations booked ahead of time, you will not be allowed in.
There are a mix of both public and private accommodations available. Though it is most common to camp, there are also some hotel rooms and cabins available.
To be perfectly honest, the reservation system is very poorly organized. There are three different organizations which own the land to camp on, and you need to contact each organization individually to reserve your spots.
Here’s an overview of the 3 primary organizations to contact for camping and lodging for the W Trek:
1. CONAF - Camp Italiano, Camp Torres
CONAF is a private, non-profit organization which contributes to the preservation and conservation of Chile’s National forests. Their campsites are free, but for that reason fill up well ahead of time.
As of June 2019, reservations were not open for the 2019-2020 season.
Last year they opened in September, but I would advise you to register now and keep checking the site regularly.
2. Fantastico Sur - Camp Francés, Refugio Torre Norte, Los Cuernos, Torres Central and El Chileno
Fantastico Sur is a private company which is in charge of the Frances, Cuernos, Torres Central and El Chileno camp sites.
As of June 2019, bookings for the 2019-2020 season are now open.
3. Vertice Patagonia - Camp Grey and Paine Grande
Vertice Patagonia is another private company which is in charge of the Dickson, Los Perros and Grey campsites.
As of June 2019, bookings for the 2019-2020 season are now open.
Nowadays, reservations for the popular dates fill up about a year in advance. So if you’d like to do this treck you need to plan way ahead of time.
A very complete guide to the reservation processes for the W Loop can be found here.
What to bring for The W Trek Loop
Unless you’re one of the few who plan on staying in a room at one of the lodges, the W loop is all camping. There are restaurants at all of the refugios and some of the big ones, such as Pain Grande, even have shops where you can get food and supplies. The prices at the restaurants and shops are very expensive, so I would plan on bringing in and cooking most of your food.
There is an abundance of clean, drinkable, fresh water available on the path, so you don’t need to bring in water. All of the campsites offer taps you can use and there are many rivers, lakes and streams you will pass on the way.
Besides this, you’ll just want to bring your basic backpacking gear.
One of the advantages of a ridiculously well traveled trek like this is that it is very easy to obtain all the supplies you need for the hike in the town of Puerto Natales.
This includes all camping gear (buy or hire), clothes and food. So don’t sweat it if you forget something!
when to hike the Torres Del Paine W Trek Loop
The season for the loop opens in October and closes in May. The “best time” to go, as far as weather is concerned, is the Southern Hemisphere summer during the months of December to February.
This is, however, by far the most busy, and camping reservations for these time slots fill up over a year in advance.
For this reason, the “shoulder seasons” are becoming increasingly more popular.
Keep in mind that even in the summer the weather is unpredictable. There is a lot of wind and rain and it is common to experience all 4 seasons in one day. So come prepared.
2. The Torres del paine O Trek Loop

Trekking Torres Del Paine O Trek Loop Quick Facts:
Required hiking time: 8-10 days
Total Mileage: 120km (~74 miles)
Hike Difficulty: Difficult
Cost of Trek: $250-$300 (without tour)
Difficulty to Arrive to Trailhead: Easy
Difficulty to Navigate Trail: Easy
“Wow” Factor: 9/10!
When To Hike: November to March
If you with the time and desire you should consider hiking the full “O” Trek loop around the Cordillera del Paine.
This hike requires a bit more commitment, planning, and a higher level of fitness as, in total, the trek is approximately 120km (~74 miles)!
This hike isn’t for the faint of heart, and few will be willing to take on the challenge, but for those who do, you will be rewarded with fewer crowds, remote wilderness, and a true Patagonia trekking experience you’ll never forget. It’s by far one of the best treks in Patagonia.
O Trek Loop Logistics

Note: Blue Dotted Line Marks the Route: Source
The “O” loop is actually a combination of the earlier mentioned “W Trek” and also includes the backside of the cordillera. This means that you’ll get all of the highlights of the “W” in addition to getting a few more days of tranquility on the backside.
Though it is possible to do the loop both ways (either clockwise or counterclockwise), it is most common to start Las Torres Hotel and then hike towards the Serón Camp.
After a 3-4 days, you will arrive at the Paine Grande Refugio, where you can continue the rest of the W loop if you choose.
Of course, there are no “rules” to how you have to do the loop, so you can always shorten or elongate the trek to fit your own time restraints and requirements.
How to get to the O Trek Loop
Getting to the “O Trek” loop is the same as getting to the “W Trek” loop, so refer to the upper section above (except for one small difference).
Most people start the “O” loop on from the east side of the park from the Torres Central Refugio, and work their way in a counterclockwise direction towards Camp Seron.
The “W” loop on the other hand, normally starts from the west side of the park at Pain Grande, and then works it way east back towards Torres Central.
camping & accommodations at Torres del Paine National Park “O Trek”
Similar to the “W” loop, with the “O” loop you’ll have to make all of your reservations well in advance. There are the same three companies for the “O” loop which offer accommodations. See W Trek Camping and Accommodations Section above for more details.
Remember, reservations must be made far in advance for the popular dates. If you do not have proper reservations, you will not be allowed into the national park!
What to bring for The O Trek Loop & When to hike
The best time to go to Patagonia and what to pack are same as for the “W” loop, so refer to those sections for more information.
The most difficult thing to pack on this trek is your food, as the “O” loop is much longer and more remote than the “W” loop.
In addition, the camps on the backside of national park don’t have shops or restaurants like those on the “W” loop do, meaning that if you run out of food, you’ll be on your own!
However, with a bit of planning, any unpleasantries can easily be avoided. There is a very good grocery store in Puerto Natales called UniMarc which is full of food specifically designed to bring on the trek.
Water is plentiful on the trek, so make sure to bring as much dehydrated and vacuumed sealed foods as possible.
3. Day hiking to the refugio frey
Trekking El Refugio Frey Quick Facts:
Required hiking time: 1-2 days
Total Mileage: 25km (~15.5 miles)
Hike Difficulty: Moderate
Cost of Trek: $20-$50 (if taking 2 days)
Difficulty to Arrive to Trailhead: Easy
Difficulty to Navigate Trail: Very Easy
“Wow” Factor: 8/10!
When To Hike: October to May
Located just outside the Bavarian themed town of Bariloche is the hike to Refugio Frey. Nestled in the mountains of Patagonia and bordering the beautiful Nahuel Huapi lake, Bariloche has exploded in popularity as both an international and domestic tourist attraction.
Bariloche is arguably one of the most beautiful towns on the planet, and has access to some of the best outdoor opportunities Argentina has to offer such as hiking, trekking, camping, rock climbing, skiing, kayaking and fishing.
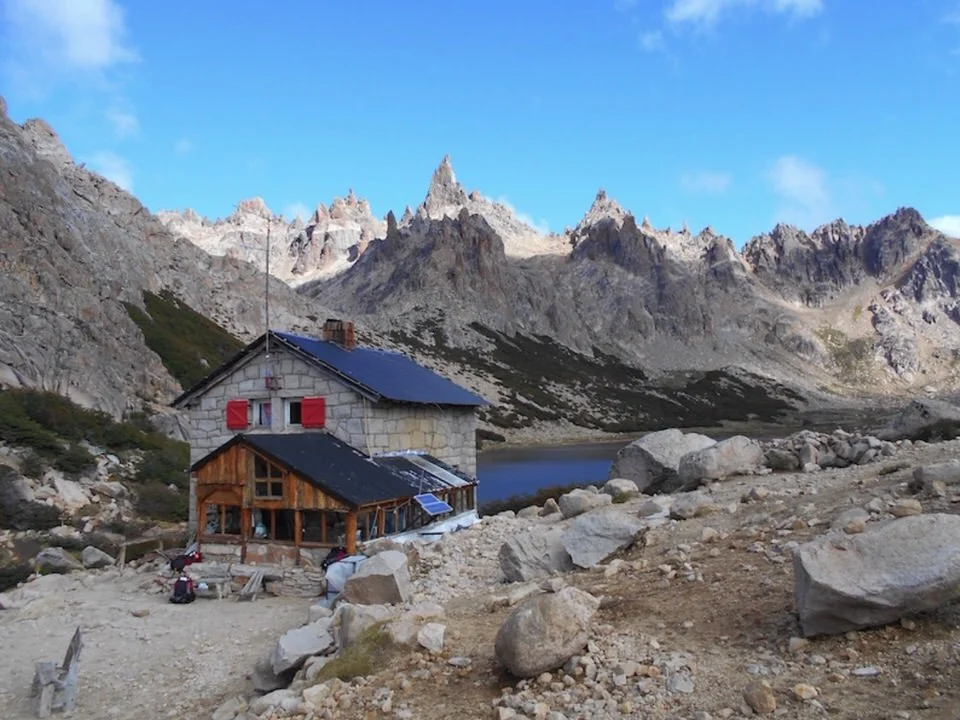
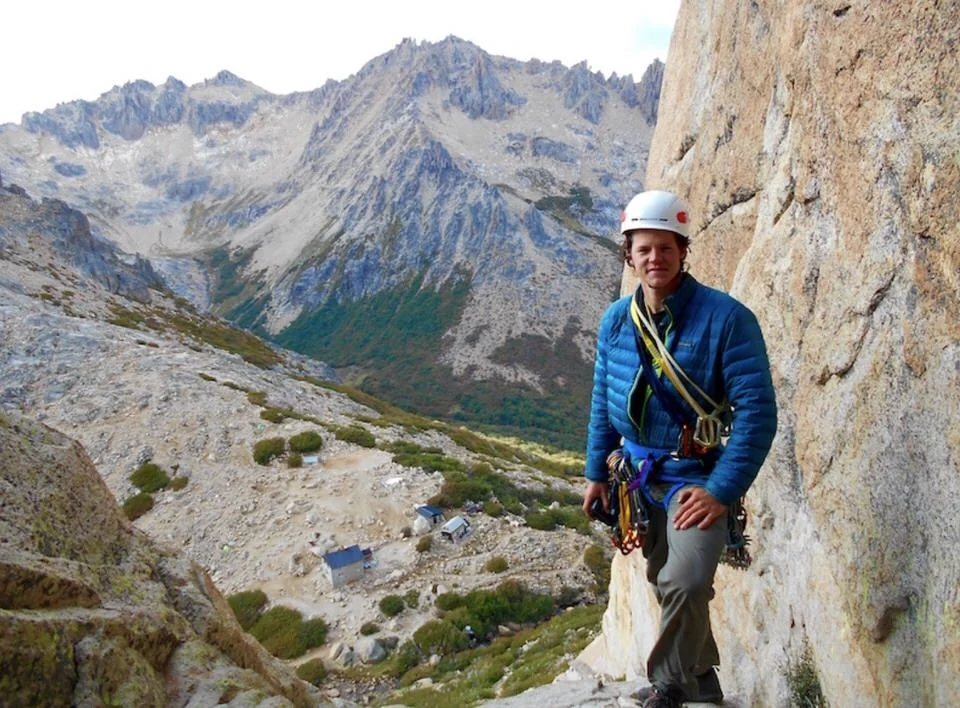
The hike to Refugio Frey first gained popularity from rock climbers in the 1980s. The granite spires around the Refugio are some of the best trad crack climbing on the plant, and climbers from around the world flock here each season to test their limits.
This is one of the most popular and most beautiful day hikes from the city, and is most likely one of the prettiest day hikes you’ll ever do.
In one hike you’ll have stunning views of Patagonian wilderness, wild granite spires and pristine lakes and streams. It’s a full-value outdoor Patagonia experience.
The path is challenging, with around 300m of elevation gain, but well traveled and easy to follow.
There is a whole network of treks around the Refugio Frey, so you can easily extend this hike from 2 days to more. Here is a great reference on the hikes around Refugio Frey and nearby Refugio Jakob.
How to get to Refugio frey and back
To arrive at the Rugio Frey, first you must take the number 55 bus which reads “Villa Catedral” on the front. Ride the bus up the mountains and get off at the last stop at the Villa Catedral, which is the local ski resort.
The bus takes about 45 minutes to one hour. The first bus in the morning leaves Bariloche’s terminal towards Villa Catedral at 7am. The last bus from Catedral towards Bariloche leaves the parking lot around 10pm.
NOTE - You cannot pay for the bus with cash. You must first purchase a SUBE card. These can be found all over the town of Bariloche at all corner shops.
Keep in mind that this is the same SUBE card that can be used all over Argentina, so if you have already bought one in Buenos Aires, for example, you don’t have to buy another!
Once getting off of the bus, cross the parking lot to the other side. You’ll see a sign which reads “Refugio Frey”. Simply follow this path for the next 3-4 hours to arrive!
camping & accommodations on the Refugio frey hike
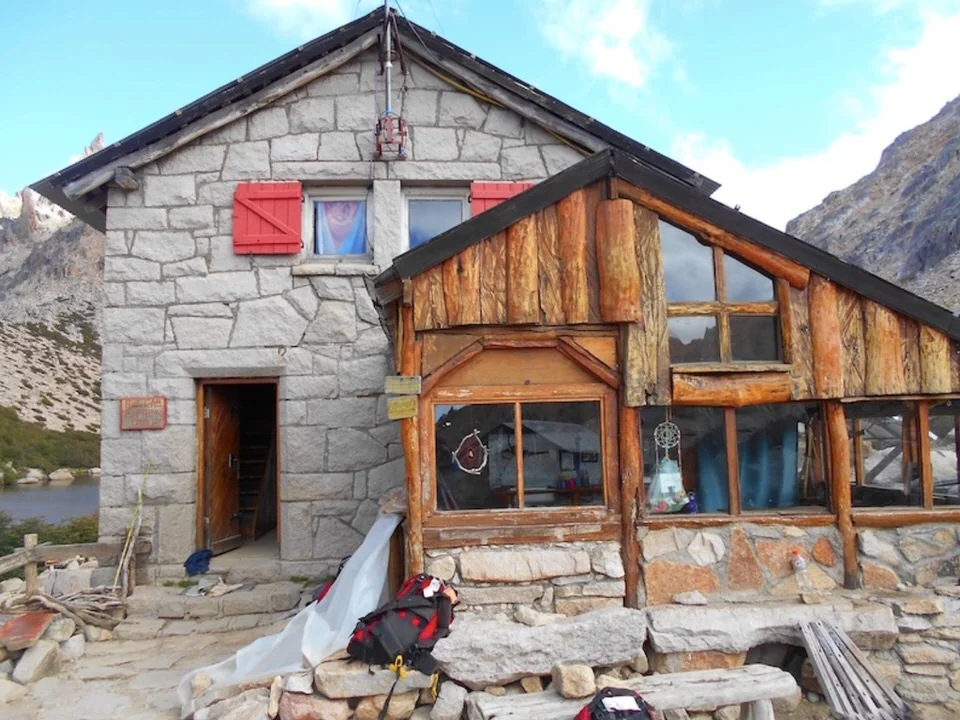
Though the hike is possible to do in a day trip, it takes anywhere from 4-6 hours from Bariloche to arrive at the Refugio. For that reason most people break it up into two days.
The Refugio has beds available for renting and camping. The 2018/2019 cost of accommodations are as follows
700 ARS ($16 USD) - You need to bring your own sleeping bag
150 ARS ($3.30 USD) - Use of Kitchen
100 ARS ($2.20 USD) - Use of Toilet
480 ARS ($11 USD) - Diner
Free - Camping
There is a limit on the number of beds and camping spaces available. Because of the limited number of beds, you have to make a reservation beforehand, both to stay in the Refugio and to camp.
These reservations need to be done a minimum of two days ahead of time, but in the summer months it should be done much earlier. You can make reservations here.
What to bring on the Refugio frey hike
I will assume for this post that you are doing the hike in two days, as this is the most common method. If you are planning on doing the hike in one day you will need much less stuff!
The Refugio has a fully stocked kitchen that you can use and a small restaurant that makes excellent pizzas. There is also a communal kitchen available for use. If you’re planning on cooking yourselves, you’ll only have to bring your desired food for dinner, breakfast and two days worth of lunches (one for the way up, and one for the way back!).
Though there are both rivers and streams near The Frey, the water is not drinkable due to the presence of some naturally occurring toxic minerals.
For this reason you’ll have to bring your own bottled water from town or some sort of filtration device. The Refugio also has a filter that you can use to fill up your water bottles.
If you plan on sleeping in the Refugio, they have a dormitory style rooms, but keep in mind that you still will have to bring your own sleeping bag. Be sure to make a reservation ahead of time.
If you plan on camping, you’ll have to bring your own tent, sleeping bag, sleeping mat etc… It gets very cold at The Frey at night, especially from autumn until spring. In addition, the wind here is strong, and sudden freak rainstorms are also common.
It is normal to experience all four seasons in one day here!
During my one week stay at The Refugio Frey in March-April of 2017, we had rain, snow, heavy wind and pristine blue skies. Literally all types of weather imaginable! Make sure to bring layers and pack for all weather conditions.
when to hike to Refugio frey
Though the trail is technically open all year round, the best time to hike Patagonia’s Refugio Frey hike would be the Southern Hemisphere summer months.
This is a very popular day hike for both tourists and Argentinians, so if you go during the summer holidays (middle of December to the beginning of March), it will very likely be busy.
If you do go at this time, it is advisable to start the hike as early as possible to beat the crowds.
The shoulder months of Nov-Dec or March-Feb also offer great spring or autumn weather conditions, and are a great time to complete the hike. Not only will there be less people, but the temperatures will be cool and crisp as opposed to hot and balmy.
That being said, Patagonia is notorious for bad weather at any time of year, and The Frey is no different.
Make sure to check the weather before you go, as you could easily get caught in a bad storm!
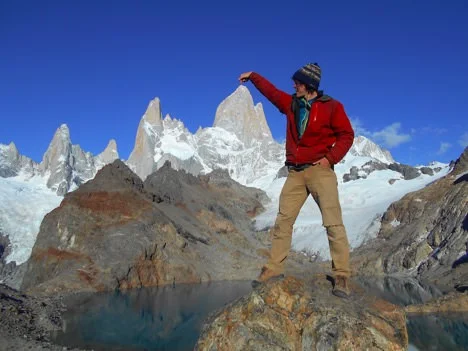
4. Hiking El Chalten Laguna De Los Tres
Trekking El Chalten Laguna De Los Tres Quick Facts:
Required hiking time: 1-2 days
Total Mileage: 25km (~15.5 miles)
Hike Difficulty: Moderate
Cost of Trek: Free
Difficulty to Arrive to Trailhead: Easy
Difficulty to Navigate Trail: Very Easy
“Wow” Factor: 10/10!
When To Hike: November to March
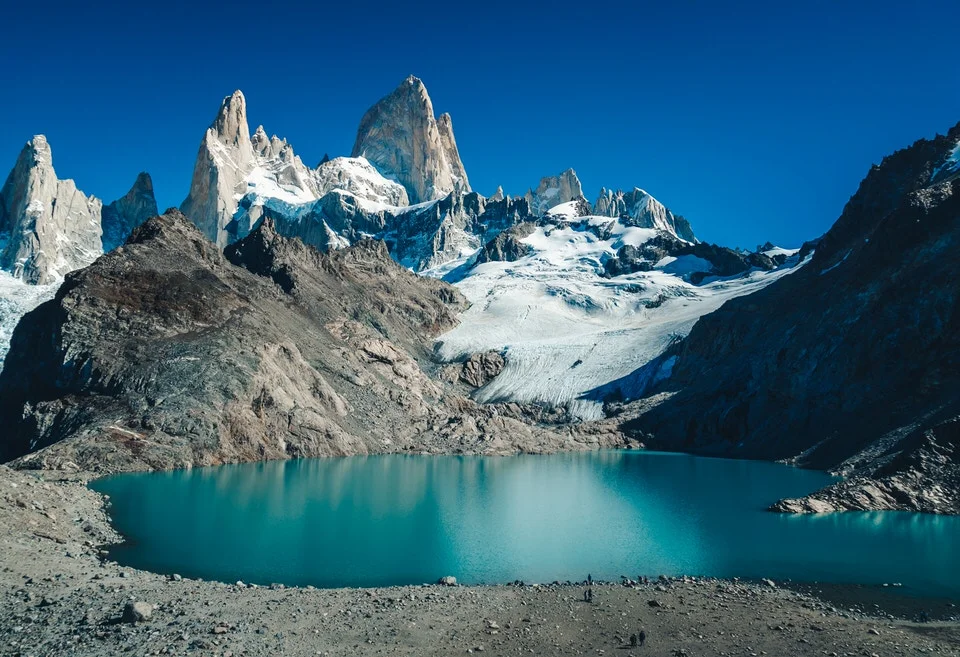
Located just outside of the small town of Chalten, the Laguna de Los Tres is one of the world's most incredible day hikes you’ll ever do, period, and one of my favorite Patagonia hiking trails.
Here you’ll be able to see incredible views of the Fitz Roy Massif, the legendary red Patagonian sunrises and the absolutely stunning crystal clear waters of the Laguna de Los Tres which reflect the incredible spectacle like a perfect mirror.
The hike is at a nice moderate grade for the most part, starting off a little steep for the first few km, then maintaining a moderate gradual slope upwards until reaching Campamento Poincenot, 2 km before the laguna.
The last two kilometers are very steep, as you gain about 700ft of elevation in that distance, but once you reach the top you will be rewarded with a view of one of the world’s most beautiful natural wonders.
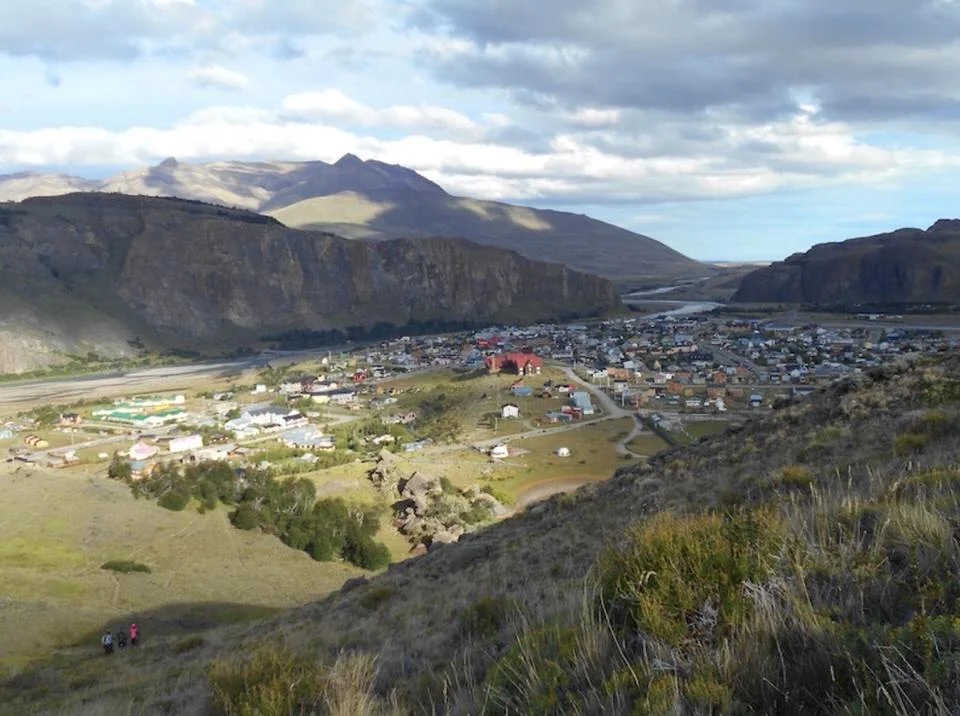
How to get to the El Chalten Laguna De Los Tres hike

To complete the Laguna de Los Tres hike, first you’ll have to arrive in the town of El Chalten. The closest airport is “El Calafate Airport”, located about 200 km away from the town.
From the airport the company Lengas has regular busses which go directly to El Chalten. It will take you about three hours to arrive.
The trail to the Laguna de Los Tres starts on the edge of town at this trailhead. The trail is very well marked with signs the entire way until you reach the laguna.
The entire trail is now on Google Street view, so you can get a taste for the views before you even go!
camping & accommodations at the Laguna De Los Tres
For accommodations you have two options. If you are doing the day hike, you will be able to stay in the town of El Chalten at one of the many places available to stay.
If you’re planning on breaking the hike up into two days you’ll have to spend a night at Campamento Poincenot.
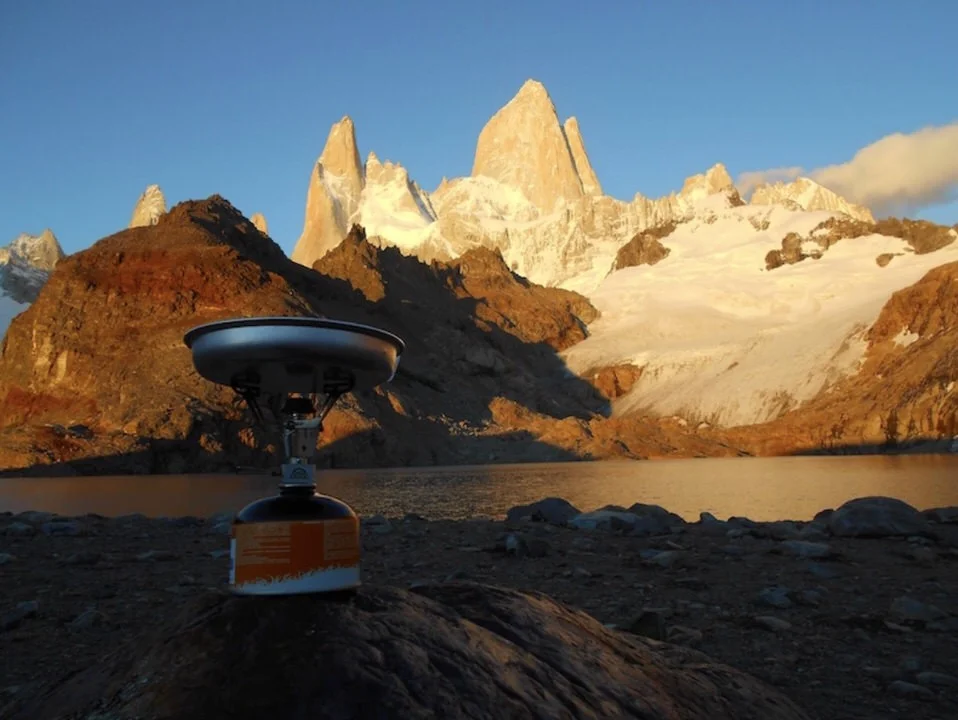
This hike can be quite easily done in one day. However, I suggest breaking it up into two days and camping at Poincenot so that you have the chance to go to the Laguna in the morning to get sunrise pictures of the Fitz Roy!
The camp is located at km 8 on the trail. Staying overnight here allows you to get to sleep early, then wake up before dawn to finish the last hour of the hike in order to be in a position to see the sun hit the Fitz Roy in the morning.
What to bring for the Laguna De Los Tres hike
The hike can be done from El Chalten to the Laguna and back down in about 8-9 hours. If this is your plan all you need to bring are essential day hiking gear.
If you chose to spend the night at Campamento Poincenot in order to catch the legendary red sunrises, you’ll need all of the basic backpacking gear, as Poincenot has no amenities whatsoever.
A few absolutely essential pieces of gear for this hike are: a good rain jacket, a windbreaker, sunglasses and sunscreen. The last hour of the hike is also quite steep, so trekking poles wouldn’t be a bad idea but they certainly are not required.
when to hike the Laguna De Los Tres
The trail is open year round, but as with most of the hikes on this list, the best time to do it is spring to fall, but the “best” time is the summer months of December to February.
Patagonia is notorious for bad weather, freak storms, strong winds, and quickly changing conditions. Though it is slightly more predictable in the summer, it is by no means guaranteed. Weather can change hourly, so your best bet is to come to Chalten with a few extra days in case you need to wait out a bad storm.
I was in El Chalten in January, and during my two weeks there about half of the days were very rainy and cloudy, while the other half sunny. I was told that this was considered “very good” weather, as it is normal to have stretches of rain for weeks or even months at a time.
You can do the hike even with bad weather, but you'll be missing out on the picturesque views which has made El Chalten so famous.
5. El Chalten Laguna Cerro Torre Hike

Picture Source: Wikimedia Commons
Trekking El Chalten Laguna Cerro Torre Hike Quick Facts:
Required hiking time: 6 hours
Total Mileage: 22km (~14 miles)
Hike Difficulty: Easy
Cost of Trek: Free
Difficulty to Arrive to Trailhead: Easy
Difficulty to Navigate Trail: Very Easy
“Wow” Factor: 8/10!
When To Hike: November to March
For those of you looking for an incredible day hike right outside the edge of town, look no further. The hike to the Laguna Cerro Torre is one of the most famous hikes in all of Patagonia, and for a very good reason.
This is one of the only places in the world you’ll ever be able to see massive granite spires like this without the requirements of a serious remote expedition.
Imagine waking up in your hotel and being able to literally walk across the street to the trail, and have views like this only a few hours later!
The Cerro Torre hike is one of a kind in its access to absolutely stunning views after only a relatively short walk.
The best part is that this hike can be combined with the Laguna de Los Tres hike, making for an incredible short 2 day trek with views that most will only see from a postcard!
How to get to the laguna cerro torre hike
Similar to the Laguna de Los Tres Trek, this hike can be easily accessed from the town of El Chalten.
The trail leaves from the south west end of town next to the river Rio Fitz Roy. The exact location of the trailhead can be seen here.
The trail initially starts slightly steep immediately after leaving town, but then flattens out and remains so for the rest of the walk. After about an hour of hiking, you will reach the Mirador Torre, where you will be able to see the towers for the first time if the weather is clear. From the Mirador Torre, follow the trail on an initially slightly downward direction for another 1.5-2 hours or so until you reach the Laguna.
If the weather is good, you will have excellent views of all three needles of the Cerro Torre spire and the Cerro Torre Glacier.
camping & accommodations at the laguna cerro torre hike
This hike is an easy day hike. If you are staying at the town of El Chalten, you can certainly arrive at the lake and be back to the town in one day.
As I mentioned before, it is a popular option to connect both the Cerro Torre and Laguna de Los Tres hikes into one trek without returning back to El Chalten. If you choose to do this, you will have to stay at one of the designated campsites. Campamento De Agostini is a free campsite (with no service) located near the Laguna Torre viewpoint.
If you are coming from the other direction from the Laguna de Los Tres hike, you will most likely want to stay at Campamento Base Poincenot, and then make your way to Laguna Cerro Torre.
The town of El Chalten has a great visitor center where you can get free maps and up to date information on the camping requirements.
Due to the popularity of El Chalten, rules change nearly every year, so I would suggest checking there prior to camping.
What to bring Trekking Patagonia’s laguna cerro torre hike
Since most people will be doing this hike in one day, you don’t need to pack too much for this hike besides your day hiking essentials.
Make sure to bring the basics such as a rain jacket (very important, even if it looks sunny!), sunscreen, and food and water for the day.
If you are planning on camping you will have to bring all required backpacking supplies as the free campsites have zero amenities.
6. The Paso Leon to Cochamo Valley Trek
Trekking the Paso Leon to Cochamo Valley Hike Quick Facts:
Required hiking time: 5 days
Total Mileage: 50km (~31 miles)
Hike Difficulty: Difficult
Cost of Trek: $80-$100
Difficulty to Arrive to Trailhead: Moderate
Difficulty to Navigate Trail: Advanced
“Wow” Factor: 10/10!
When To Hike: December to February
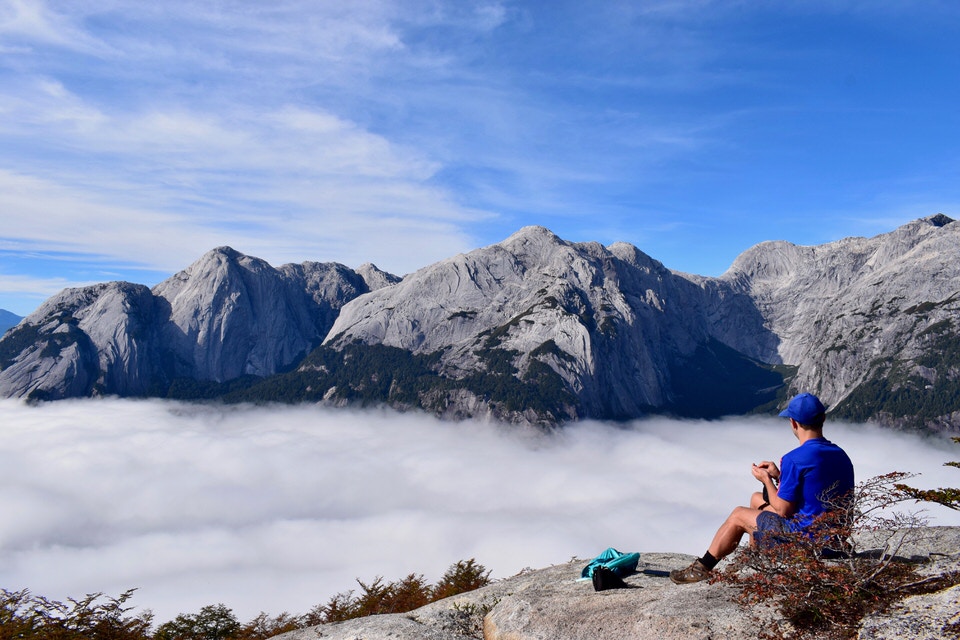
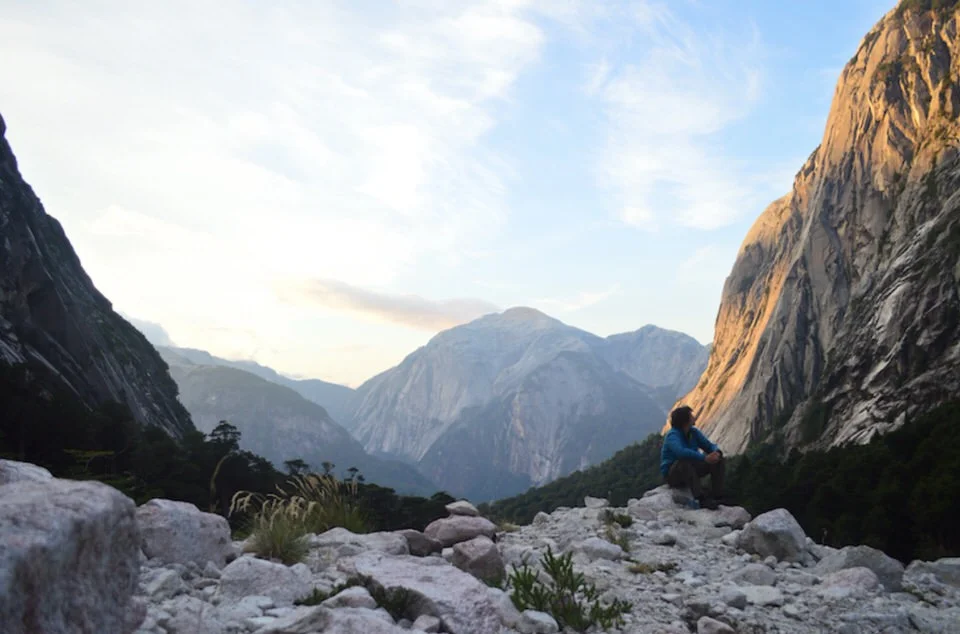
Get ready to be amazed, as the Valley Cochamo is one of South America’s hidden gems.
It’s legendary shining granite walls where only first discovered by foreigners in the 1990s, and since then it has been slowly gaining more and more attention. It has been dubbed “South America’s Yosemite”, and it is easy to see why. The massive granite walls shooting out of the lush green forest from below are an incredible site to behold.
Though Cochamo has gained the most attention from rock climbers, it is still a popular destination for campers and trekkers looking to escape the normal tourist path and experience some pure, untapped Patagonian wilderness.
Cochamo is like Yosemite in the 1950s. No tourist shops, not stores, and most importantly, (almost) no people!
Despite its incredible beauty, one of the greatest parts of this trek is that very few people do it. When I did it in March of 2017, my friend and I only encountered about one other party every day.
This is a 5 day trek, during which you cross over the Andian Mountains, starting at the Pase Leon and ending at the Cochamo Valley. With a bit of planning, you can stay at shelters or people’s homes the entire way!!
If you’re looking for a more wild and raw Patagonian experience, look no further.
the paso leon to cochamo valley hike Logistics

This hike can be done from both directions, either starting from Argentina and crossing into the Chilean Cochamo valley, or the reverse. It is slightly favorable for most people to come from Argentia and arrive in Chile, simply because the path is more downhill from that direction. Of course it is up to you to choose your own adventure!
The directions here are under the assumption that you’ll be coming from the Argentine side.
The first part of the journey will be to arrive at Paso Leon. If you’re coming from Bariloche, you will first have to take the bus to the small town of Río Villegas.
From here you can either hire a car or hitchhike up the road to Paso Leon. Since you are crossing the border, here is where you will get your passport stamped, as you will be crossing the border from Argentina into Chile. If you have arrived late in the day and the office is closed you will want to stay the night. I suggest camping here, as the hotels are quite expensive
You continue the trek by following a rough set of trails which work their way towards the Cochamo Valley from east.
The Cochamo website has a good resource on the path you can follow.
Keep in mind that this is not a major tourist destination. You will have to be self-reliant and use your own best judgment to follow the path. Also plan on constantly asking for directions and advice along the way.
This trek is not suggested if you are a beginner trekker or if you do not have any Spanish language skills.
If you are coming from the Chilean side, first you will need to arrive at either the towns of Puerto Montt or Puerto Varas.
From there daily buses can take you towards the Cochamo trailhead. A complete list of directions on how to arrive at the Cochamo Valley from Puerto Montt or Puerto Varas can be found here.
camping & accommodations at the paso leon to cochamo valley hike
There are a range of camping sites and homestays available on the way. If you plan your days correctly, you will be able to arrive at a designated campsite every day of the trek.
When possible, I would contact the homestay beforehand. I did this trek in March, which isn’t the high season, so I had no problem showing up without a reservation.
If you’re staying the first night at El Rancho Viejo Gormaz, you can find their contact info here.
For the second night, there is no contact info online for accommodations located at the north side of the lake. However there are three or four options, so if one is full or if you don’t like it, continue walking to the next.
The third night you’ll have to stay at the Refugio El Arco. This is a free but basic campsite with no amenities, and for that site reservations are not required.
On the fourth night, you’ll be able to stay at La Junta or any of the other nearby campsites in the Cochamo Valley. During the high season, reservations are advised here.
If you don’t have a reservation, you don’t have to worry. There is always room to camp.
What to bring for the paso leon to cochamo valley hike
Though there are a few guest houses available to stay, for the most part you’ll be camping. Due to the rain, which is common in here, you’ll want to make sure that your tent is of high quality and completely waterproof or you will get wet!
In the summer months, the temperatures get anywhere from 60-80 fahrenheit during the day and stays in a friendly 50-60 degrees at night. In fall or spring, it is common for the temperatures to get close to or go below freezing at night.
The most important thing you’ll want to bring is a waterproof rain jacket, pants and hiking boots with gators to get you through the very muddy parts of the trail. Even when there has been “dry” weather, the trail rarely dries out completely.
Some of the places you’ll be staying will have a communal kitchen available for your use, but not all of them. In addition, there are no shops on the way to buy food. This means that you will have to pack all of your own food, snacks and cooking supplies for the journey. Water is plentiful along the trail.
when to hike paso leon to cochamo valley
Like all of the hikes on this list, Cochamo is in the Southern Hemisphere, meaning that the best time to visit Patagonia and to do the trek is in the summer months of December to February. The best month to visit Cochamo is December, as it is the driest month of the year and has the longest days (about 18 hours of sunlight).
That being said, you still need to check the weather right before you go, as rain is common even in summer months. It is not advisable to do this trek when there is heavy rain in the forecast, as the rivers and streams can become dangerous to cross, and the trails can get extremely slippery and muddy.
Plan a bit of extra time when choosing to do this trek, as it is possible you’ll have to wait a few days for bad weather to pass.
7. The Cerro Castillo Trek
Trekking the Cerro Castillo Trek Quick Facts:
Required hiking time: 3-4 days (or 1 day)
Total Mileage: 54 km / 13 km (for 1 day) (~33 miles / ~8 miles)
Hike Difficulty: Moderate
Cost of Trek: $50
Difficulty to Arrive to Trailhead: Moderate
Difficulty to Navigate Trail: Easy
“Wow” Factor: 9/10!
When To Hike: November to March
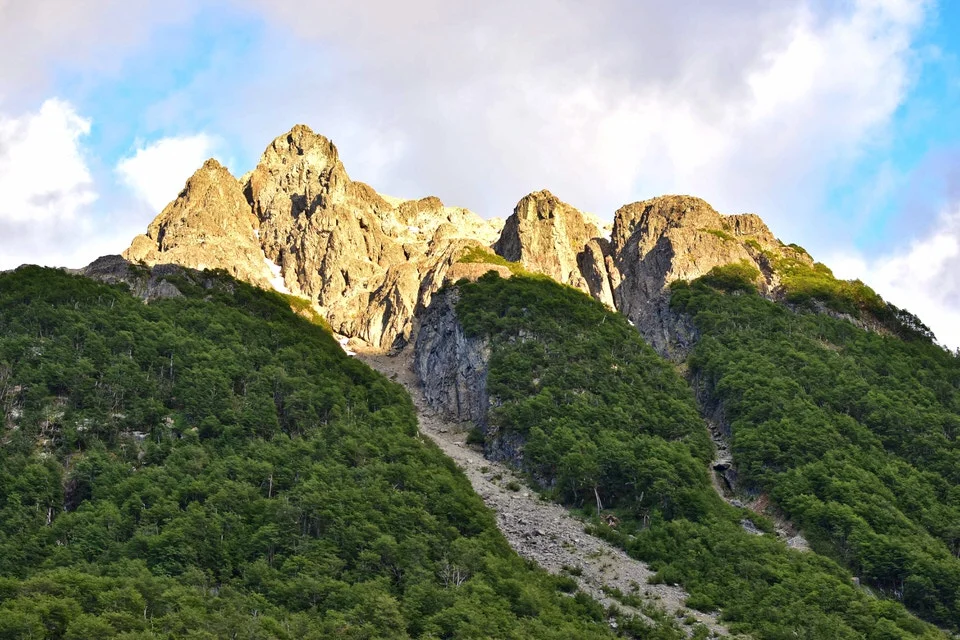
If you’re looking for the stunning scenery of the Torres del Paine but without the crowds, reservations and inflated costs, look no further. The Cerro Castillo trek is another one of Chilean Patagonia’s undiscovered gems.
The full trek can be completed in 3-4 days. With this trek you will see all of the amazing sites of the Cerro Castillo Nature Reserve such as the indigenous forest, the valley of the Río Turbio, the incredible views of the El Peñon pass, and the granite spires and hanging glacier of the Cerro Castillo
In the past few years, the Chilean government has opened up the “emergency trail”, a steep but much shorter path which allows you to cut directly from the south entrance to the reserve toward the Cerro Castillo Laguna/ Glacier lookout. This allows you to see the “highlight” of the trek, the Laguna Cerro Castillo and glacier lookout in a day hike, greatly reducing the amount of time and commitment required. If you’re short on time, this is one of the best day hikes you’ll probably ever do.
How to get to the Cerro Castillo Trek
To get to the Cerro Castillo Trek, you must first get to the town of Coyhaique, which is located bout 75km from the reserve. For Patagonia, this is a large city, so it is easy to get a bus. The town also has a good supply of supermarkets and stores, so this is where I would suggest you buy your supplies for the trek.
From the Coyhaique terminal, there is a daily bus which will take you to the entrance to the reserve. It leaves between 9am-9:30am each day, and costs around 5000CLP. If you missed the bus, you can either hire a cab or hitchhike to arrive.
Where you want to get dropped off depends on whether you’re intending to do the full 4 day trek or the shortened 1 day option. If you’re doing the full trek, you will want to get dropped off at Las Horquetas. Follow the gravel road until you find the small house to pay the entrance (5000CLP). Keep your ticket as they will ask for it on the way out.
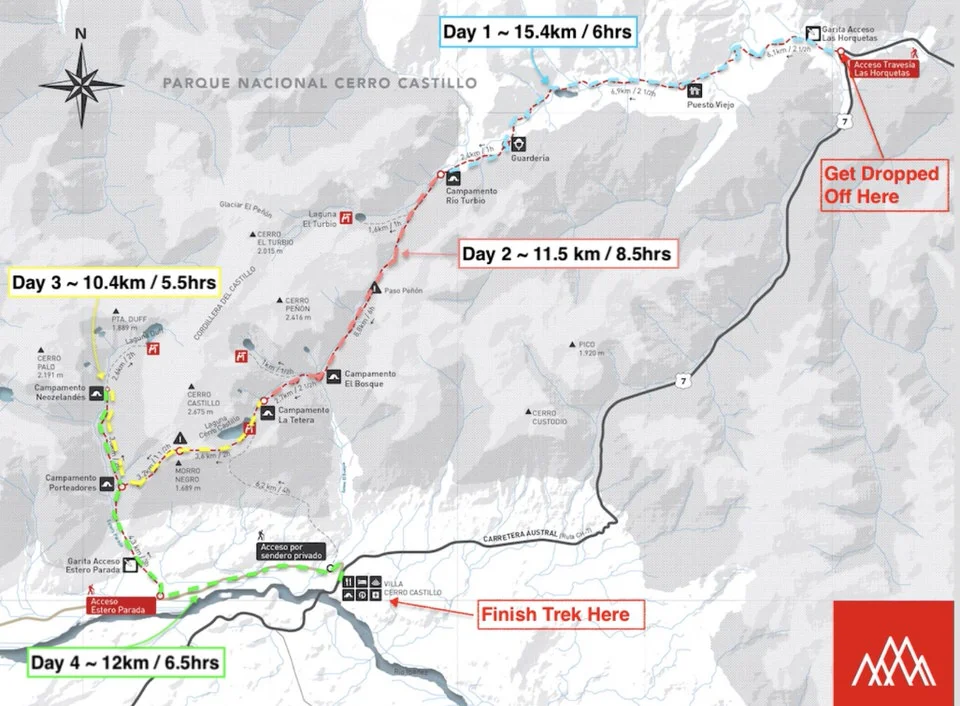
Above: Cerro Castillo 4 Day Trek Map. Image Source
If you are doing the one day trek, you will want to get dropped off another 30 km down the road at the small town of Villa Cerro Castillo.
camping & accommodations at the Cerro Castillo Trek
If you’re doing the full trek, there are free designated campsites along the entire path, and with a little bit of planning, it is easy to reach one each night.
If you’re just planning on doing the day hike, there are a range of campsites and guesthouses available at the town of Villa Cerro Castillo.
Night 1 - Río Turbio Campsite: A basic campsite with picnic tables and an outhouse available for use. Located in a wooded area, which gives you good protection from the wind (high winds are common year-round in Patagonia!)
Night 2 - El Bosque or La Tetra Campsites: On your second night you have two options. The first campsite you will arrive at is El Bosque. As the name suggests, it is in a wooded area and similar to Río Turbio, it gives you good protection against the wind and rain.
If you continue about 1.5hrs past El Bosque, you will arrive at La Tetra. This campsite is located only about a 15min walk from the Cerro Castillo Laguna and Glacier lookout, which is ideal if you are interested in taking sunset or sunrise pictures (highly recommended!). The downside of this campsite is that it is exposed, so only stay here if you have a sturdy tent and good weather on the forecast.
Both of these campsites are very basic, and have zero amenities.
Night 3 - Los Porteadores or Neozelandes Campsites: Night 3 you will have two campsite options. The first you will arrive at will be Los Porteadores. This has picnic tables and a toilet to use, but also can get more crowded.
I suggest continuing on to Neozelandes Campsite, which is about 2 hrs further down the trail. Though there are no toilets to use, the campsite is much more beautiful and secluded. A perfect way to end the trek!
Night 4 (Optional) - Villa Cerro Castillo: Once you finish your trek, you have the option to spend the night at one of the guesthouses or campsites in the small town of Villa Cerro Castillo. Or, depending on when you arrive, you can hitchhike or get a bus back to the town of Coyhaique.
What to bring for the Cerro Castillo Trek
The trek requires you to have a full set of camping sleeping equipment. It is important not to forget to have many layers of warm clothes and proper rain gear.
There are no amenities at the campsites, so you will have to make sure that you bring all of your cooking supplies and food as well.
Make sure that your tent is of high quality, and can resist the heavy rain and winds which are very common here. Even in the summer you can expect to see a little bit of rain most days. The weather here can change within a few hours, so you need to be prepared for any type of weather. It is common to see all 4 seasons in one day!
Water is abundant on the trek.
You can follow Jacob and his adventures over on his blog, The Wandering Climber.
LOOKING FOR MORE World travel outdoor ADVENTURES?
If you are looking for additional world travel outdoor adventures, check out our guides and resources below:
The Ultimate 2 Week Itinerary - New Zealand North Island Road Trip Guide Via Campervan
Climbing Destination Guide - Bouldering The Rocklands in South Africa
ESSENTIAL HIKING & BACKPACKING RESOURCES
Also be sure to check out these essential hiking & backpacking resources!
7 Tips to Hiking and Summiting Your First Fourteener Mountain
Important Permit & Reservation Deadlines for Popular California Hiking Trails & Campsites
Essential Backpacking Hygiene Tips & Feminine Care in the Outdoors
Cheers,
Allison - She Dreams of Alpine


Related Posts:


How to Get a Mt. Whitney Permit: Understanding the Permit & Lottery Process for Day Hiking and Backpacking the Whitney Area | Mount Whitney is the tallest peak in the lower 48 states, which makes it a very popular peak to hike and climb. Due to its popularity, there is a very structured permit process, and this post covers everything you need to know about grabbing Mount Whitney permits so you can plan your hike up this epic California peak. | shedreamsofalpine.com