How to Clean a Camelbak - 3 Quick & Easy Methods!

If you’ve ever wondered how to clean a Camelbak – or maybe it’s never even crossed your mind – I’m happy to report that it’s SUPER EASY (just like washing your down jacket) and doesn’t require a lot of fancy stuff to get it clean!
There are many different ways you can choose to clean your hydration bladder, but I like to stick with what's simple. So in this “gear spring cleaning” post I’m going to show you 3 quick and easy methods for cleaning your Camelbak or other hydration bladder.
But the best news? You really don’t have to clean your Camelbak very often at all!
Believe me, this definitely appeals to my post-backpacking trip lazy mood. I’m notoriously bad at unpacking my backpack until at least a few days after I’ve returned, so thank goodness hydration bladders don’t need to be constantly cleaned.
Sometimes you need to clean the bite valve more often, but that’s super easy to just do with a little soap.
To break it down, there are 3 basic steps to every hydration bladder cleaning method:
Mix hot water and cleaning substance of choice into your Camelbak
Rinse your Camelbak
Air dry
You could get fancy and get brushes and special cleaning solutions for this, but honestly, you don’t need to. I personally don’t!

Spring is the time to get ready for backpacking season, so spring cleaning your gear is a great thing to do every year. If you’ve been neglecting your gear and not cleaning it, now’s the time to do a bit of freshening up before the summer backpacking and hiking season begins.
GRAB MY [FREE] OUTDOOR BACKPACKER STARTER KIT
I created the Ultimate Outdoor Backpacker Starter Kit for you (and it's FREE)! This starter kit is filled with 14 pages of my best hiking and backpacking tips to help you learn what it takes to become a safe, confident, and self-sufficient outdoor backpacker!
How to Clean a Camelbak
This post is broken down into two sections: a quick video showing you my favorite approach to cleaning Camelbak bladders, and then the instructions for 3 quick and easy hydration bladder cleaning methods. We also have some answers to FAQs about cleaning hydration bladders.
How to Clean a Camelbak Bladder (Video Tutorial)
In the steps below, I will walk you through how to clean a water bladder with 3 quick and easy methods (including the one I showed you in my video). You’ll notice the steps for cleaning your Camelbak are very similar – it’s mainly the cleaning solution ingredients that change, and you can really use whichever one you have at home.
But first, let’s talk preventative care!
Care & Storage of a CAMELBAK
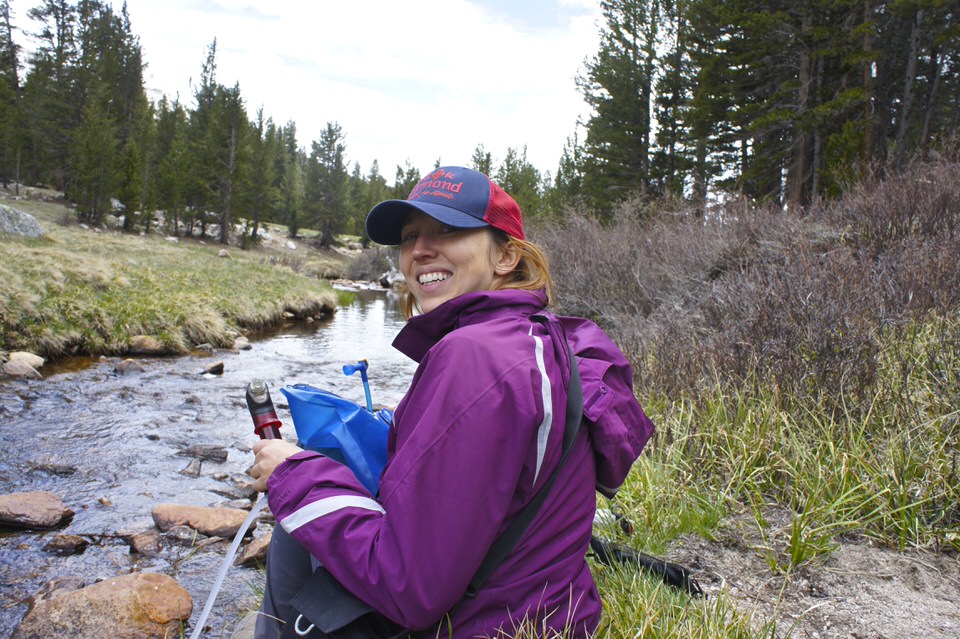
The best way to keep your Camelbak or other hydration bladder clean and free of gunk and mold is to always be sure to dry it out after a trip.
When you get done using it on the trails, bring it home, drain it of water, and give the inside a good wipe down. Then prop the inside open (like I show in the video above) and let your Camelbak air dry. Be sure to also drain the water from the Camelbak tube as well and let that also air dry.
When you do this after trips, you shouldn’t need to do too much extra cleaning most of the time. I really only “wash” mine every 3-6 months, especially if I have been using it fairly frequently.
Many people also suggest that after you are done drying it, you can fold it up and store your Camelbak in the fridge. I don’t personally do this, but it makes total sense as to why that would be another great way to help prevent mold from growing inside your hydration bladder.
How to clean a camelbak with vinegar
The tutorial below corresponds with my video on cleaning a Camelbak above, so if you’re a visual learner, you can watch that instead.
SUPPLIES NEEDED
White Vinegar
Hot Water
Paper Towels / Clean Towels
Step 1 - RINSE CAMELBAK WITH WATER & VINEGAR SOLUTION (AND DRAIN)
Measure 1 part white vinegar to about 6-10 parts hot water. I usually make about a tall cup’s worth of the mixture.
Pour that mixture into your Camelbak and close the lid securely. Spend about 5 minutes swishing the mixture around in your Camelbak. Then drain the mixture out through the Camelbak tube (so that you make sure that gets cleaned, too!).
Step 2 - RINSE WITH CLEAN WATER (AND DRAIN)
Now, nobody likes the taste of vinegar in their drinking water, so you’re going to want to fill up your Camelbak again but with fresh water this time instead.
Swoosh it around inside again and drain through your straw.
Step 3 - AIR DRY
After you’re done cleaning your hydration bladder, wipe down the inside with a paper towel or clean towel. Then put 2 bunched up paper towels (or small clean towels) on the inside to help prop up the bladder for airflow.
I also usually prop a large kitchen spoon or utensil at the front (where the lid is) to hold it up even better for airflow.
Disconnect your straw from your Camelbak, make sure to drain it, and let this air dry as well.
Pro Tip: Store your (dry) Camelbak or hydration bladder in the freezer to keep it extra fresh!
How to clean a hydration bladder with baking soda
SUPPLIES NEEDED
2 Tablespoons Baking Soda
Hot Water
Paper Towels / Clean Towels
Step 1 - RINSE CAMELBAK WITH WATER & BAKING SODA SOLUTION (AND DRAIN)
Measure 2 tablespoons of baking soda with a couple cups of hot water.
Then pour that mixture into your Camelbak and close the lid securely. Spend about 5 minutes swishing the mixture around in your Camelbak. Let the mixture sit for an extra 30 minutes for extra cleaning.
Then drain the mixture out through the Camelbak tube (so that you make sure that gets cleaned too!).
Step 2 - RINSE WITH CLEAN WATER (AND DRAIN)
Again, we want to make sure to rinse the solution thoroughly from the water reservoir, so you’re going to want to fill up your Camelbak again but with fresh water this time instead.
Swoosh it around inside again and drain through your straw.
Step 3 - AIR DRY
After you’re done cleaning your hydration bladder, wipe down the inside with a paper towel or clean towel. Then put 2 bunched up paper towels (or small clean towels) on the inside to help prop up the bladder for airflow.
I also usually prop a large kitchen spoon or utensil at the front (where the lid is) to hold it up even better for airflow.
Disconnect your straw from your Camelbak, make sure to drain it, and let this air dry as well.
Pro Tip: Store your (dry) Camelbak or hydration bladder in the freezer to keep it extra fresh!

How to clean a water bladder with Lemon Juice
Lemon juice is particularly helpful with neutralizing odors in your hydration bladder, so this is a good option if you start to notice your water bladder having a “funk” to it.
SUPPLIES NEEDED
Lemon Juice
Hot Water
Paper Towels / Clean Towels
Step 1 - RINSE CAMELBAK WITH WATER & LEMON JUICE SOLUTION (AND DRAIN)
Measure 1/4 cup of lemon juice and combine with a liter of hot water.
Pour that mixture into your Camelbak and close the lid securely. Spend about 5 minutes swishing the mixture around in your Camelbak. Let the mixture sit for an extra 30 minutes for extra cleaning.
Then drain the mixture out through the Camelbak tube (so that you make sure that gets cleaned too!).
Step 2 - RINSE WITH CLEAN WATER (AND DRAIN)
Again, we want to make sure to rinse the solution thoroughly from the water reservoir, so you’re going to want to fill up your Camelbak again but with fresh water this time instead.
Swoosh it around inside again and drain through your straw.
Step 3 - AIR DRY
After you’re done cleaning your hydration bladder, wipe down the inside with a paper towel or clean towel. Then put 2 bunched up paper towels (or small clean towels) on the inside to help prop up the bladder for airflow.
I also usually prop a large kitchen spoon or utensil at the front (where the lid is) to hold it up even better for airflow.
Disconnect your straw from your Camelbak, make sure to drain it, and let this airdry as well.
Pro Tip: Store your (dry) Camelbak or hydration bladder in the freezer to keep it extra fresh!
FAQ’S ON CLEANING CAMELBAKS

1) Do I need to clean my Camelback for the first use? It’s a good idea to use one of the three methods in this post to clean your Camelbak or any hydration bladder before its first use!
2) How do I clean the Camelbak tube? Nothing extra fancy here, just make sure the mixture runs through your tube when you are cleaning the whole reservoir. You can get a special kit with a brush designed to go in the tube if you like, but it’s not necessary.
3) How do I clean the Camelback bite valve? Use the same solution you’re using in one of the methods above, but just do some extra scrubbing around the bite valve. Then be sure to rinse thoroughly with water!
4) Can I use bleach to clean my Camelbak? Yes, you can. You would use similar proportions as the baking soda method (2 tablespoons inside a solution of water), but honestly I chose not to go over this method because I personally don’t like the thought of using bleach to clean something I drink out of regularly – especially since there are other natural materials that do the trick just as well.
5) How frequently should I clean my hydration bladder? You don’t need to do this very often if you’re using your Camelbak regularly and are sure to dry it out well after trips. I like to wash mine about every 3 to 6 months. HOWEVER, if you put anything besides water into your reservoir (like electrolytes or anything with sugar), make sure to clean out your Camelbak afterwards. You can also clean the bite valve more often with just a bit of soap.
RECOMMENDED HYDRATION BLADDERS
If you don’t yet have a hydration bladder, here are a few highly recommended options. I would suggest a hydration bladder that is 3L-4L, because it gives you more flexibility than a smaller size. You can choose to either fill it up all the way or only part way if you don’t need the full capacity for certain trails.
Note: This post may contain affiliate links.

Hope this post helps you keep your Camelbak or other hydration bladder clean and fresh! If you have any more questions about the cleaning methods mentioned here, feel free to ask in the comments.
Looking for more Outdoor gear goodness?
Check out these other hiking and backpacking gear articles!
Cheers,
Allison - She Dreams of Alpine


Related Posts:


How to Get a Mt. Whitney Permit: Understanding the Permit & Lottery Process for Day Hiking and Backpacking the Whitney Area | Mount Whitney is the tallest peak in the lower 48 states, which makes it a very popular peak to hike and climb. Due to its popularity, there is a very structured permit process, and this post covers everything you need to know about grabbing Mount Whitney permits so you can plan your hike up this epic California peak. | shedreamsofalpine.com