11 Lesser Known Rules to Learn for Your First Time Backpacking

When it comes to going backpacking, all of the rules, tips, tricks, and hacks can feel totally overwhelming, and I get that. If you’re a first-time backpacker it’s always a challenge to remember the nuances of the core Leave No Trace principles, how to protect yourself from unwanted wildlife encounters, and how to pack everything in its proper place.
But fear not, I’m here to give you a little insight into some of the more advanced backpacking tips to keep in mind for your first backpacking trip. Let’s just say these tips are some of the most easily-forgotten, but still very important things to remember as you prepare to hit the trails for your overnight adventures.
So let’s dive into the 11 lesser-known rules to learn for your first time backpacking… things that even us experts can forget sometimes!
Note: This post may contain affiliate links.

1. Always Camp 200 Feet Away from Water
One of the important things to learn when you go backpacking for the first time is the Leave No Trace principles, and where you set up your tent is one of the crucial things on that list.
It’s nice to plop your tent next to a high alpine lake for that picture-perfect ‘gram shot, am I right? Nope!
It turns out this is NOT okay. When you hike into the wilderness to camp, you enter areas that aren’t used to the normal hustle and bustle of civilization, and as a result, ecosystems in these areas, particularly those with water, are super-fragile.
When you camp near a stream, lake or another water source, you risk introducing your germs, food waste, people waste, microplastics, oils, and other pollutants that aren’t a part of that environment into these fragile lakes and ecosystems.
Therefore, always camp 200 feet or 70 adult steps away from the water source. This ensures that your impact on the environment is kept to a minimum.
2. Don’t Forget to Adjust Your Compass for Declination
Okay, for most of us, learning how to properly use a compass is part science and part voodoo magic. However, it’s an essential skill for any backpacking enthusiast so it’s important to know the nuances of compass navigation. It’s an essential skill that we teach thoroughly in the Become an Outdoor Backpacking Badass Program.
One important thing to remember is the magnetic declination. In short, true north and magnetic north are slightly different. Since the Earth is a sphere, this means that whenever you travel to a new backpacking destination, you’ll have to set your compass to the correct declination to accommodate for using a flat map on a round earth.
Most topographical maps will list the declination in the key, but this changes over time - the Earth is beautiful and weird - so always do a double-check using the NOAA website prior to heading out. Once you know the declination you can rotate the north needle housing on your compass to offset it.
Check your compass manufacturer’s instructions on how it’s done on your model (most use a key). Remember, if you don’t set your declination, you’ll be doing tons of complicated math to get your position (either subtracting or adding the declination degrees each time you take a reading or use a waypoint).
I promise, it’s not as complicated as it sounds. :)
Looking For More One-on-one Support as you get started with outdoor backpacking?
Join me (and your peers) on a transformational adventure, where you will learn how to confidently go on your first ever (or perhaps your first solo) outdoor backpacking trip without the constant fear of getting lost, the debilitating worry of being unprepared, and the lurking feeling that you lack the "know-how" and skills required to stay safe on the trails. Click below to be the first to know when my one-of-a-kind backpacking program re-opens again for enrollment!
3. Bury Your Poo (and Fido’s too!)
When you are going backpacking for the first time, you MUST known the proper ways to dispose of your waste in the backcountry.
There is nothing more disgusting than finding human waste in the backcountry. Not only is it unsightly, but it also attracts unwanted wildlife (ahem, bears, ahem).
So how do you poo? First, walk 70 adult steps (200 feet) from the trail or a water source. Next, dig a hole about six to eight inches deep and do your business in the hole. Cover the hole and dispose of your toilet paper (more on that in a second) and voila! You’re finished. Don’t forget to use some hand sanitizer to keep your hands clean.
You don’t just want to bury your poo, but your dog’s too! Although you can’t quite control where your dog poops, you can control how you clean it up.
Again, dig a hole, next, get some dirt on your trowel and use the dirt as a buffer to gently push the poop into the hole. The object is to have a poop-free trowel. Then bury the poop. That easy!
Note: Some areas, for example Mount Whitney and Mount Shasta in California, require that you pack out your human waste in “wag-bags”, so always be sure to know your local regulations any time you go out backpacking.
4. And Please Don’t Forget to Pack Out Your Toilet Paper!
Maybe you already know how to bury your poop in the backcountry, but what do you do about your toilet paper? You pack that out, too!
Why? It does NOT break down easily, and animals dig it up and eat it, ingesting harmful chemicals and causing an unsightly scene. And please don’t burn it either!
Don’t want to see it when you pack it out? Take a plastic baggie and wrap it in duct tape. Sprinkle some baking powder in the bag to account for the smell and put your used TP, tampons, feminine pads, and any other waste associated with the toilet in there. Seal it up and be on your way.
>>> Read more here about our favorite Essential Backpacking Hygiene Tips & Feminine Care in the Outdoors.
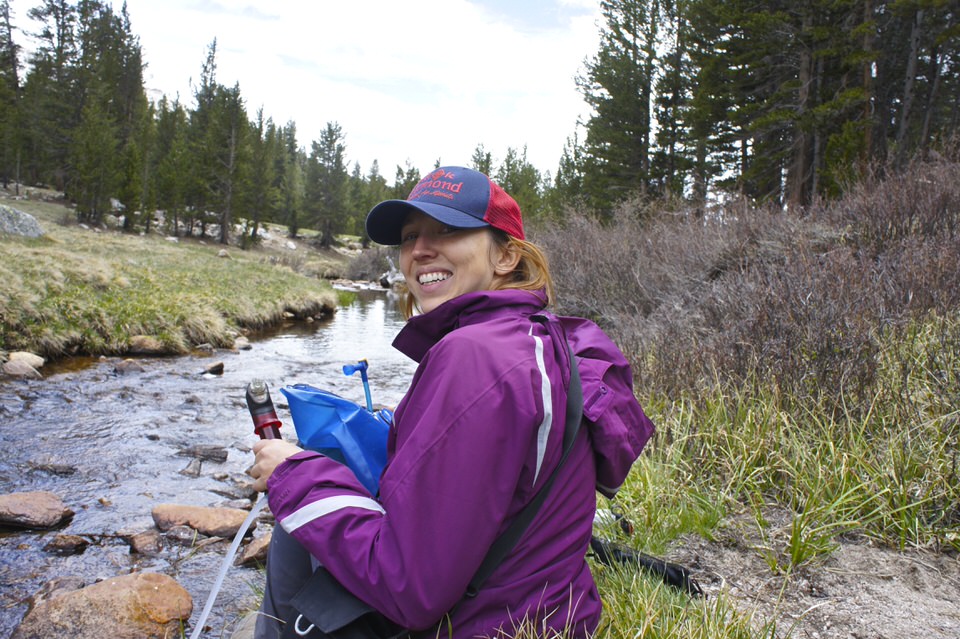
5. Fight the Freeze (Understanding Your Water Filtration and Carry Systems)
When temps dip low, it’s easy for water bladders and straw filter systems to turn into popsicles. Ice will form in water bladder tubes and filter straws even before temperatures dip into freezing, especially if there is wind, and it can be a real pain to deal with.
The easiest way to combat these issues is to simply not use a water bladder or straw filter if you are going to be traveling at higher elevations where temps drop or in cold climates.
If that’s all you’ve got, blowing air back into the bladder or through the straw can help, but I’ve found that most of the time the water gets pushed back into the system and still freezes.
6. Understand How to Adapt to Altitude Adjustments
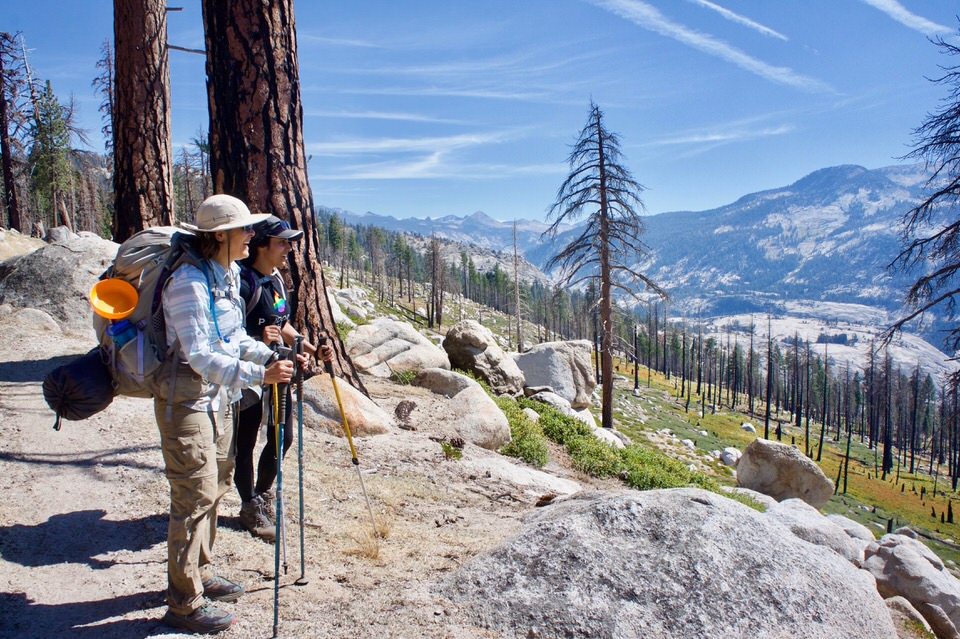
Hiking at high altitude with a heavy pack is brutal, especially if you aren’t well-adjusted to life high above the sea. When it comes to high altitude hiking, it isn’t so much about your daily mileage, but more about your daily gain.
Here are a few quick tips for dealing with altitude, so you’re prepared for your first overnight backpacking trip:
Plan on gaining only 1,500 feet of vertical gain in a day, especially if you are new to backpacking. If you do gain more, be prepared to really feel it! As you begin to ger more backpacking experience you’ll better understand your limitations and how your body handles altitude adjustments.
Hydrate, hydrate, hydrate. Also, increase your salt intake to balance out all the water and replenish lost salt from sweat. Putting electrolytes in your water will help out a lot.
Avoid caffeine and alcohol on the uphill. It doesn’t jive well with your body when you’re trying to adjust to altitude.
Climb high, sleep low. This is an old high altitude mountaineering trick that works well at lower altitudes, too. Set up your camp and then try to hike a bit higher (you can drop that heavy bag). It doesn’t have to be a huge elevation gain, even a few hundred feet can help you sleep better at altitude.
Go slow. One easy way to continue your upward progress is to take a step, breathe, then take another step. Get into a rhythm instead of trying to power through for several yards, only to come to a halt, huffing and puffing.
Remember, if you persistently feel the effects of altitude and your symptoms worsen, the only way to get better is to go back down. It’s always okay to turn around – risking your health isn’t worth it.

7. Make Sure to Animal-Proof All of Your Smelly Stuff
You may know that it’s important to store your food in a bear can or sack, but did you know other items need to be put away, too? The last thing you want is a marmot to chew through your tent, or a bear to come sniffing after that fruity-flavored lip balm.
Aside from food, here are a few examples of items that also need to go in your bear can or sack:
Used toilet paper, tampons or other human waste by-products (seal them in a separate baggie)
Flavored lip balm, deodorant, scented wipes, toothpaste, or any toiletry that smells.
Trash and food scraps. These should go in their own separate trash baggie. I use odor proof bags and have a separate one just for trash.
In certain areas, especially those with a large grizzly presence, you’ll want to wear separate clothes to cook. Any spillage on your clothing while camping means you may want to put those clothes in your bear can.
8. Pack Extra Socks for Hiking and Camping
If there’s one rule of staying cozy and happy in the backcountry, it’s to treat your feet kindly. Oftentimes when you backpack, you’ll be wearing the same thing day in and day out. However, if you don’t give your feet a little TLC, you can end up with blisters, foot fungus, and other unwanted issues.
I always have at least 2-3 pairs of socks when I’m backpacking. Usually I have 2 lighter thickness pairs of socks for hiking in during the day that I will switch out frequently while I let the other pair dry on the back of my backpack.
One of the best little luxuries you can give yourself is a pair of camp socks. Bring a pair of clean socks and use them exclusively at camp. This gives your feet a much-needed break from the stinky socks you’ve hiked in all day. Don’t forget to let your tootsies breathe and dry out first.
GRAB MY [FREE] OUTDOOR BACKPACKER STARTER KIT
I created the Ultimate Outdoor Backpacker Starter Kit for you (and it's FREE)! This starter kit is filled with 14 pages of my best hiking and backpacking tips to help you learn what it takes to become a safe, confident, and self-sufficient outdoor backpacker!

9. Keep Your Batteries Close to You
One thing that people don’t realize is electronic batteries don’t like the cold. Even on milder days, phone batteries can easily die quickly in colder temps.
To combat this, learn to sleep with your phone and camera batteries to keep them toasty warm overnight.
When hiking in cold weather, keep your phone in a chest pocket, where your core body heat can keep your phone warm.
And always make sure to keep location services off, unless you’re checking your position on a GPS app. Even when a phone is in airplane mode, it is still using a satellite to connect and give your location, which significantly drains battery life. Use a power-saver mode if you have one, too.
10. Check the Trees that You Sleep Under
Beginner backpackers need to understand how to select a camp that is not only ideal for a tent, but safe.
It’s always a good idea to look up!
Are there dead or dying trees nearby? Don’t pitch your tent where a strong wind could topple over a dead tree onto your tent!
Aside from looking out for dead trees, remember these tricks:
Cold air settles in valleys overnight, but ridge lines are prone to wind. Pick a spot that isn’t too low or too high if you can.
Exposed camping isn’t always the best camping. Sure it’s pretty, but the trees do a lot to block wind, making pitching your tent, cooking, and other camp activities much easier.
Pay attention to the sun. If you want to sleep in, it will be worth it to have some morning shade so you sleep longer. If you’re in a cold area, the morning sun is a nice way to wake up and warm up.

11. Sleep Better at Night
A lot of people argue that you sleep better in a down bag without clothing. Personally, I think this is up to debate and depends on the quality of your bag.
However, if you’re finding that you’re cold with clothing on in your bag, try stripping down to your underwear and see if you’re warmer. If not, you can always add a water bottle filled with hot water to the bottom of your bag to stay toasty warm.
With these beginner backpacking tips, you’ll be on your way to tackling any backpacking trail! These lesser-known hacks will have you backpacking in expert-mode in no time.
Become a Self-Sufficient, Confident Badass on the Trails: Join my One-of-a-Kind outdoor backpacking program!
Join me (and your peers) on a transformational adventure, where you will learn how to confidently go on your first ever (or perhaps your first solo) outdoor backpacking trip without the constant fear of getting lost, the debilitating worry of being unprepared, and the lurking feeling that you lack the "know-how" and skills required to stay safe on the trails. Click below to be the first to know when my one-of-a-kind backpacking program re-opens again for enrollment!
More ESSENTIAL HIKING & BACKPACKING RESOURCES
Also be sure to check out these essential hiking & backpacking resources!
7 Tips to Hiking and Summiting Your First Fourteener Mountain
Essential Backpacking Hygiene Tips & Feminine Care in the Outdoors
7 Reasons Why Women Make Great Backpacking Leaders on the Trail
Cheers,
Allison - She Dreams of Alpine


Related Posts:


How to Get a Mt. Whitney Permit: Understanding the Permit & Lottery Process for Day Hiking and Backpacking the Whitney Area | Mount Whitney is the tallest peak in the lower 48 states, which makes it a very popular peak to hike and climb. Due to its popularity, there is a very structured permit process, and this post covers everything you need to know about grabbing Mount Whitney permits so you can plan your hike up this epic California peak. | shedreamsofalpine.com