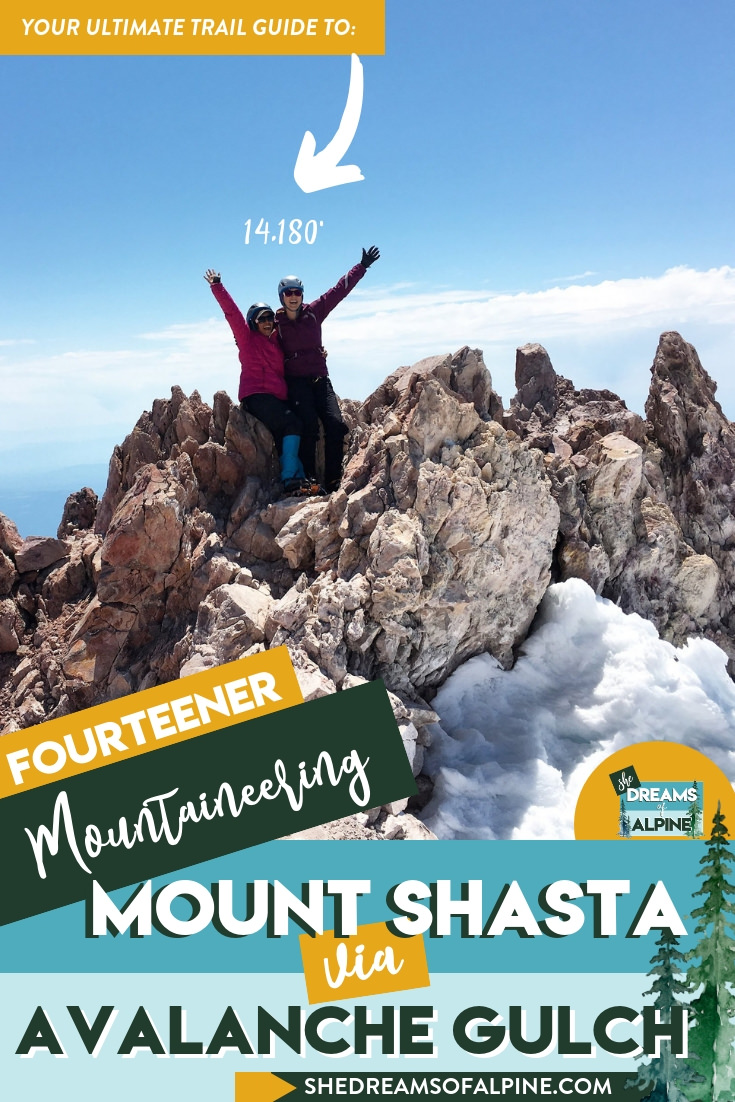
Climbing Mt. Shasta 2024 Beginners Guide – Avalanche Gulch Route

So you want to climb Mt. Shasta? I don’t blame you! Climbing Mount Shasta was on my list of goals since I first discovered a love for mountaineering and set a big goal to one day eventually climb all of the California Fourteeners.
Unlike some of the other California 14ers, like Mount Whitney and Mount Langley, Mount Shasta is more complicated to plan and requires you to have some technical mountaineering skills.
(So if you’re still new to this whole mountaineering thing, then I highly recommend you check out our guide on how to get into mountaineering!)
This Mount Shasta climbing guide goes into depth on the logistics of planning your climb up Mount Shasta’s Avalanche Gulch route – plus what to do if you are a beginner and need to learn mountaineering skills.
Mount Shasta’s Avalanche Gulch route is a great beginner route to learn mountaineering, but this learning is best done with a guide (more details on that later in the post). Even though this route is “beginner,” be aware that it is still a very physically challenging route!
And if you’re a visual kind of person, I loved this video from Tava on YouTube. It’s a great short climb showing the Avalanche Gulch route and what your Mount Shasta climb will look like. Check it out below!
Still stoked on planning your Mount Shasta Climb via Avalanche Gulch? Then read on, my friend!
WHAT WE WILL COVER IN THIS CLIMBING MT. SHASTA GUIDE
As I mentioned above, if you are skilled in mountaineering, climbing Mount Shasta via Avalanche Gulch is a great route to add to your mountaineering peak-bagging list.
However, if you are new to mountaineering, be sure to seek out a professional guide. You should learn the proper skills for mountaineering from a trained guide or experienced mentor before ever attempting one on your own.

Here’s what we’re going to cover in this climbing Mount Shasta post:
Climbing Mt. Shasta Trail Stats - All the nitty-gritty details for the Avalanche Gulch Route in one spot, including mileage, elevation gain, & more.
How to Get a Mt. Shasta Climbing Permit - Required for climbing to the summit!
Best Time to Climb Mount Shasta – Details about the best time to climb Mt. Shasta and typical Mt. Shasta summit weather to expect on your trip.
Mt. Shasta Avalanche Gulch Trail Map & GPX Files - I've created a map detailing the whole trail that you can explore, including a look at the elevation gain/profile of the hike. You can also download this file as a GPX file to upload into your own personal GPS device.
How to Get to the Avalanche Gulch Trailhead – Driving and parking recommendations.
Mt. Shasta Camping – Where to camp on and off the trail when visiting.
Itinerary for Climbing Mount Shasta - I’ll walk you through my experience and suggested itinerary for climbing Mt. Shasta via the Avalanche Gulch Route.
Important Mount Shasta Climbing Safety Tips – The top hazards to expect along the trail.
Climbing Mount Shasta Gear List – An essential packing list for the climb. Don’t hit the trail without these things!
Mt. Shasta Avalanche Gulch Trip Report – My personal account on the Avalanche Gulch route.
If you’re looking for something specific, feel free to skip ahead to the section you’re looking for!
Plus, be sure to check out the bottom of this post to find more California trail guides and other additional hiking, camping, and backpacking resources!
GRAB MY [FREE] OUTDOOR BACKPACKER STARTER KIT:
I created the Ultimate Outdoor Backpacker Starter Kit for you (and it's FREE)! This starter kit is filled with 14 pages of my best hiking and backpacking tips to help you learn what it takes to become a safe, confident, and self-sufficient outdoor backpacker!
1. CLIMBING MT. SHASTA TRAIL STATS
If you’re anything like me, the first thing you want to know about a trail is the stats and basic info so I can quickly figure out what the hike is all about. So here you go!
MOUNT SHASTA AVALANCHe GULCH ROUTE QUICK FACTS
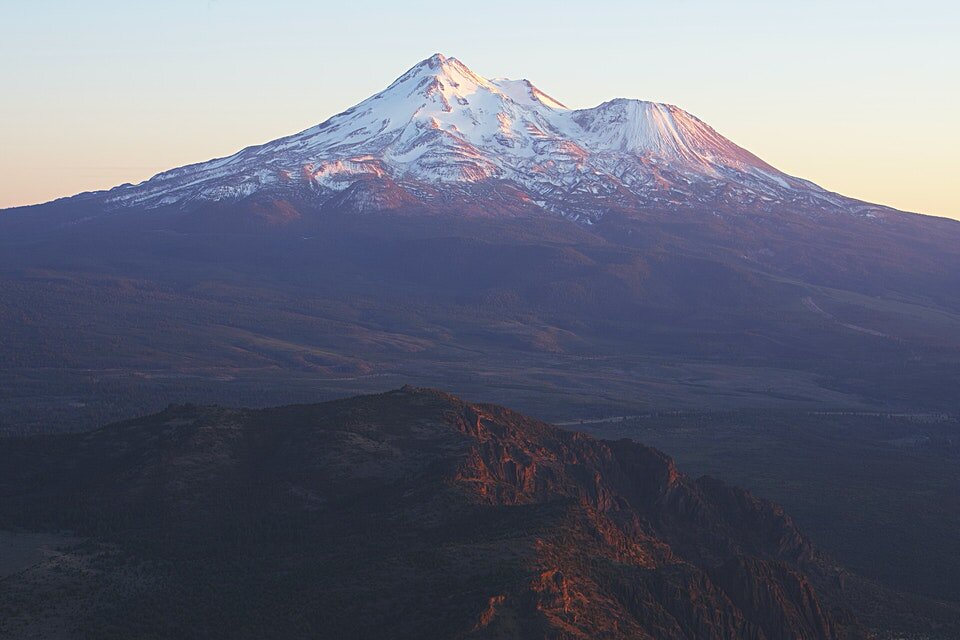
Mt. Shasta Summit Elevation: 14,179 feet
Trail to Summit: There are many routes up Mount Shasta. In this post, we will discuss the Avalanche Gulch Route. Avalanche Gulch is the second technically easiest route up Mount Shasta and by far the most popular.
Type of Trail: Out and Back
Avalanche Gulch Route Mileage: 11 miles (that’s right... 5.5 miles with 7,300' gain!) Check out Section 4, “Mt. Shasta Avalanche Gulch Trail Map & GPX Files” for more details.)
Total Elevation Gain: ~7,300 feet total elevation gain
Mount Shasta Avalanche Gulch Trailhead: Bunny Flat Trailhead
Trailhead Elevation: 6,950 feet
How long does it take to climb Mt Shasta? The Avalanche Gulch route can be climbed in anywhere from 1 to 3 days. The time required really will depend on your physical fitness and your mountaineering skills. Guided trips usually range from 2-4 days up the route.
Do you need a permit to climb Mount Shasta? Yes. See the permit section below.
How difficult is climbing Mount Shasta? Strenuous and Difficult! This is a technical trail. Do not attempt unless you are comfortable with mountaineering. There is also a lot of elevation gain in this route, so don’t be fooled by people calling it an “easy” route up Mount Shasta, especially if you are a beginner mountaineer. Again, opt to go the guided route if you have never mountaineered before or aren’t comfortable with this climbing skill set.
Can you hike to the top of Mount Shasta? As I’ve mentioned before, Mount Shasta should really only be attempted if you have mountaineering skills or you are willing to go with a guide. The route is technical, and even in the summer months when snow is starting to melt, the mountain poses its own unique dangers. There is no non-technical trail to the top like you will find on other mountains (like the Mount Whitney Trail).
How do you train to climb Mount Shasta? Mount Shasta is a serious peak, and you’ll have the best summit attempt if you dedicate a few months in advance to training.
Is Mount Shasta going to erupt? When did Shasta last erupt? It’s not likely that Mount Shasta will erupt in our lifetime. According to the records, it only erupts about every 600-800 years and it last erupted about 200 years ago.
How far can you drive up Mount Shasta? You can’t drive to the top of Mount Shasta, but most people drive up to Bunny Flat Trailhead, which is at around 6,950 feet, or the Old Ski Bowl Trailhead at 7,800 feet.
Is water available on Mount Shasta? If you’recamping on the mountain overnight, you will melt snow on this trail for water.
Is Mount Shasta dog friendly? Unfortunately, dogs are not allowed in the Mount Shasta Wilderness.
2. HOW TO GET A MT. SHASTA CLIMBING PERMIT
While you are required to get a permit for entry in the Mount Shasta Wilderness area (year-round), there is currently (as of 2023) no quota system or advanced reservations required. Meaning you can show up and grab your permits the day of or before your attempt of Mount Shasta. However, there are a few special regulations that apply, which we’ll cover here.
WHAT PERMITS DO YOU NEED TO CLIMB MT. SHASTA?
You need both a Wilderness Permit and a Summit Pass before climbing Mount Shasta.
Wilderness Permit – Every person attempting to summit Mount Shasta will need to fill out their own free wilderness permit.
Summit Pass – If you climb above 10,000 feet (which you will if you attempt a summit of Mount Shasta), then you also need a Summit Pass.
WHERE TO GRAB YOUR MOUNT SHASTA PERMIT
You can grab your permits at the Mt. Shasta Ranger District Office or McCloud Ranger District Office during business hours, or you may “self-issue” a permit outside the front door of the offices after business hours. You can also self-issue yourself a permit at the trailheads.
If you go on a guided trip, permits are usually taken care of for you by your guides (but be sure to confirm).
HOW MUCH DOES A PERMIT COST?
The fee for a Mount Shasta Summit Pass is $25 per person.
Again, you can “self-issue” both permits, but please come with exact change in cash or personal check if you self-issue a permit.
If you live in the area and plan to summit Mount Shasta often, you can also grab an Annual Summit Pass from one of the Ranger Stations mentioned above for $30. This pass will be valid until December 31st of the calendar year you bought the pass in.
OTHER USEFUL PERMIT CONSIDERATIONS
Groups are limited to 10 people or less, and camping is restricted to 7 nights within a 30-day window.
Disposal of Human Waste (AKA, pack out your poo): Much like Mount Whitney, Mount Shasta is a highly trafficked peak. In order to preserve the beauty and health of the Mount Shasta environment, the Mt Shasta Wilderness Rangers and climbers have developed a Waste Disposal System (much like the mandatory “WAG Bag” system at Mt. Whitney).
To put it plainly, plan to do your part in helping keep Shasta beautiful, and pick up WAG bags at one of the Ranger Stations or Bunny Flat Trailhead. Grab a few!
You’ll poop into the WAG bags and carry them out at the end of your trip. If I can do it (and many other mountaineers) so can you, my friend. Think of it as a right of passage.
For more information about Mount Shasta permits, check out the Forest Service Mt. Shasta permits site.
3. BEST TIME TO CLIMB MOUNT SHASTA
Most people attempt the Avalanche Gulch route on Mount Shasta between mid-May and mid-July. This is the best time to do this route because you typically get optimal weather conditions and snow pack coverage during this time of year.
If you wait until too late in the summer, the snow melts and there is a lot of loose scree, which causes the hike to be more challenging – and also more dangerous because there is a higher chance of rock fall in the Gulch.
Whenever you visit Mt. Shasta, always be prepared for rapid weather changes. Mount Shasta can jump from perfect conditions to stormy conditions at any time of the year, and sometimes it can happen in the span of only a few hours. Also anticipate for winds to be greater the higher you ascend the mountain.
This means you should also come prepared with extra rain gear and layers when climbing Mt. Shasta!
Check out the Mount Shasta weather average temperature map below for reference.

Be prepared before you go. Just like I teach my students in my backpacking program. It’s important that you research the weather conditions before you go, weeks and days before your trip. You can check the weather conditions at one of the following resources:
Mount Shasta Avalanche Center Forecast – Maintained by local Mount Shasta Wilderness Rangers
Mountain Forecast – One of my favorite sources for mountain weather forecasts when checking a few days before a trip
Winter at Mount Shasta: The winter months at Mount Shasta are known for high winds, stormy weather, and deep snow. Only the most experienced mountaineers should ever attempt a winter ascent of Mt. Shasta.
4. MT. SHASTA AVALANCHE GULCH TRAIL MAP & GPX FILES
Here are a couple of different ways to visualize the Avalanche Gulch Route on Mount Shasta.
First is a map I made from CalTOPO which shows a shaded relief map, the Avalanche Gulch trail (in red), and a few of the key “trail markers” along the path up to the summit.

And for an even more “real” look at the Avalanche Gulch route, I really like this photo below from the website, Timberline Trails.

He did an excellent job detailing this route visually, and our group essentially followed this same blue route except for one small deviation. When I climbed Mount Shasta, we actually ended up going over Red Banks instead of over the bergschrund near the Thumb. I’ll discuss this in more detail in the trip report below.
I always recommend downloading a GPX file onto a GPS device, so that way you can check in from time to time to be sure you’re on the right trail.
You can download the GPX files from the Mount Shasta Avalanche Gulch Trail map below.
DOWNLOAD THE MOUNT SHASTA AVALANCHE GULCH GPX FILES FOR YOUR GPS HERE:
Knowledge is power my friend, and I'm a girl who loves data. Get access to this trails GPX file PLUS my library of GPX files with tracks and waypoints for all the trails loaded onto the She Dreams of Alpine blog.
Load this puppy into your trusted GPS and rest easy knowing you have tracks to follow on your next hike or backpacking trip.
DON’T HAVE A GPS? YOU SHOULD.
I believe every hiker and backpacker should strive to be self-sufficient, and that includes knowing how to practice smart navigational skills in the outdoors.
This is an important safety skill set that I teach in-depth inside of my backpacking program. There’s no reason to risk getting lost in the outdoors.
Here’s what I recommend to get started:
(Note: This list contains affiliate links)
Gaia is offering a special 20% discount on a premium account to those who subscribe online through my link.
Don’t know where to start? If you need help with some Gaia GPS basics, download my quick Gaia GPS navigation 101 guide.
2) Get an SOS Device: Once you are able to, I recommend investing in some sort of SOS communication device like the Garmin inReach Mini or the Garmin inReach Explorer+ . These devices provide not only GPS tracking capabilities, but also an SOS satellite search and rescue communicator and text communication abilities in the backcountry.
My Go-To Trail Setup: The Gaia GPS app (premium subscription) + the Garmin inReach Mini.
Alternative to Garmin: Pair your Gaia GPS App with the Zoleo SOS device . With this set up, the Gaia GPS App serves as your GPS navigation device, and the Zoleo serves as an SOS/communication device.
Learn more about the best GPS devices for hiking here.
MOUNT SHASTA CLIMB AVALANCHE GULCH ELEVATION PROFILE
Here’s a look at the Avalanche Gulch route elevation gain profile.
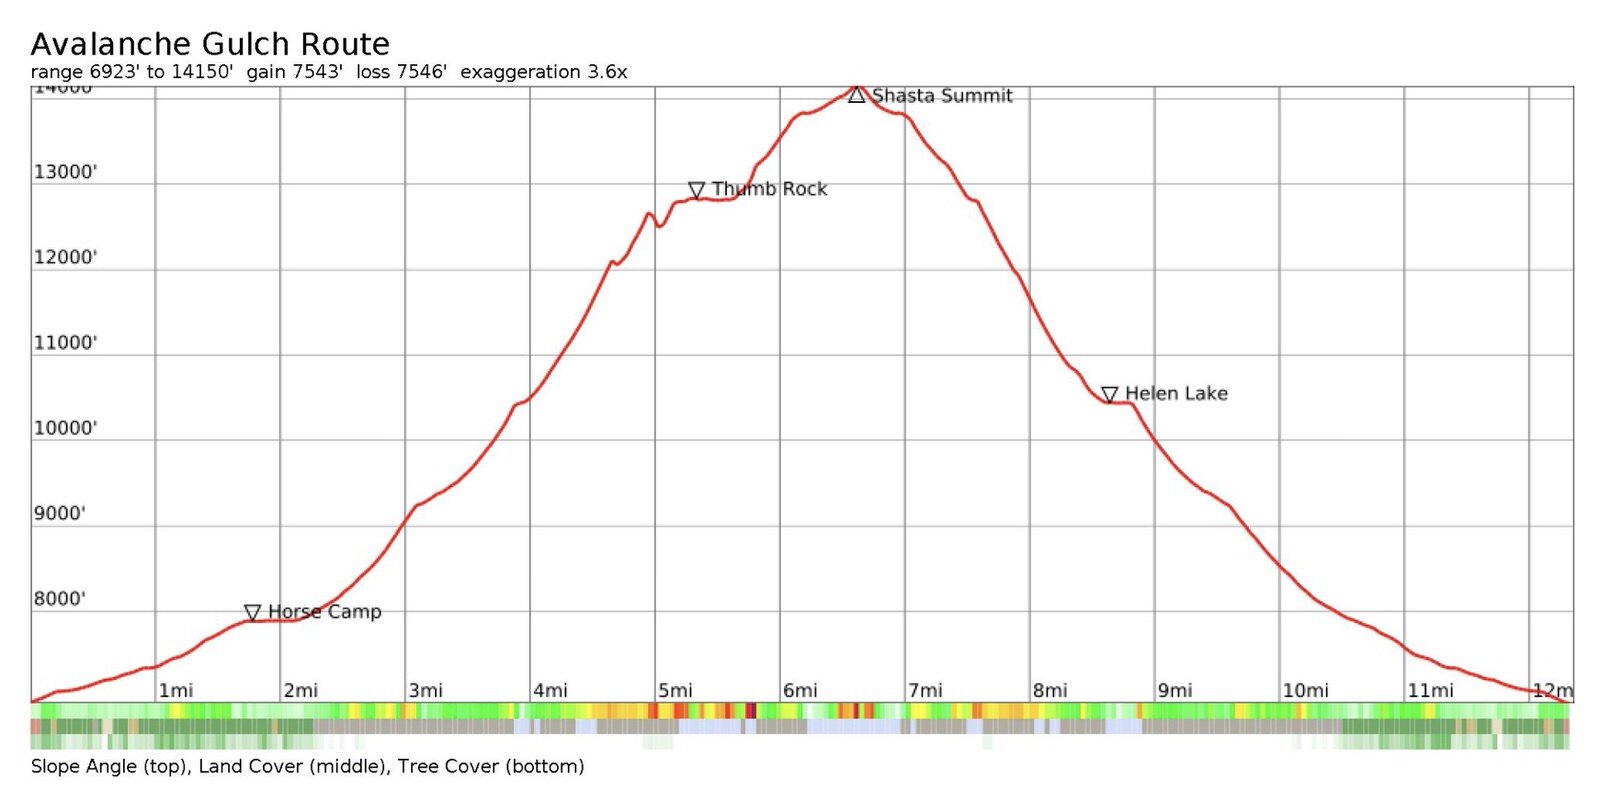
>> JUMP TO SECTION 7 FOR A SUGGESTED MOUNT SHASTA CLIMB ITINERARY
5. HOW TO GET TO THE AVALANCHE GULCH TRAILHEAD
Unlike the rest of California’s tall 14,000-foot peaks, Mount Shasta is located in Northern California near the border of California and Oregon.
If you are flying into California to climb Mount Shasta, you have a few options, but all involve a bit of driving. A few of the closest bigger airports are San Francisco, Oakland, Sacramento, and Redding.
Driving times will vary depending on where you are coming from, but here are a couple of estimates from big California cities:
Los Angeles to Mount Shasta: ~9 Hours
San Francisco to Mount Shasta: ~ 5 Hours
Oakland to Mount Shasta: ~ 4.5 Hours
Sacramento to Mount Shasta: ~3.5 Hours
Redding to Mount Shasta: ~1.5 Hours

GETTING TO THE TRAILHEAD
Getting to the trailhead to start climbing Mt. Shasta up Avalanche Gulch is pretty straight forward. Set your GPS to take you to “Bunny Flat Trailhead,” and from Mt. Shasta Town Center, you’ll take the Everitt Memorial Highway all the way to the trailhead.
There are also some alternative trailheads to Bunny Flat Trailhead including the Sand Flat Trailhead. starting at 6,800 feet, and the Old Ski Bowl Trailhead, starting at 7,800 feet. The Bunny Flat Trailhead and Sand Flat Trailhead both lead you to Horse Camp where you can refill on drinking water (without having to melt snow).
Parking: Every time I’ve visited Mount Shasta there has always been plenty of parking, but I definitely recommend getting there early so you can snag a spot closer to the trailhead. Otherwise, you might end up doing a little pre-hike before your Mount Shasta climb!
6. MT. SHASTA CAMPING
There are a few camping options on Mount Shasta when attempting the Avalanche Gulch Route. All of these are free camping, except for Horse Camp. These are the most popular ones:
HORSE CAMP – 7,900 FEET
This camping area on Mount Shasta is owned and maintained by the Sierra Club Foundation.
Drinking water available
Composting toilets
Cost: $5 per tent or $3 per solo bivy per night

HELEN LAKE – 10,400 FEET
Most climbers make a base camp here before summiting Shasta via Avalanche Gulch.
A typically dry/snow-filled lake (we never saw a “lake” here when we camped)
Be prepared to melt snow for water here, so bring plenty of fuel
This area can be prone to strong winds and cold temps, so come prepared
No reservations required
UPPER SKI BOWL
Some people also camp at Upper Ski Bowl, but it’s a bit of a detour, since you’ll have to hike over the ridge towards Lake Helen in order to get back on the right trail for Avalanche Gulch.
7. ITINERARY FOR CLIMBING MOUNT SHASTA VIA AVALANCHE GULCH
Most people typically hike this trail in one to three days, depending on their physical fitness levels.
Recall that Mount Shasta via Avalanche Gulch is roughly 11 miles round trip with over 7,300 feet of elevation gain.

2-DAY AVALANCH GULCH MOUNT SHASTA CLIMB ITINERARY
This is the itinerary we followed for our 2-day Avalanche Gulch climb.
Day One: Start at Bunny Flat Trailhead -> Stop at Horse Camp for water -> Climb to Helen Lake and set up Base Camp. (Fairly easy day)
Day Two: Wake up at midnight -> Start ascent up Avalanche Gulch Trail -> Summit Mount Shasta -> Descend back to base camp (and pack up) -> Descend to Bunny Flat Trailhead (Very difficult day)
If you opted to do Avalanche Gulch in three days, you could spend your second night back at Helen Lake, and then descend the third day. Also, some groups even stop at Horse Camp on their way up, but that doesn’t really feel worth it to me.
Or buy a Mt. Shasta Wilderness Recreation Map on Amazon to cover everything.
8. IMPORTANT SAFETY TIPS FOR CLIMBING MOUNT SHASTA
When planning your Mount Shasta climb, pay particular attention to the following hazards and plan ahead accordingly.
AVALANCHE SAFETY
When you’re climbing Mount Shasta, there’s always a risk for avalanches. It’s super important that you’re educated in avalanche safety before attempting any mountaineering route.
I’ll leave avalanche safety information up to the experts. For more information on avalanche safety, check out the Know Before You Go website. It’s also very worthwhile to take a course on avalanche safety if you plan on leading your own mountaineering trips.

BERGSCHRUND NEAR “THE THUMB”
On the Avalanche Gulch Route, you’ll encounter a section called “The Thumb” where you will have to cross a snow bridge to get to the summit of Mount Shasta.
If you don’t know what a snow bridge or bergschrund is, then you should most definitely go with a guide when you’re attempting the Mount Shasta climb.
In many cases, snow bridges can be weak or give way beneath you, and there are specific mountaineering practices you should follow anytime you’re in crevasse territory like that on a mountain.
These are all things you’ll learn in a good mountaineering class or guided trip up Mount Shasta.
MOUNTAINEERING IS INHERENTLY DANGEROUS
Again, I want to reiterate that if you’re a newbie to mountaineering that you should hire a guide, or get properly trained and educated about mountaineering and avalanche safety before attempting a route like Avalanche Gulch on Mount Shasta.
Mountaineering is NOT like hiking or backpacking, since it has a lot more risk, technical gear, and necessary skill sets that you MUST have before venturing out on your own.
If you ignore this advice, you’re putting yourself and others at risk, which isn’t cool. Don’t be that person.
A summit is never worth risking your life for. Get properly trained, and then hit the peak with confidence.
Here are a couple of guiding companies you can climb Mount Shasta with:
I think taking a guided trip of Mount Shasta is an AWESOME way to get an introduction to basic mountaineering skills AND summit an epic California 14er in the same trip! After that, you’ll know if mountaineering is something you’d like to learn more about, and then you can take more training as needed.
9. CLIMBING MOUNT SHASTA GEAR LIST
This is definitely not a complete gear list, but here are some of the key pieces of gear you should bring when climbing Mount Shasta. I also recommend you download my Mountaineering Packing List for a more detailed gear list.
This list is an overview of the most important mountaineering gear you should bring on your trip up Mount Shasta.
THE CRUCIAL GEAR
2) Sleeping Pad (inflatable AND foam): My favorite pad for mountaineering is the Therm-A-Rest NeoAir XTherm sleeping pad . However, it is best practice in mountaineering to always have a back-up foam pad in addition to your inflatable pad, just in case you puncture your inflatable pad with your crampons or technical gear. The Therm-a-Rest Z Lite Sol is a classic foam sleeping pad.
3) Sleeping Bag (0-15 degree F): For mountaineering, I recommend a 0 to 15 degree rated bag, and I love my Big Agnes sleeping bag
4) Tent (or Bivvy): You typically want a 4-season tent for mountaineering, although, depending on the weather, you might be able to get by with a 3-season tent. The ALPS Mountaineering Tasmanian 2-Person tent is an excellent option.

OTHER KEY TECHNICAL GEAR
6) Sunscreen & Lipbalm: Ok, this isn’t actually technical gear, but in mountaineering it is absolutely essential to bring sunscreen! The snow reflects the sun back up onto your face, so it’s really easy to get burned (and don’t forget to put sunscreen on the bottom of your nose and ears). My go-to is Neutrogena sunscreen and Joshua Tree SPF lipbalm.
7) Sunglasses (with Side Shields): It’s also crucial to have sunglasses when mountaineering or else you risk going snow blind with all the reflected sun. Sunglasses for mountaineering, such as the Julbo Explorer 2.0 Mountain Sunglasses , should have side shields for extra protection from sun and the elements.
8) Trekking Poles: Trekking poles are essential in mountaineering, and I highly recommend snap lock versus twist lock poles since they are less likely to collapse when you weight them. My workhorse trekking poles are the Black Diamond Trail Pro Shock Trekking Poles , and they have held up to years of adventures.
9) Mountaineering Boots: Backpacking and hiking boots are not sufficient for this kind of peak. I love my La Sportiva mountaineering boots for big peaks like Mount Shasta. You can also rent boots if you don’t plan to do a lot of mountaineering, because they are definitely a big investment to buy.
10) Harness: A simple, lightweight harness like the Black Diamond Alpine Bod is just what you need for mountaineering on Mount Shasta.
11) Crampons: There are many styles of crampons, but the important part is that they fit the mountaineering boot that you own (or rent). Black Diamond crampons are a good choice. Crampons can also be rented if you’re not ready to invest in them.
12) Climbing Helmet: You need a helmet to protect your head while mountaineering, and I love my lightweight Black Diamond helmet , which is great for rock climbing, too.
13) Ice Axe: An ice axe is a must for mountaineering, not only for ascending, but also self-arresting if you fall. The Petzl Ice Axe is an excellent choice, or you could rent one. But if you are a beginner mountaineer, you definitely want to go with a guided group to learn how to use the ice axe.
WHAT TO WEAR MOUNTAINEERING
You should plan appropriately and test your layering systems before attempting a mountaineering trip. Do NOT wear cotton, and instead opt for synthetic moisture-wicking materials or wool.
Here’s a look at the basic mountaineering layers you need:
A set of base-layers (upper and lower body). I like wool for my base layers.
A mid-layer for a bit of extra warmth. Think Synthetic or fleece.
A bigger insulated down jacket for the evenings and when you stop moving
Wool socks (multiple)
Shell pants and shell jacket layer (for snow and rain and wind)
Gaiters
Beanie
Buff
Light-weight liner gloves & waterproof mountaineering gloves
For more info on layering and the clothing brands I recommend, check out my backpacking packing list.
DOWNLOAD OUR BACKPACKING PACKING CHECKLIST
Never leave any crucial items behind when you head out on a backpacking trip! I’ve compiled all the essentials here for you so that you’ll never forget anything vital.
PLUS, as a bonus, I’ve included a list of 20+ of my favorite backpacking food snacks and meals inside of this list for inspiration.
SPECIAL GEAR NOTES
Again, this is NOT a comprehensive list. If attempting Mount Shasta yourself (assuming you have the technical skills), there is more technical gear likely needed.
Here are some other things to bring and remember if you attempt to climb Mt. Shasta via the Avalanche Gulch Route:
Rope and other climbing gear – Some people rope up for the Avalanche Gulch route, and some people don’t. In our guided group, we did rope up, although it didn’t really seem necessary most of the time. There is minimal crevasse crossing on this route, but again, do not attempt to do this peak without a guide unless you know what you are doing.
Extra fuel – for boiling snow for water
Don’t pack a hydration bladder – the straw will just freeze over. Instead, opt for 3-4 one-liter sturdy water bottles (like Nalgenes)
Don’t forget your permits and WAG bags (see permit section above)
Note that if you go with a guided group, you may not need everything on this list because the guide company will provide it for you. Also, if you are doing a more technical mountaineering route, then you may need additional technical climbing and safety gear.

10. MT. SHASTA CLIMB AVALANCHE GULCH TRIP REPORT
Even though I have mountaineered quite a bit in the past, when I went to climb Mount Shasta, my friend was completely new to mountaineering. I wanted to make sure she learned everything properly, so we went with a guided group, and signed up for the 2-day alpine ascent up Avalanche Gulch.
The Drive Up to Mount Shasta
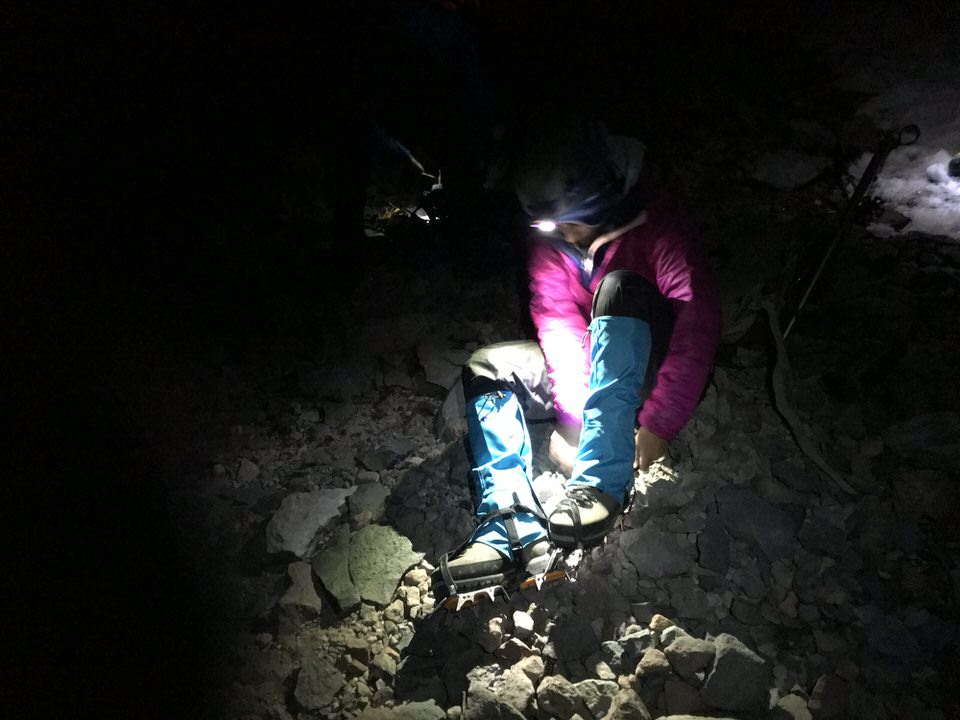
On Friday morning, we left for Mount Shasta. We made it to Mt. Shasta in the late afternoon and picked up Ashima's rental boots and crampons from The Fifth Season shop. I had my own mountaineering gear, so I didn’t pick up any rentals.
I wanted to sleep at elevation that night, so hopefully we would be better acclimated for Mount Shasta on Saturday and Sunday. So on Friday night, we slept at the Bunny Flat Trailhead which lies at about 7,000 feet elevation. It ended up being perfect, and we just slept in our cars that night at the trailhead.
Day One – Meet the Guides, Bunny Flat Trailhead to Helen Lake Base Camp
In the morning we met our Mount Shasta guides at the Shasta Mountain Guides shop. They made sure everyone had the appropriate gear and that we split some of the group weight.
My pack weighed about 32lbs and Ashima's weighed about 25lbs. Not too shabby!
We started climbing Mount Shasta with the group around 11:00 am from the Bunny Flat Trailhead, and it was pretty easygoing to our base camp near Helen Lake.
That Saturday almost felt too easy, in my opinion, and in reality, we had only gone a couple of miles and 2,000 ft. of elevation gain... meaning that we would have about 5,300 ft. left for summit day along with the total 7,300 ft for the descent. Sunday was going to be a long day.
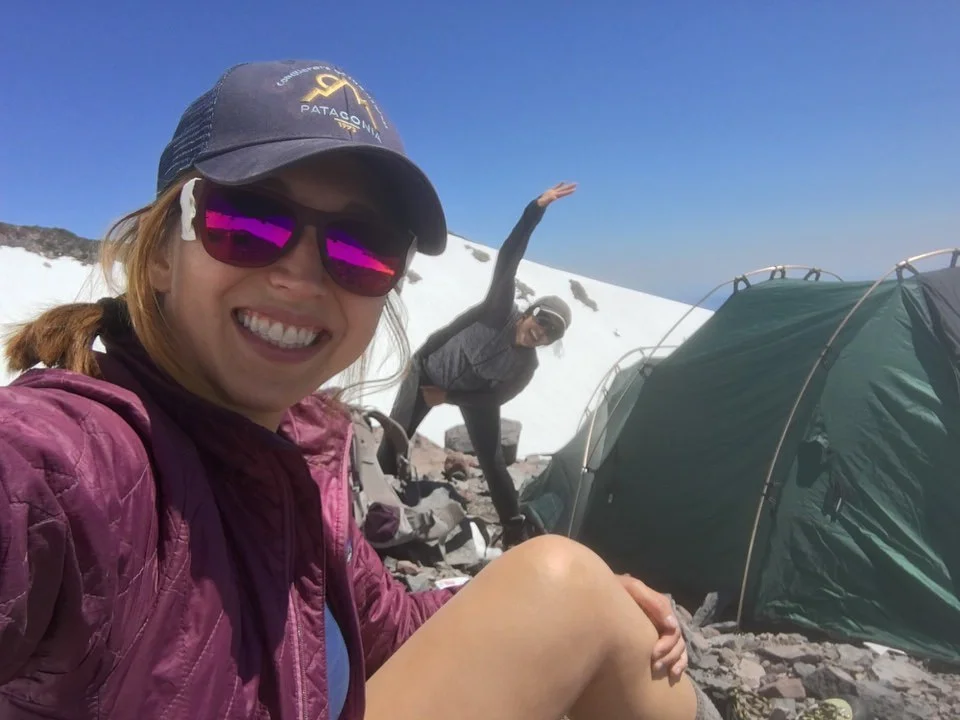
Most groups camp at Helen Lake, but we camped just south of the lake (about 900 feet below) for a little more privacy.
One upside to the lower base camp was that we wouldn't have to carry our heavier packs up 900 more feet, since we would take lighter packs on summit day. The downside though... 900 feet of extra climbing on summit day.
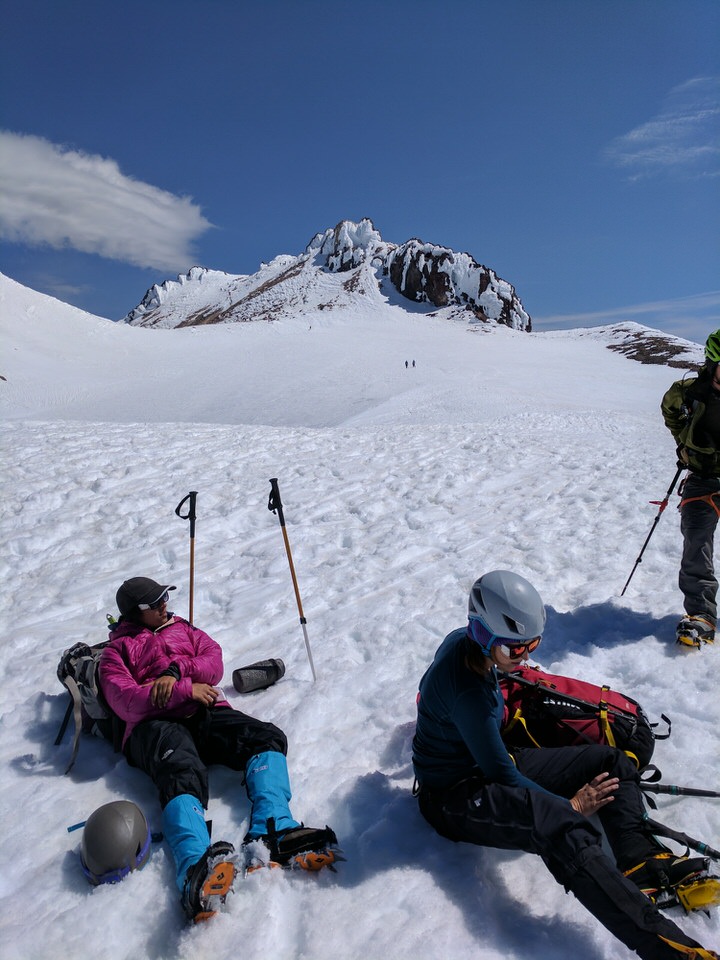
We set up our tents and began to kick back and enjoy the Mt. Shasta views.
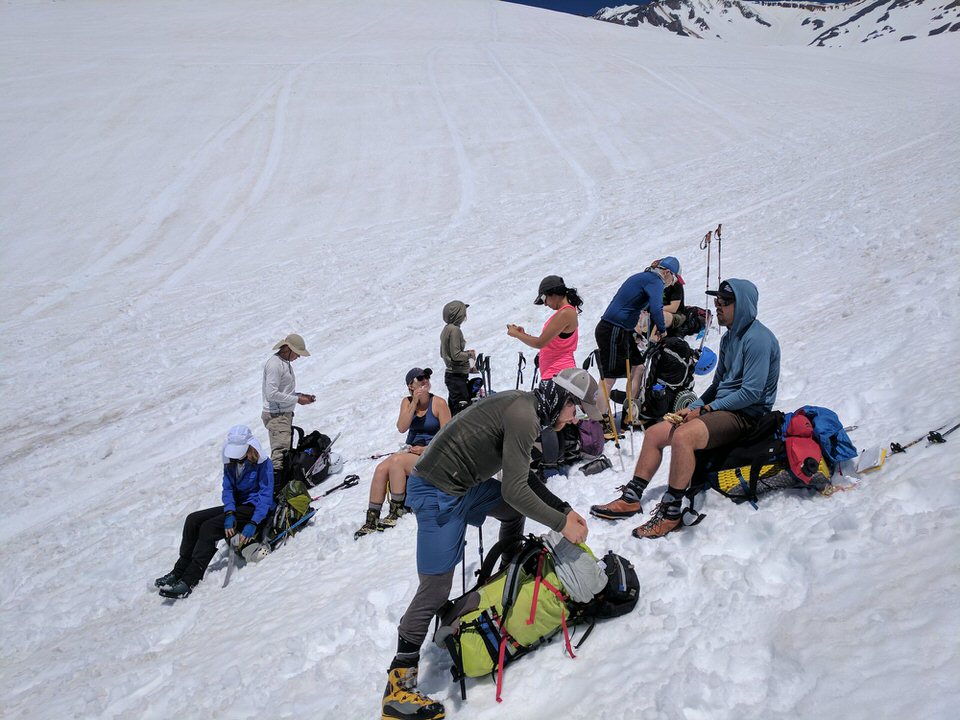
While one of the guides cooked dinner for the group, the other guides took us to a "steep" hill to practice a few common mountaineering techniques: self-arresting, the French step, the American step, and glissading. All which were good refreshers, and it's always fun to play in the snow.

Then we rested and fueled up during the evening, because we would be getting up very, very early the next morning for summit day.
Our alpine start would be 12:30am, in fact.
Day Two – Base Camp to Summit to Bunny Flat Trailhead
Our group had to get a particularly early start since we were lower on the mountain than most groups that camped at Helen Lake, and it's important to get an early start on the mountain to be safe and avoid rockfall from melting snow and rock.
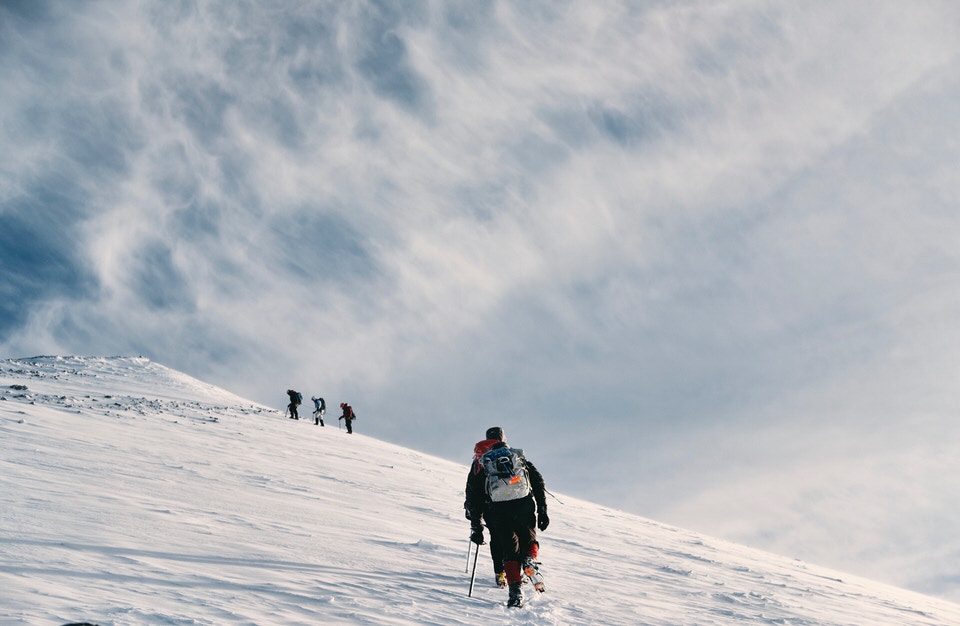
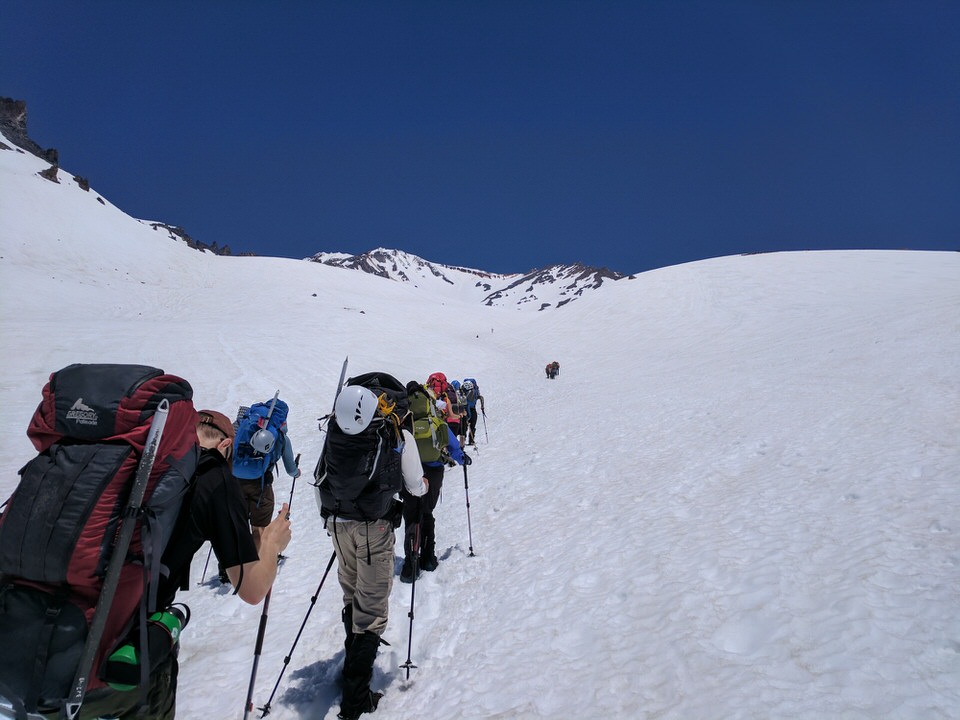
Headlights in action, and we began the long... long trudge toward the summit.
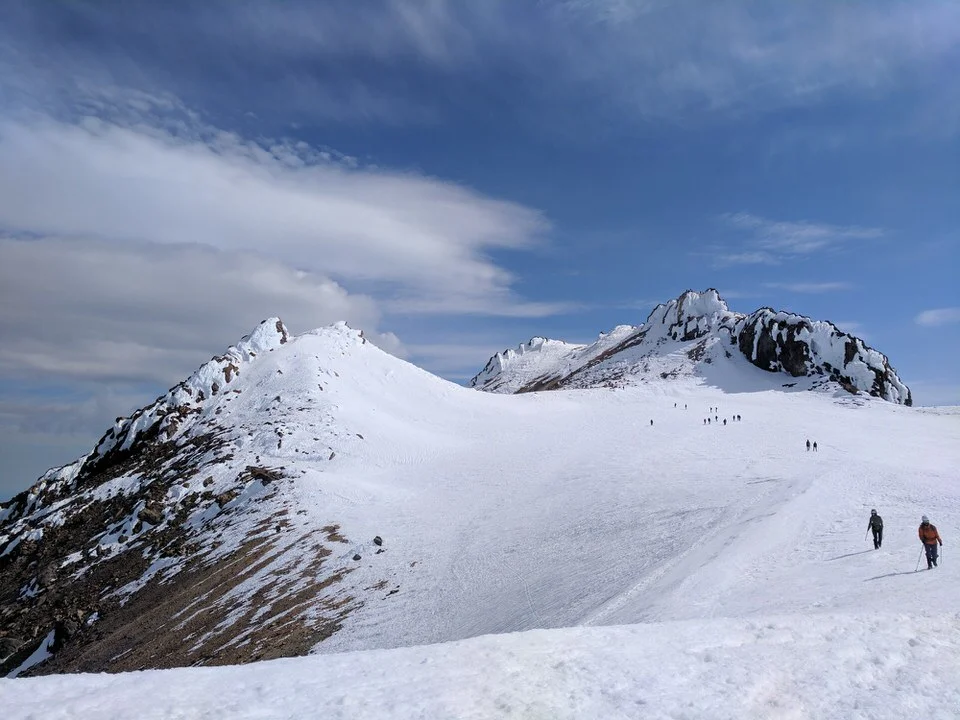
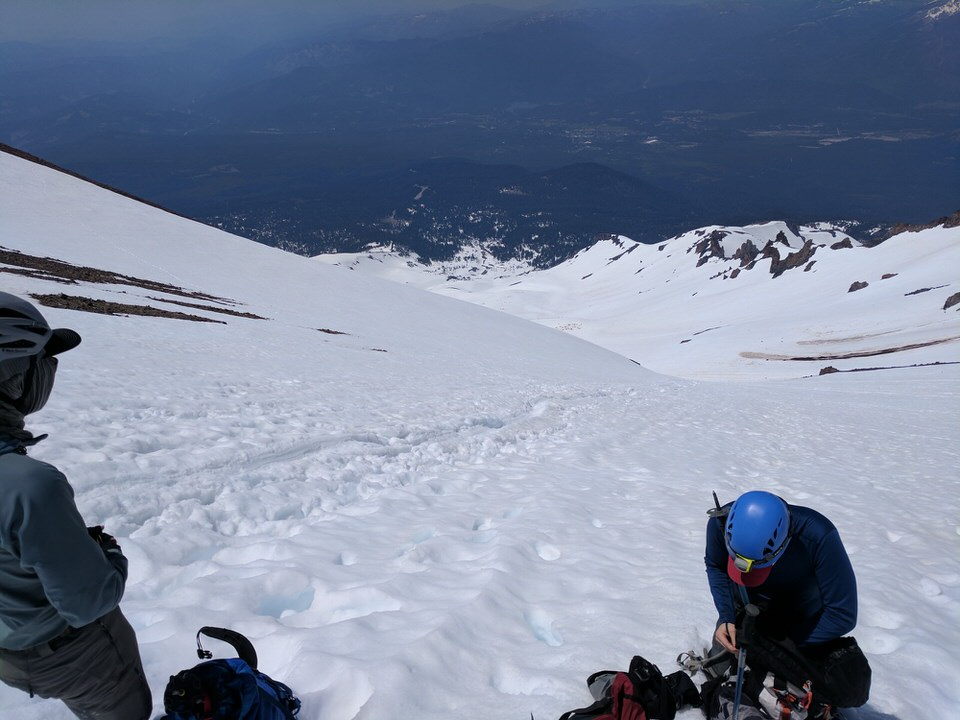
Due to the large mass of climbers going up the mountain, the climbing up Avalanche Gulch was like ascending a very long staircase of steps crafted from snow and ice, and a big game of follow-the-leader toward the bergschrund and onward to the summit.

Our guides had us rope up on the slopes, which really didn't seem necessary since there weren't any crevasses below us until the bergschrund at the top, but I guess they wanted to give the appearance of more safety to their clients.
As we neared the top of "the heart" (see map in the Mount Shasta Map section), Our guide got a call on the radio from another SMG guide that said the bergschrund looked “dangerous” and the snow bridge melted, and so he decided that we would go left up the Red Banks instead.
Not many other groups that day were ascending the Red Banks, so the terrain was a bit of different climbing compared to the stair steps we had been following previously.
We found ourselves French stepping on very steep snow/ice to the top of Red Banks, and it was much more strenuous than what we had been previously doing.
On top of that, I don't think we stopped to take a break in a couple of hours, so Ashima and I were very thirsty and needing fuel. Normally (had I not been roped up), I would've taken a mini break here or there to stuff a bar into my mouth and drink some water, but it seemed our guide was on a diehard mission.
I mean, I get it, our diversion toward Red Banks made our route a bit longer and he didn't want to stop on the steep slopes, but I also don't think he recognized that we mortals (who don't climb Shasta every weekend!) might need a little more re-fueling than him.

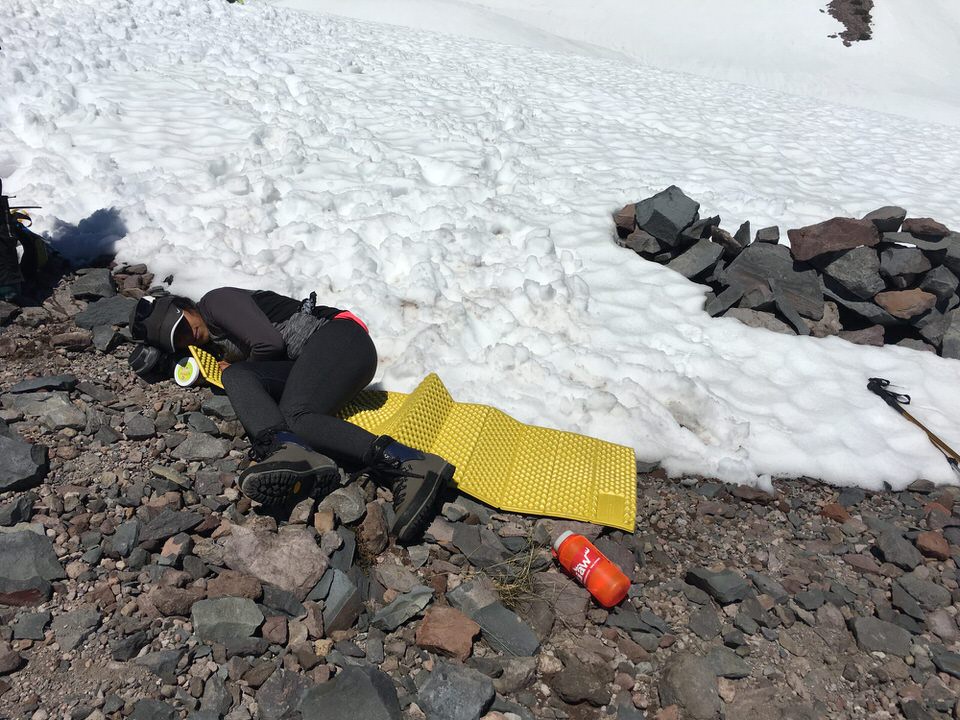
The route to the summit from there was theoretically simple, but mentally still a big challenge for us. We were feeling the altitude, the dehydration, and the exhaustion, but we were still hopeful for the summit.

When we finally got to the point where we could see the actual summit, I felt like I couldn't give any more.
In that moment, the summit looked incredibly far away. People would come by and say "You're almost there! Keep going!" and I would look at the path and think, "There's no way... I'm satisfied..." But then, a few more sips of electrolyte water and a bite of Butterfinger later, we were convincing ourselves we could do it.
In the back of my mind though, I was thinking, "I need to summit this, so I don't have to come back." Ha! How's that for motivation? It's funny writing about this now because I feel like, sure, I'd go back and climb this route again, but I was definitely feeling a bit different at the time of the climb.
The final summit push is almost a blur, and I felt like I got a 2nd wind.. or may more like a 30th wind.
But we MADE IT! Signed the register AND got the summit picture. Not to mention that great summit feeling... that cloud 9 feeling. That... oh wait, I still have 7,300 feet left to descend feeling, haha!
The summit is only halfway there, folks.

Yup, the summit high was short-lived. It was almost noon and we needed to get the hell off that mountain and find a way to get quickly and safely down the mountain toward the nearest pizza place to stuff our faces with several victory slices.
I’m not going to lie, going down was pretty miserable. Ashima and I were (surprise!) still tired, and it didn't change much on the descent, which is even more brutal on your knees.
We got lucky though, super lucky actually. We found out that the bergschrund was actually just fine to cross, and that the snow was perfect condition for glissading.
So we crossed the bergschrund via a snow bridge and then enjoyed the longest glissade I've ever done in my whole life.
For those of you who don't know what glissading is, it's basically like sliding down the mountain on your butt, mountaineering axe in hand in case things get out of hand. But the snow was perfect! We butt-glided down those slopes basically all the way back to base camp, thousands of feet.
It was just insane, and fun, and such a relief to my mind (and knees). It would have been a very, VERY long day had we descended by foot down that climbing route.
The ending is simple from there. When we got to base camp, we packed up the rest of our stuff and did a bit more glissading down the mountain until it got too flat, and we had to walk the rest of the way to the trailhead.
Then it went like this: flip flops, clean clothes, drop off rental gear, and eat pizza.
That moment you've been waiting for... when you get to talk with your climbing friends about the craziness that you just survived and the summit achieved all in the presence of your own personal pizza and flip flops.
It's the little things.
Well, I hope you all enjoyed this Mount Shasta climbing trail guide, and be sure to let me know in the comments if you’re planning your own Mt. Shasta climb!
LOOKING FOR MORE BIG SUMMIT ADVENTURES?
If you are looking for additional Big Summit California hiking adventures, check out our resources below:
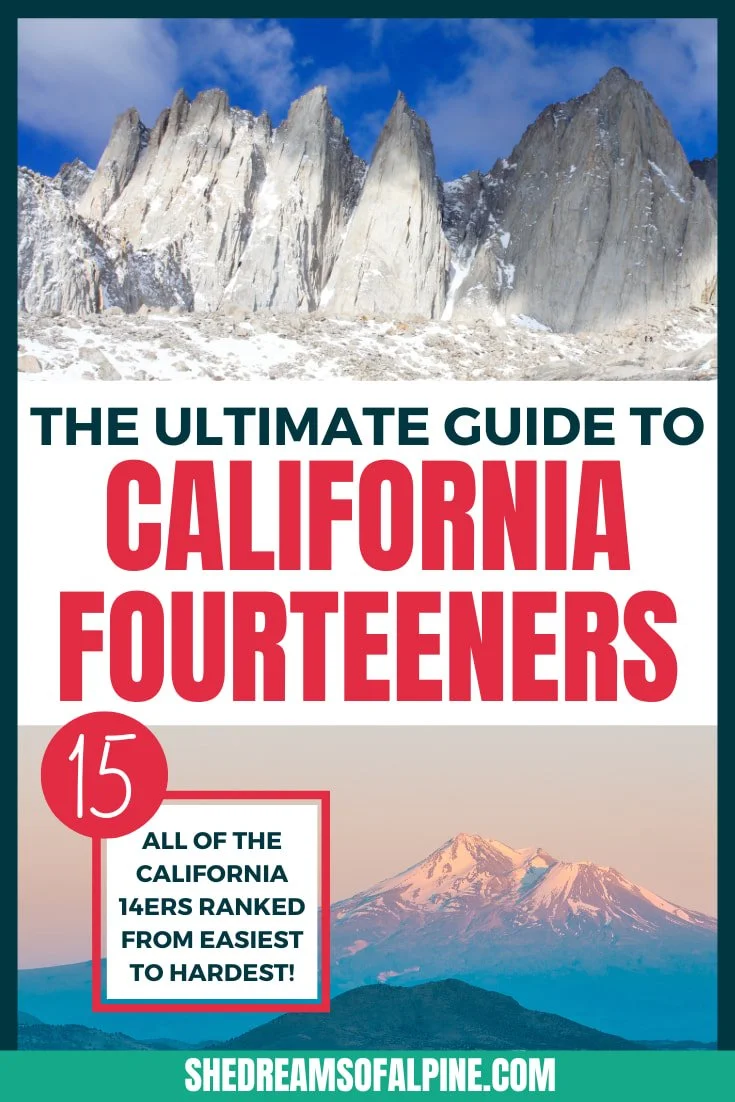
A Full List of All the California 14,000 Foot Peaks
Mount Whitney Trail – California 14er
Mount Langley Hike – California 14er
Split Mountain Hike – California 14er
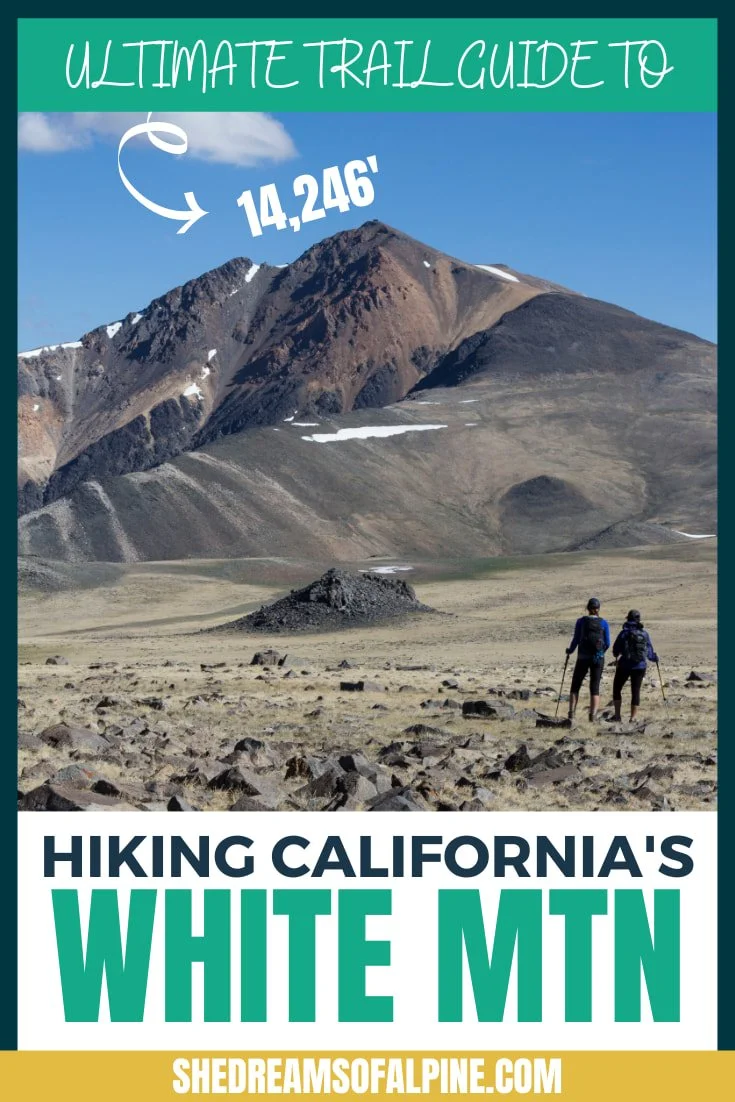
Hike White Mountain Peak – California 14er
Winter Ascent Mountaineers Route to Mount Whitney – California 14er
ESSENTIAL MOUNTAINEERING RESOURCES
Also, be sure to check out these essential mountaineering and hiking resources!
7 Tips to Hiking and Summiting Your First Fourteener Mountain
The Best Hikes in Southern California to Help Train for the Big Mountains
Cheers,
Allison – She Dreams of Alpine


Hiking Mt. Whitney Trail Guide: How to Successfully Summit the Highest Peak in the Lower 48 | This Mount Whitney Trail Guide is your A to Z resource on any and all things involving the Mount Whitney Hike. From day hiking Mt. Whitney to backpacking Mt Whitney, you’ll find everything you need to successfully summit and tackle one of the tallest peaks in the United States. A bucket list hike for every outdoor lover! | shedreamsofalpine.com